
Set up Computed Fields
In this article, you'll learn how to create Custom Fields to leverage in syncs, audiences and journeys.
The why
As you are building audiences and journeys in GrowthLoop, you may notice that you would like to apply filters on a customer attribute such as "Total Purchase Count" that doesn't exist on any table in your data cloud. GrowthLoop enables you to easily create and add these fields to your Audience and Journey Builder with Computed Fields.
GrowthLoop Computed Fields empower your teams to add new calculated fields to your Audience and Journey Builder to create more sophisticated targeting. Use this feature to:
Count— Create a field that counts occurrences of a given action for customers. For example, counting the number of login events in the past 30 days for each user.Aggregate— Create a field that calculates Sum, Average or Median values. For example, aggregate the total value of purchases in the past 14 days by user.Occurrence— Create a field that shows a value from an action occurring First, Last, Most Frequent or Least Frequent”. For example, create a field that shows the name of the last purchased product for each user.List— Create an array or comma-separated list of values OR a list of objects if multiple table fields are selected”.- For example, create a field that lists all product categories purchased by a user.
- Or, create a field that contains the last 3 posts by a user with all their metadata.
These Computed Fields are stored as views in your data cloud and are able to be used in your Audience or Journey building by users.
The how
Set up your Computed Field
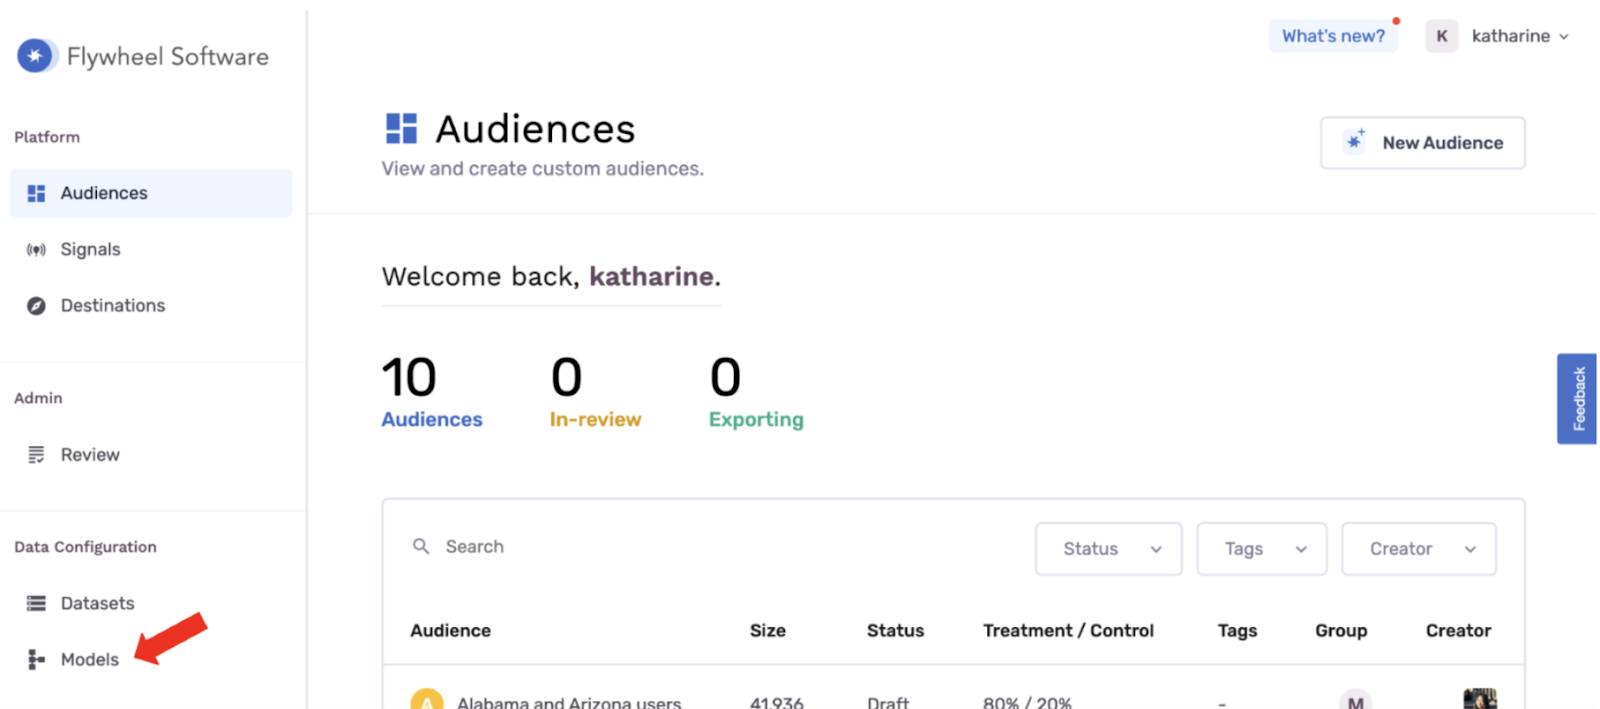
- Navigate to the Models tab on the left side of the GrowthLoop app.
- Click Create Model.
- Provide a name for your model and decide whether you want the model Enabled or Disabled.
- Enabled: Your model will become immediately available as a dataset for audience segmentation.
- Disabled: Your model will be kept in “draft mode” and will not be available as a dataset. You can come back and Enable the model at another time.
- Select Model Type as User Trait
- Select Dataset Group: This is the dataset group you would like to add your new computed field to.
- Select Join Key: The join key simply specifies how you would like us to connect your new computed field to your primary dataset in the dataset group. Typically this is the unique key for your primary dataset. For example,
customer idoruser id.
Write your Computed Field
There are two ways to create a computed field.
- Agent computed fields: Describe the field you want in natural language and agents draft the SQL and show results. Note: This feature is currently in Private Preview.
- SQL Computed Fields: You can write SQL to create your computed field. This allows you to create highly custom computed fields to use as filters in your builders.
Agent computed fields
- Describe the field you'd like to create and add to your primary dataset. In this example, we'll use the prompt
total transaction countto create a field that aggregates a count all transactions done by a user.
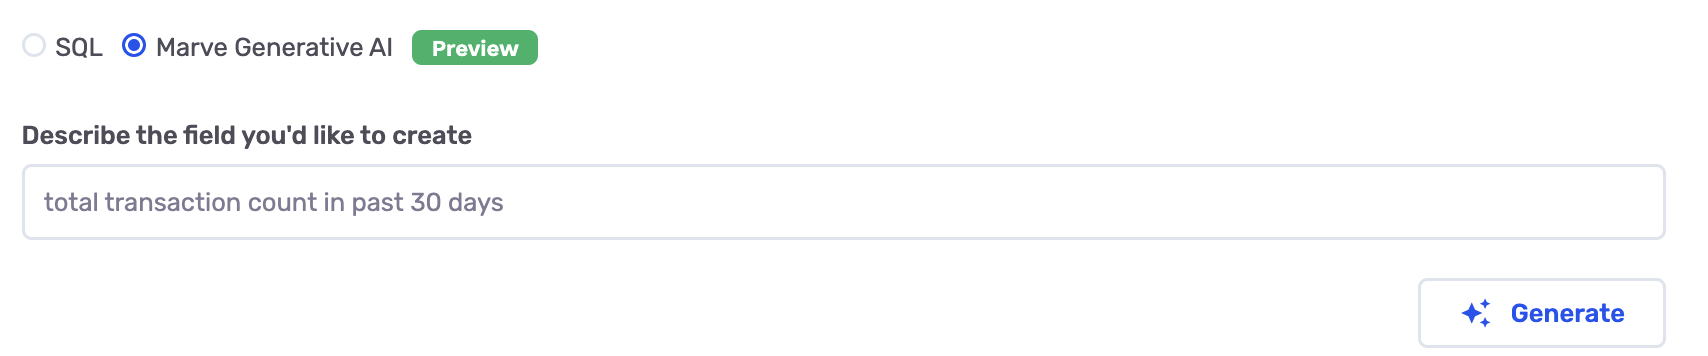
- Click Generate
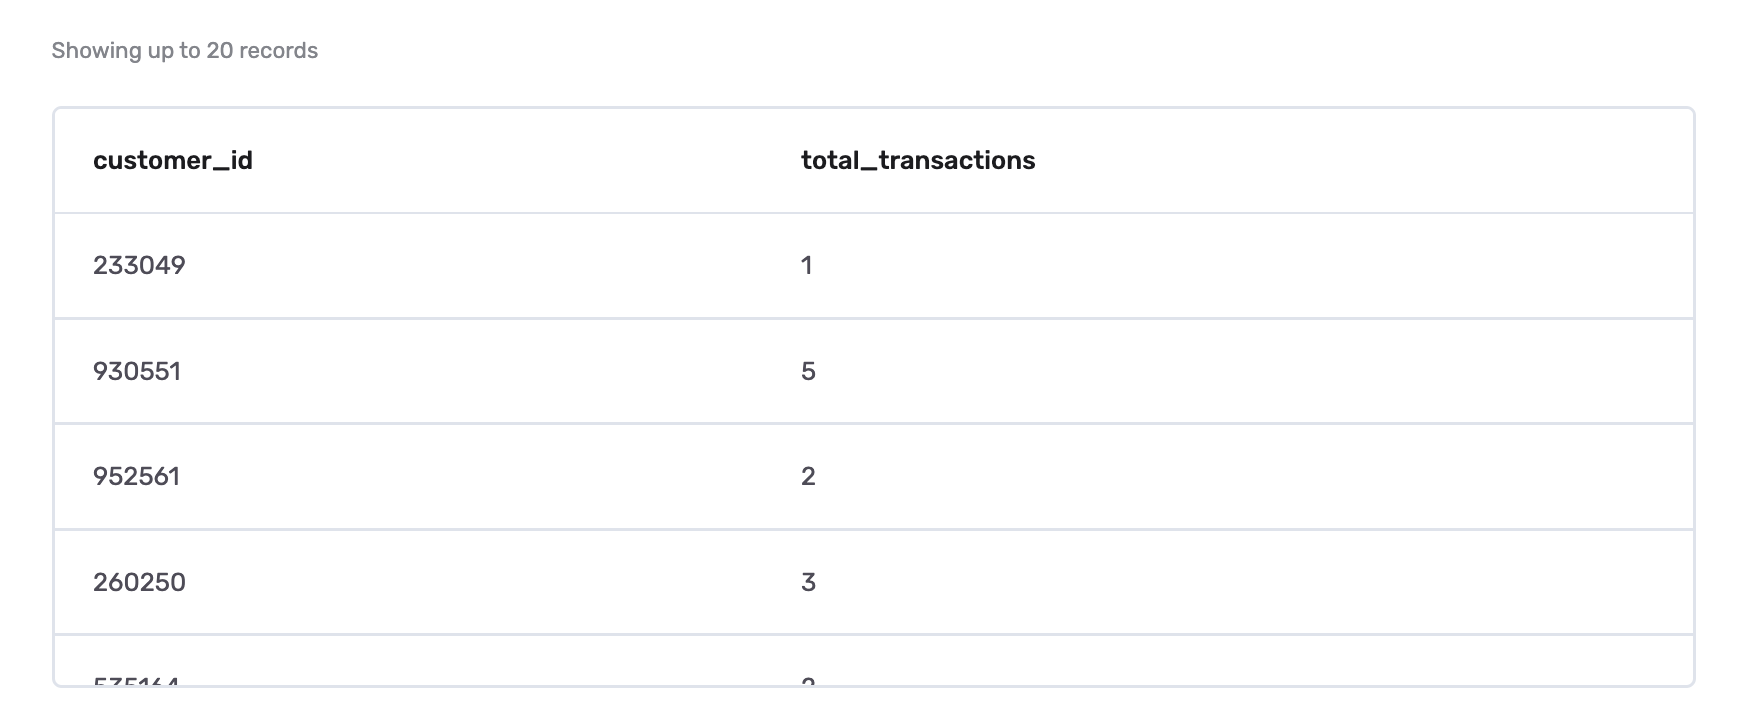
- View Preview of new field. You can see the results of your new field appear below your prompt. Take a look and see if it fits your expectations. If it doesn't look quite right, don't worry. You can simply try another description of your field and click Generate.
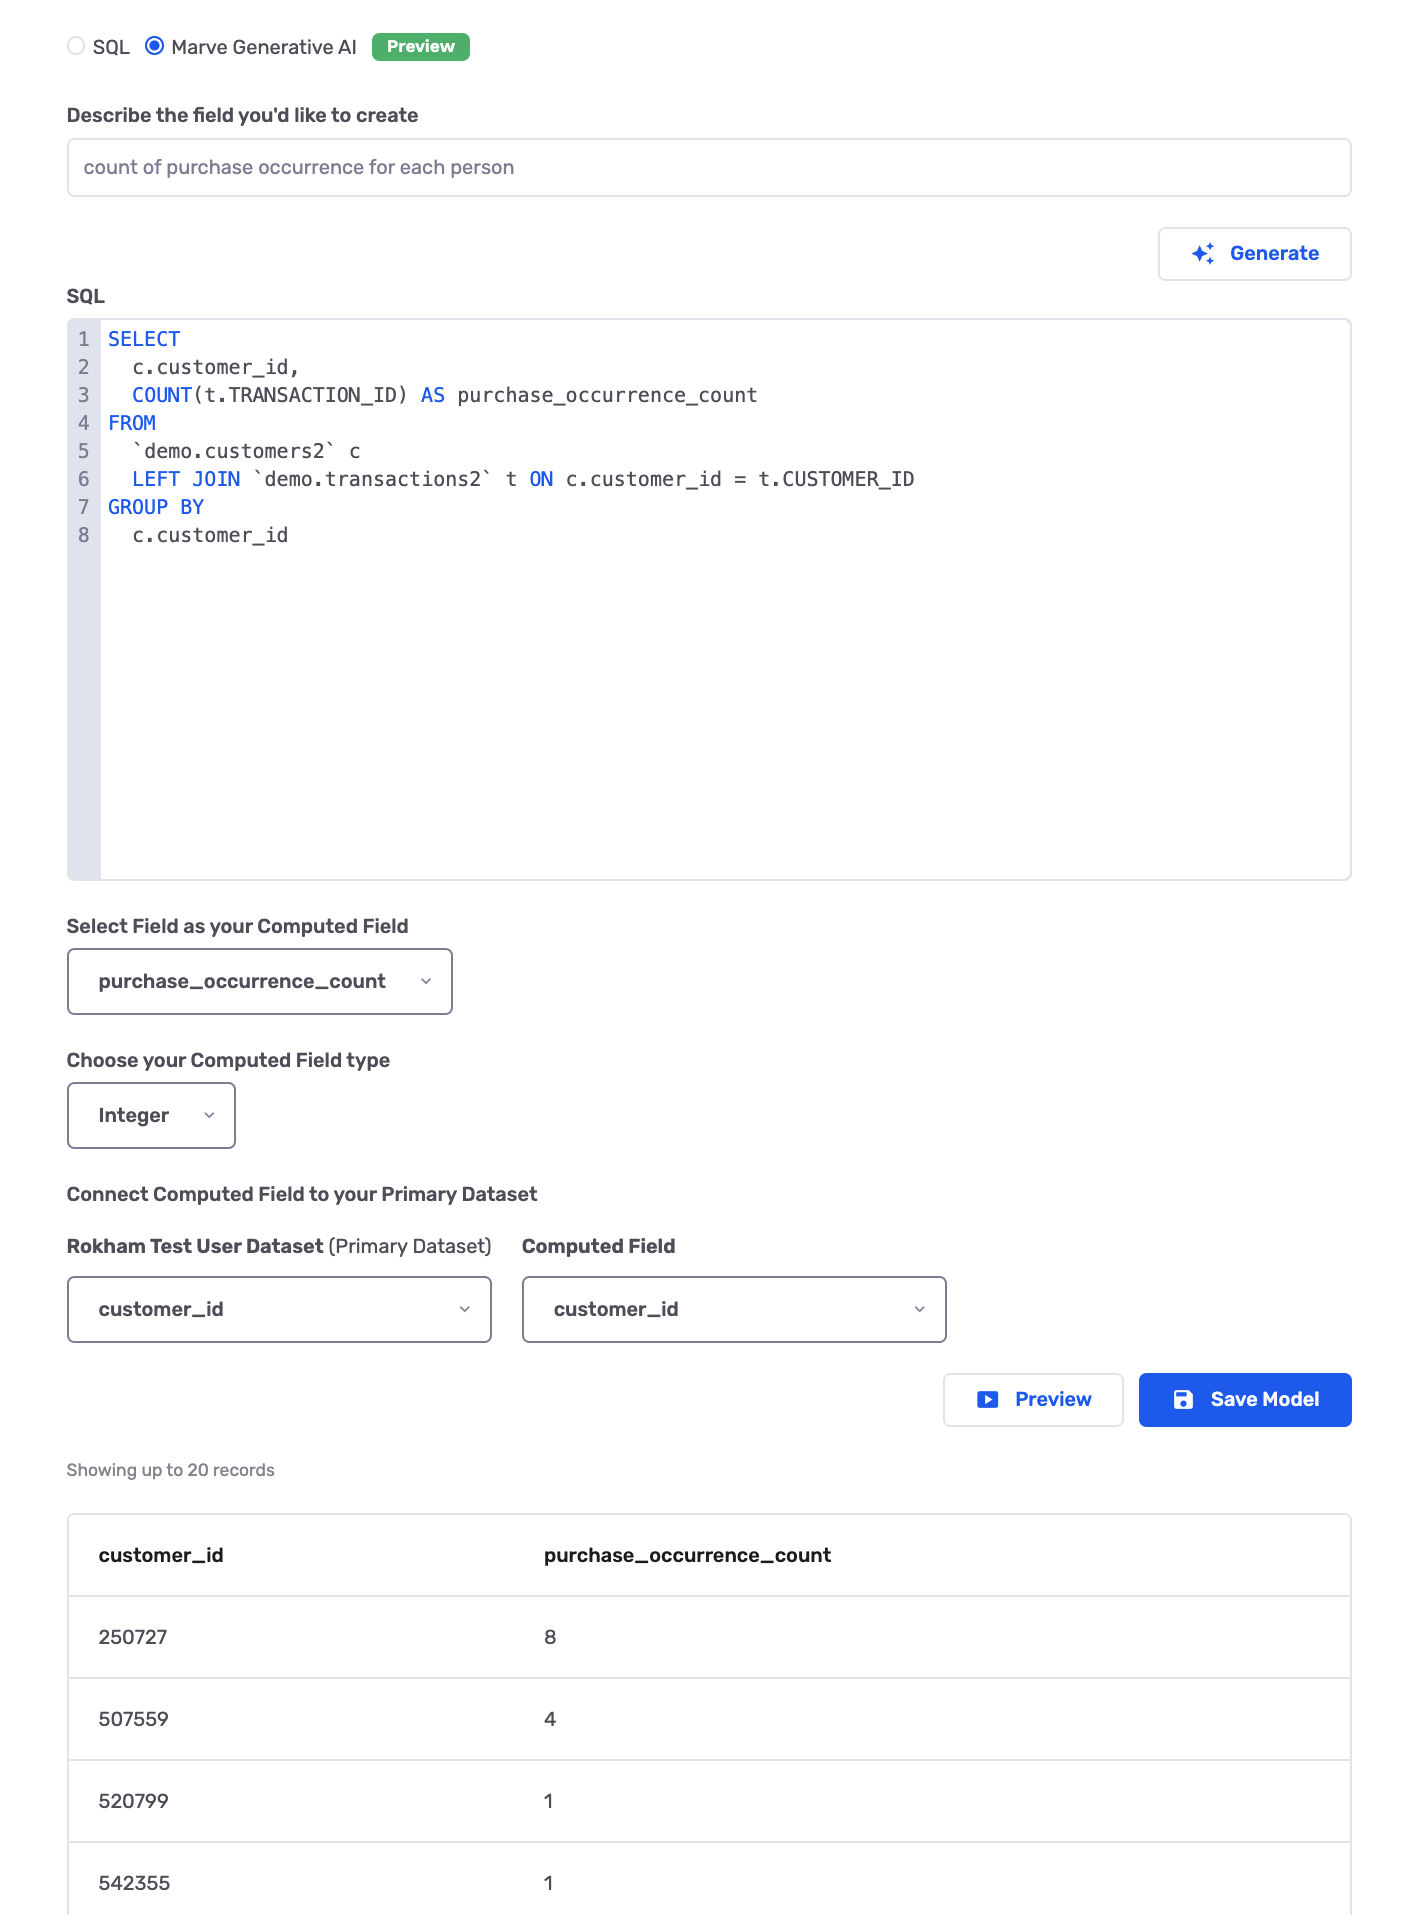
- You have full audit visibility of how the field was created in the SQL section. If you are technical, you can check the query to ensure it is using the underlying tables you expect for this computed field.

-
Next you have to set up the fields data type as well as connect it to the primary table (eg, your customer's table).
In the example below, you can see that we are creating a User Trait to count the number of purchases each customer has made.
We have inspected the SQL and preview of results and feel good about saving this new user trait.
So we go ahead and
- have the new column name be under purchase_occurrence_count
- its data type be integer
- join the computed field to the primary dataset using customer_id, the unique identifier specified in the computed field for data matching
-
Click Save
Congratulations, you have created your first Computed Field. You can now create audiences, syncs, and journeys using this field and leverage it as a personalization attribute you send to destinations!
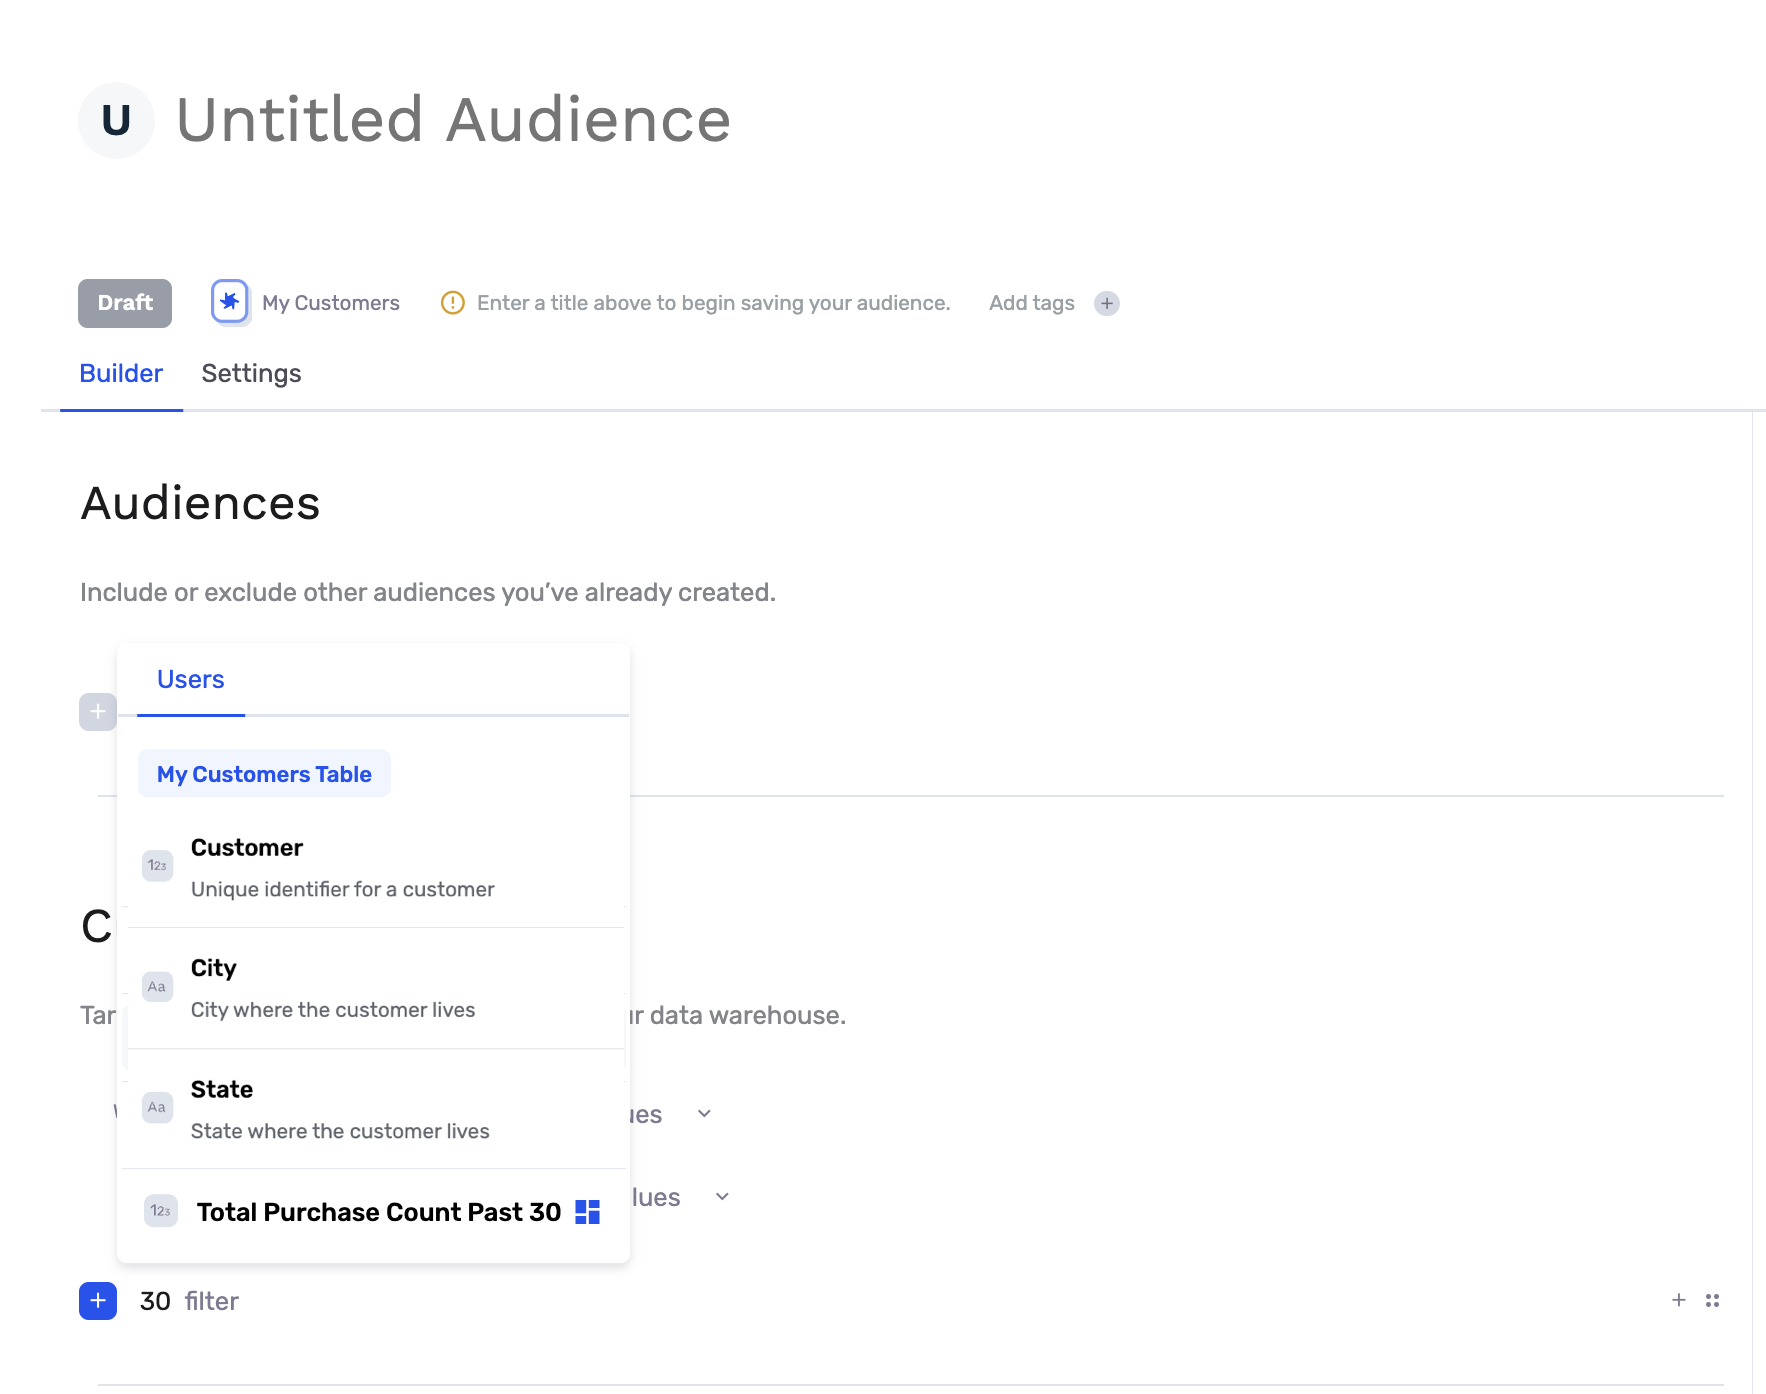
Example Computed Field in Audience Builder:
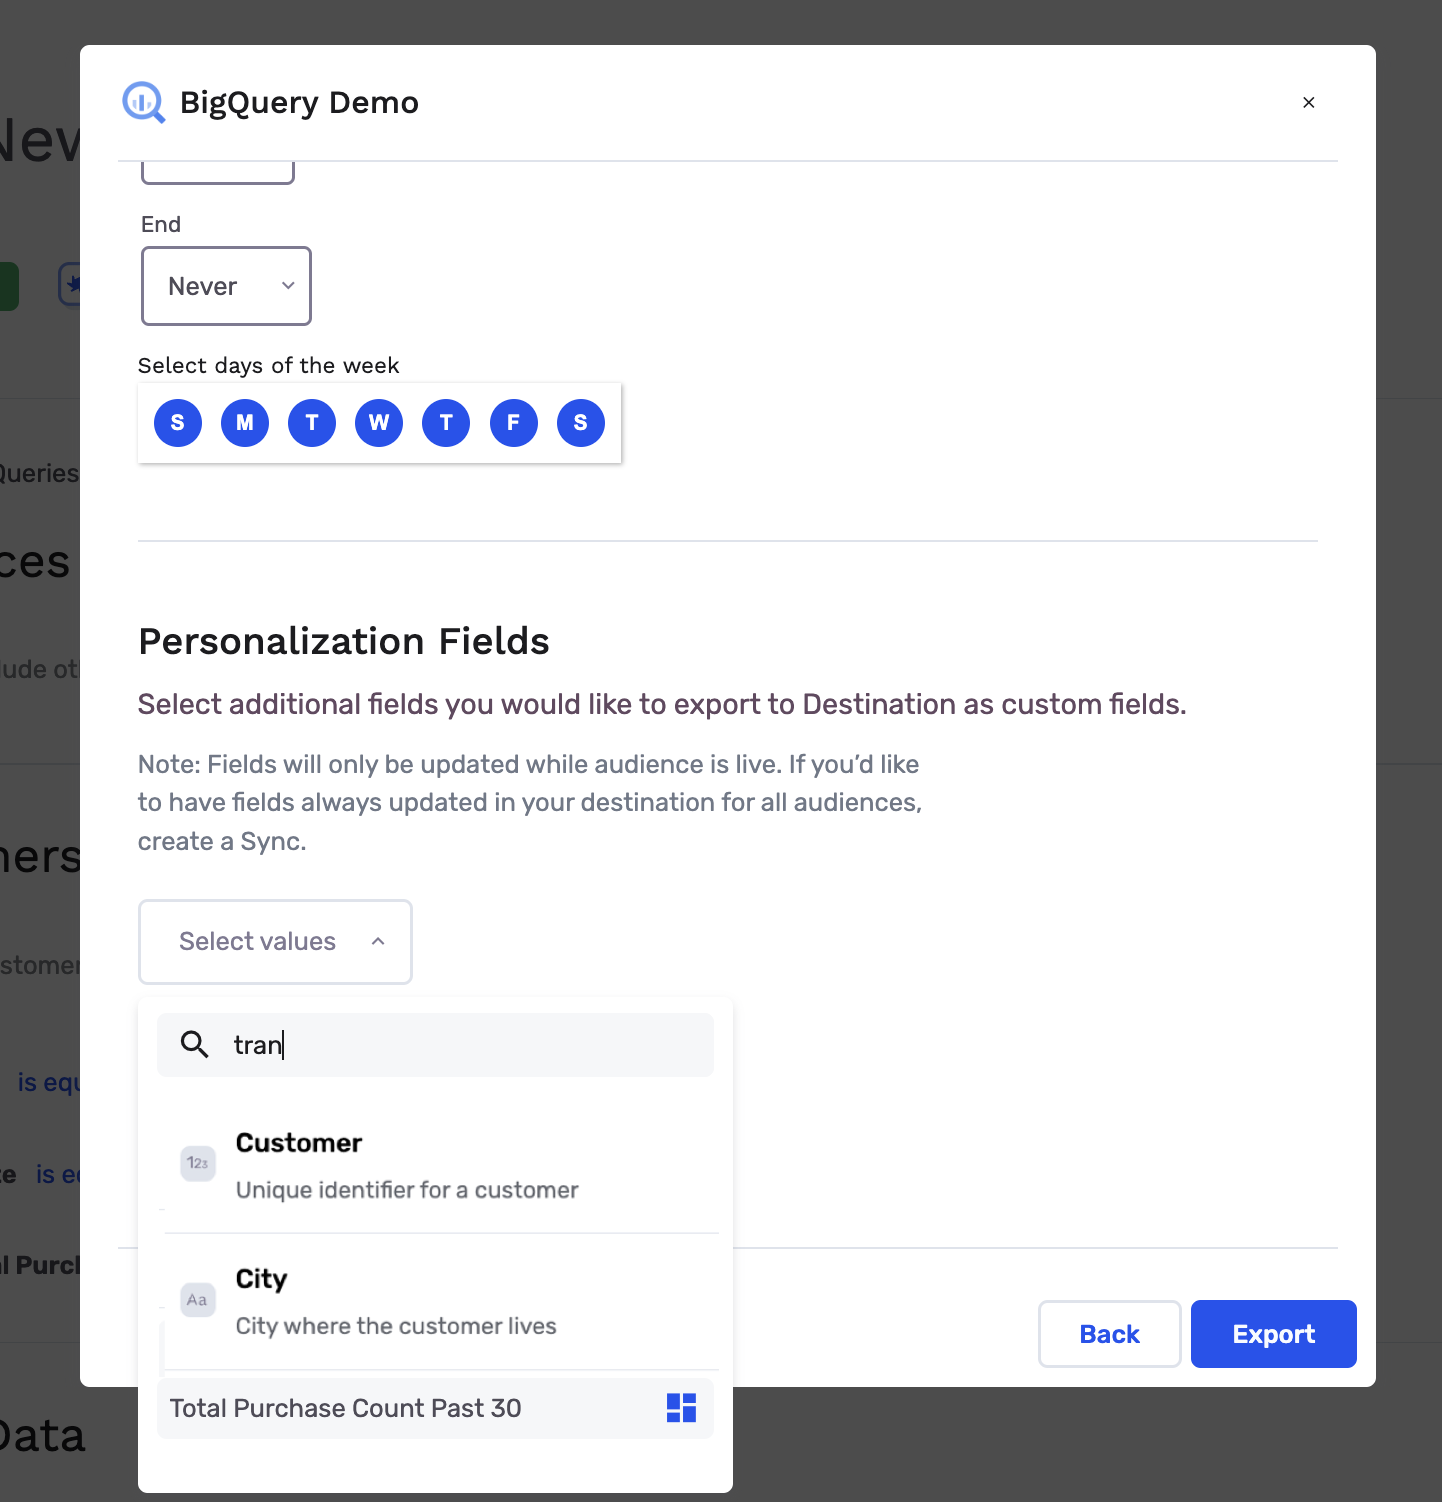
Example Computed Field in Audience Export as personalization field.
SQL Computed Fields
The second option for creating computed fields is to use SQL. There are a couple key concepts to know before you start writing SQL.
- Input: You are able to write SQL only on datasets and tables your Source Connection is provisioned access to. This typically includes any tables in your dataset group.
- Output Your SQL must contain two columns as the output of your Select statement.
- Join Key : This is the field that connects your computed field to your primary dataset table. This must match the name of the Join Key you selected in the dropdown menu on your computed field. We will join your computed field to your primary dataset table on this field.
- Computed Field: This is your computed field that you will be calculating in the rest of the query.
Now that you know the format for computed fields, we'll run through an example together.
-
Write SQL for Computed Field
-
Write Select Statement
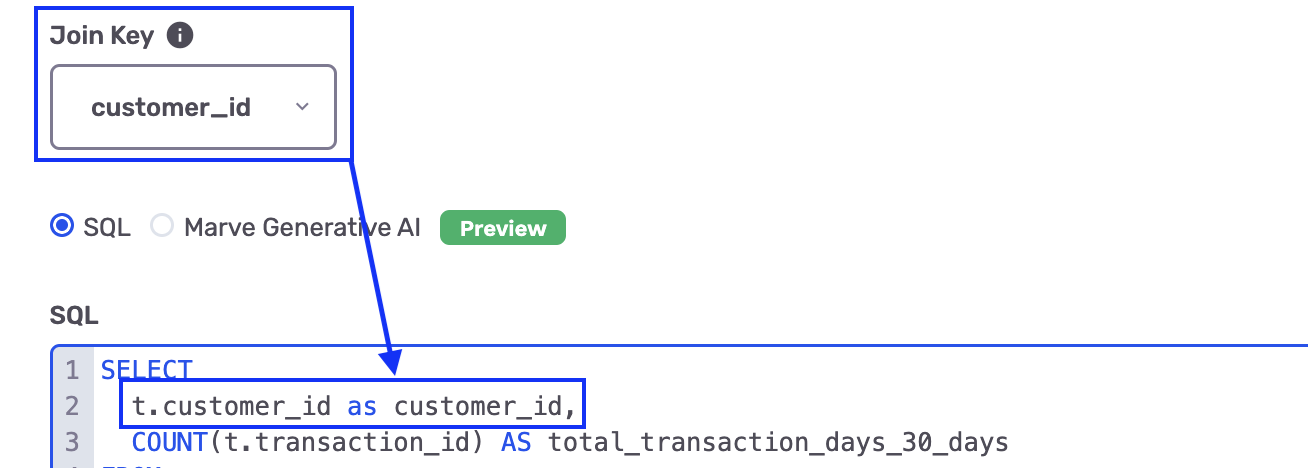
- Include your Join Key: Ensure this has the same name as your join key selected above.
- Include your computed field.
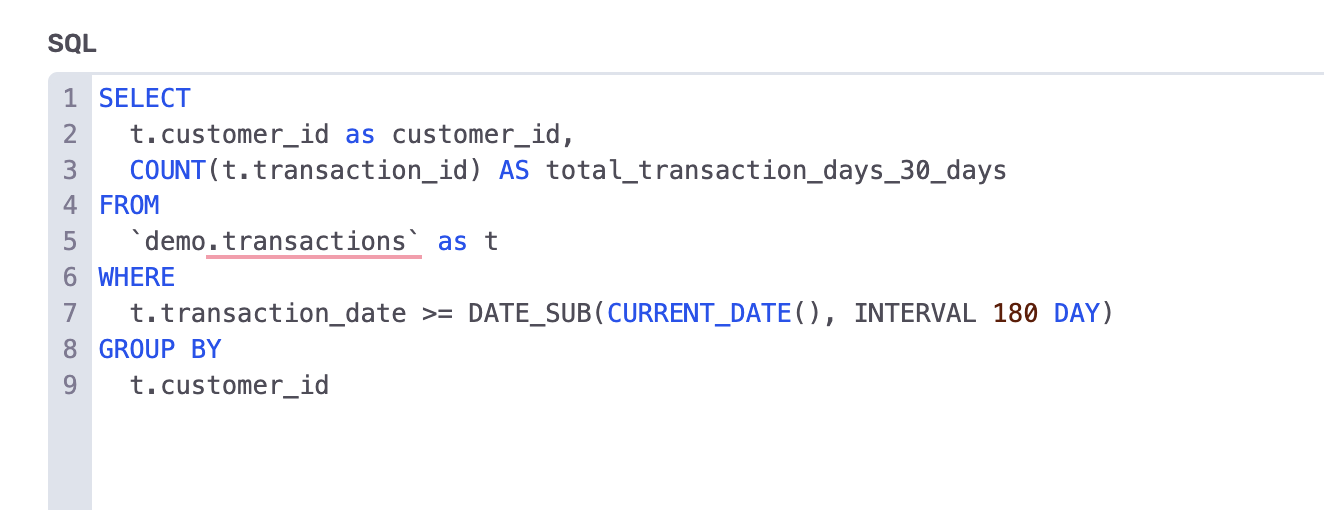
- Write your Computed Field. In this case we are:
- WHERE Clause: Filtering a transactions table to the transactions that have occured in the past 30 days
- GROUP BY: Grouping by customer id so we are "counting" the transactions per user
- Click Preview to view 20 results.
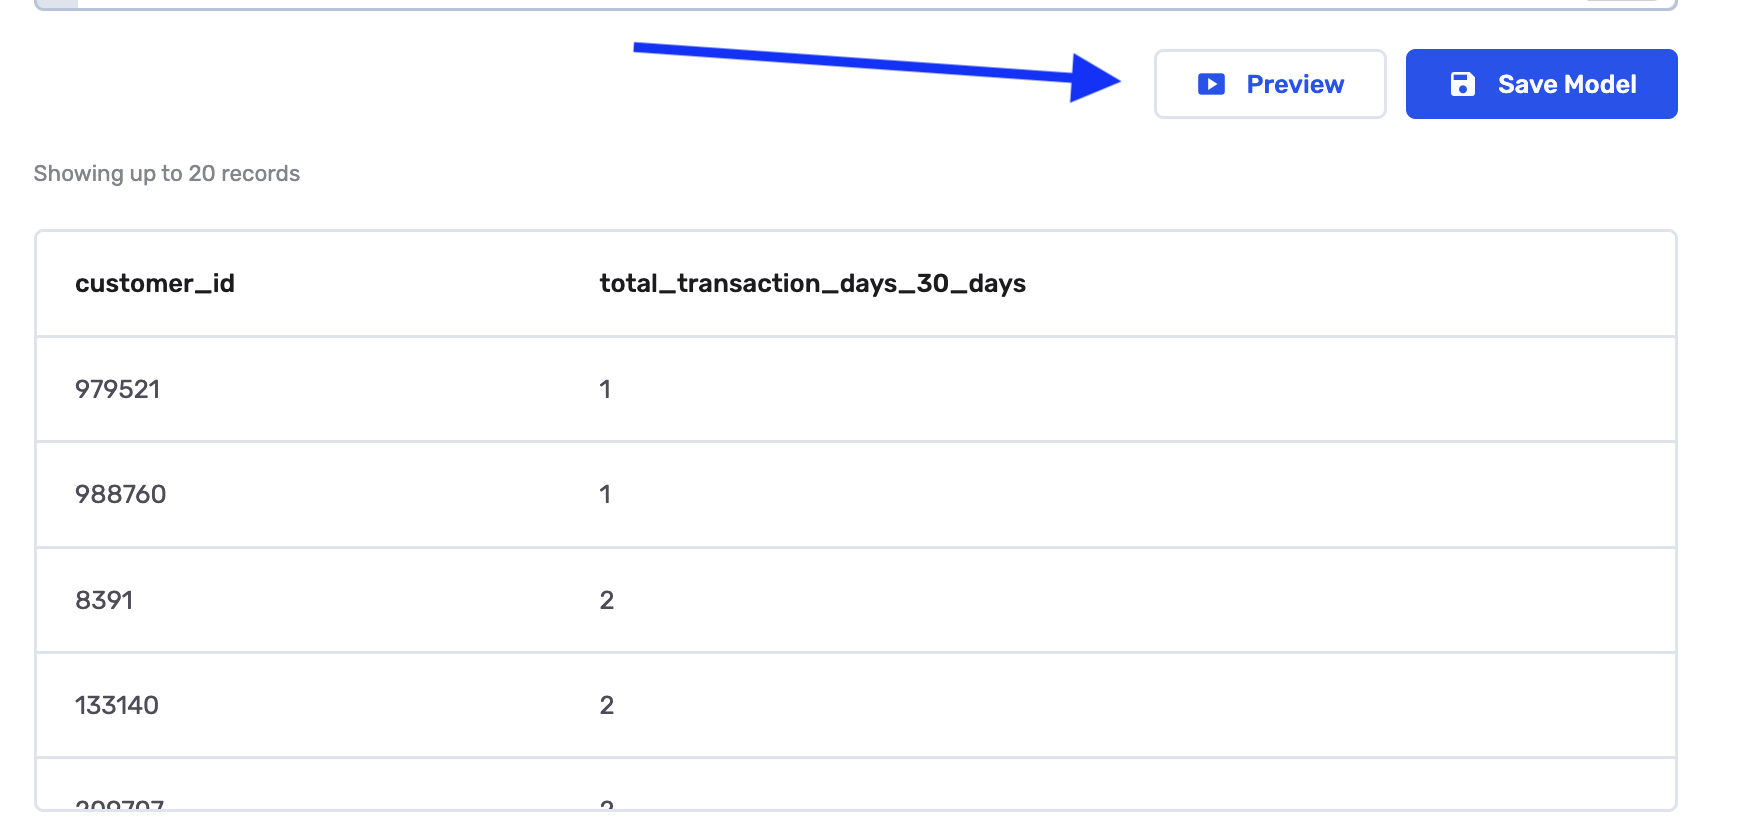
- Click Save Model
Examples
Here are some examples queries and results to better show you how computed fields can be used. For all the examples below, these are the tables that we have with their respective relationships.
- Users table -- basic user info such as customer_id, first_name and last_name
- Transactions table -- transaction details such as transaction date, value and item
- Blog activity table -- whether the user published a blog post or commented on one
Tables 2 & 3 are joined to Table 1
Now let's get to our examples
-
Total number of purchases per customer
SELECT
  c.customer_id,
  COUNT(cf.id) as total_purchases
FROM
  `rokham.customers` c
  LEFT JOIN `rokham.computed-field-transactions` cf ON c.customer_id = cf.customer_id
GROUP BY
  c.customer_id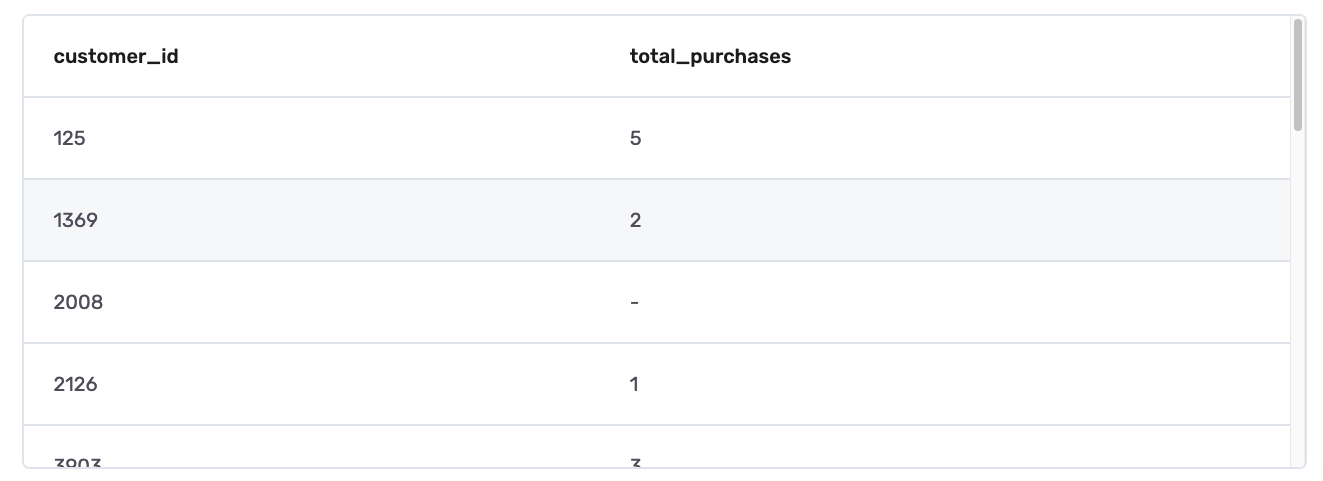
-
Last purchased item
SELECT
  c.customer_id,
  ARRAY_AGG(
    purchased_item
    ORDER BY
      transaction_date DESC
    LIMIT
      1
  ) [OFFSET(0)] as last_purchased_item
FROM
  `rokham.customers` c
  LEFT JOIN `rokham.computed-field-transactions` t ON c.customer_id = t.customer_id
GROUP BY
  c.customer_id
-
List of purchased items by each customer
SELECT
  c.customer_id,
  ARRAY_AGG(COALESCE(ctf.purchased_item, 'No Purchase')) AS purchased_items_list
FROM
  `rokham.customers` c
  LEFT JOIN `rokham.computed-field-transactions` ctf ON c.customer_id = ctf.customer_id
GROUP BY
  c.customer_id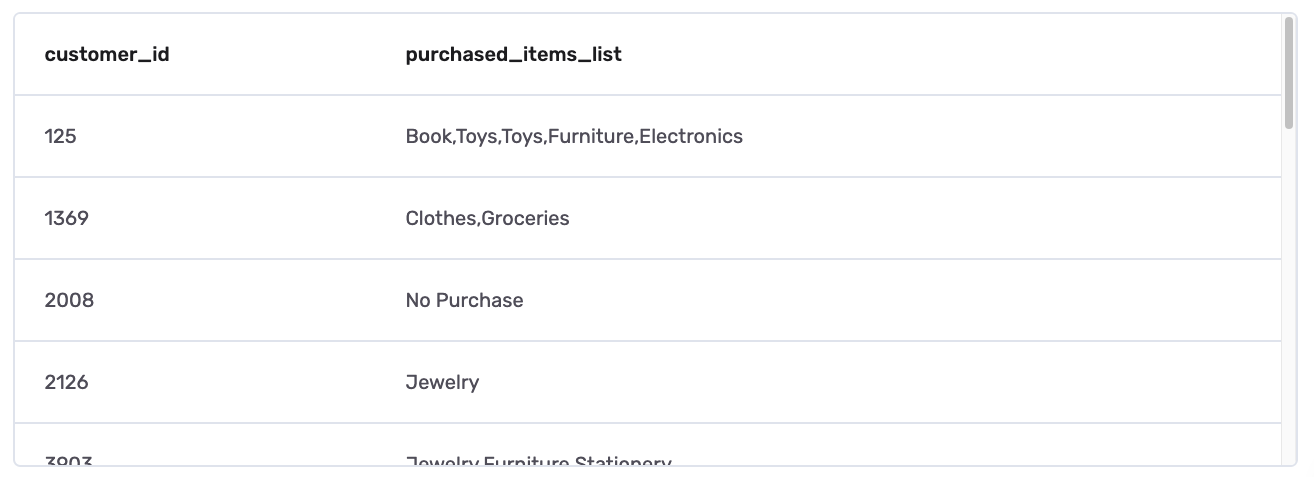
-
Users who have ONLY published a blog post and no comments
Please note that the preview screenshot below, only shows those who are not just authors as a sample set of results.
SELECT
  c.customer_id,
  IF(
    cfba2.blog_publish_date IS NOT NULL
    AND cfba2.comment_publish_date IS NULL,
    TRUE,
    FALSE
  ) AS author_only
FROM
  `rokham.customers` c
  LEFT JOIN `rokham.computed-field-blog-activity-2` cfba2 ON c.customer_id = cfba2.customer_id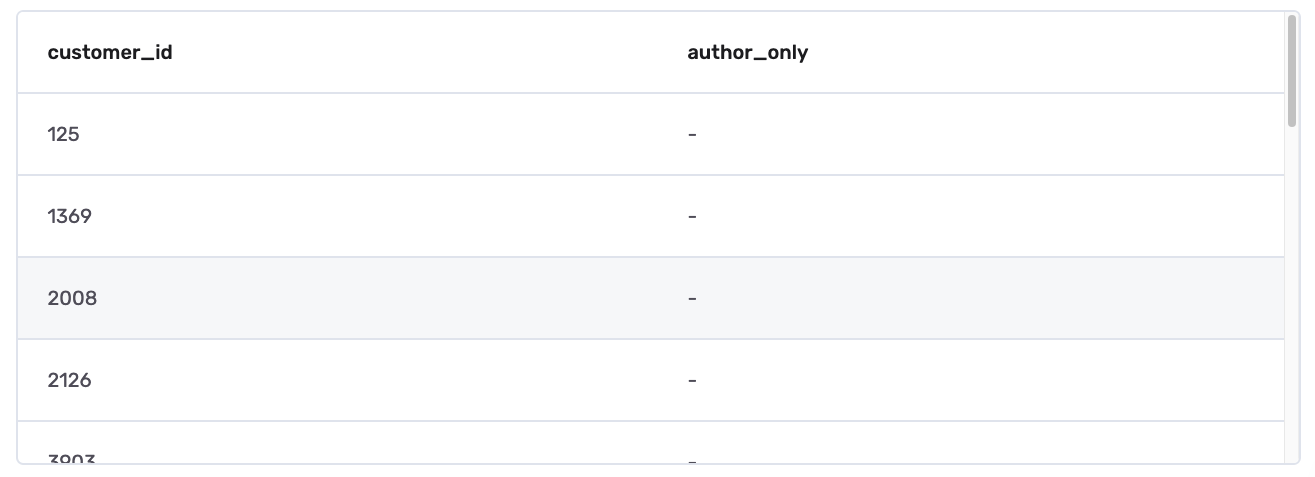
Congratulations, you have created a Computed Field using SQL. You can now create audiences, syncs, and journeys using this field and leverage it as a personalization attribute you send to destinations
Updated 3 months ago