
Build a Journey
Learn how to build a cross-channel, multi-step journey for your customers using a single canvas.
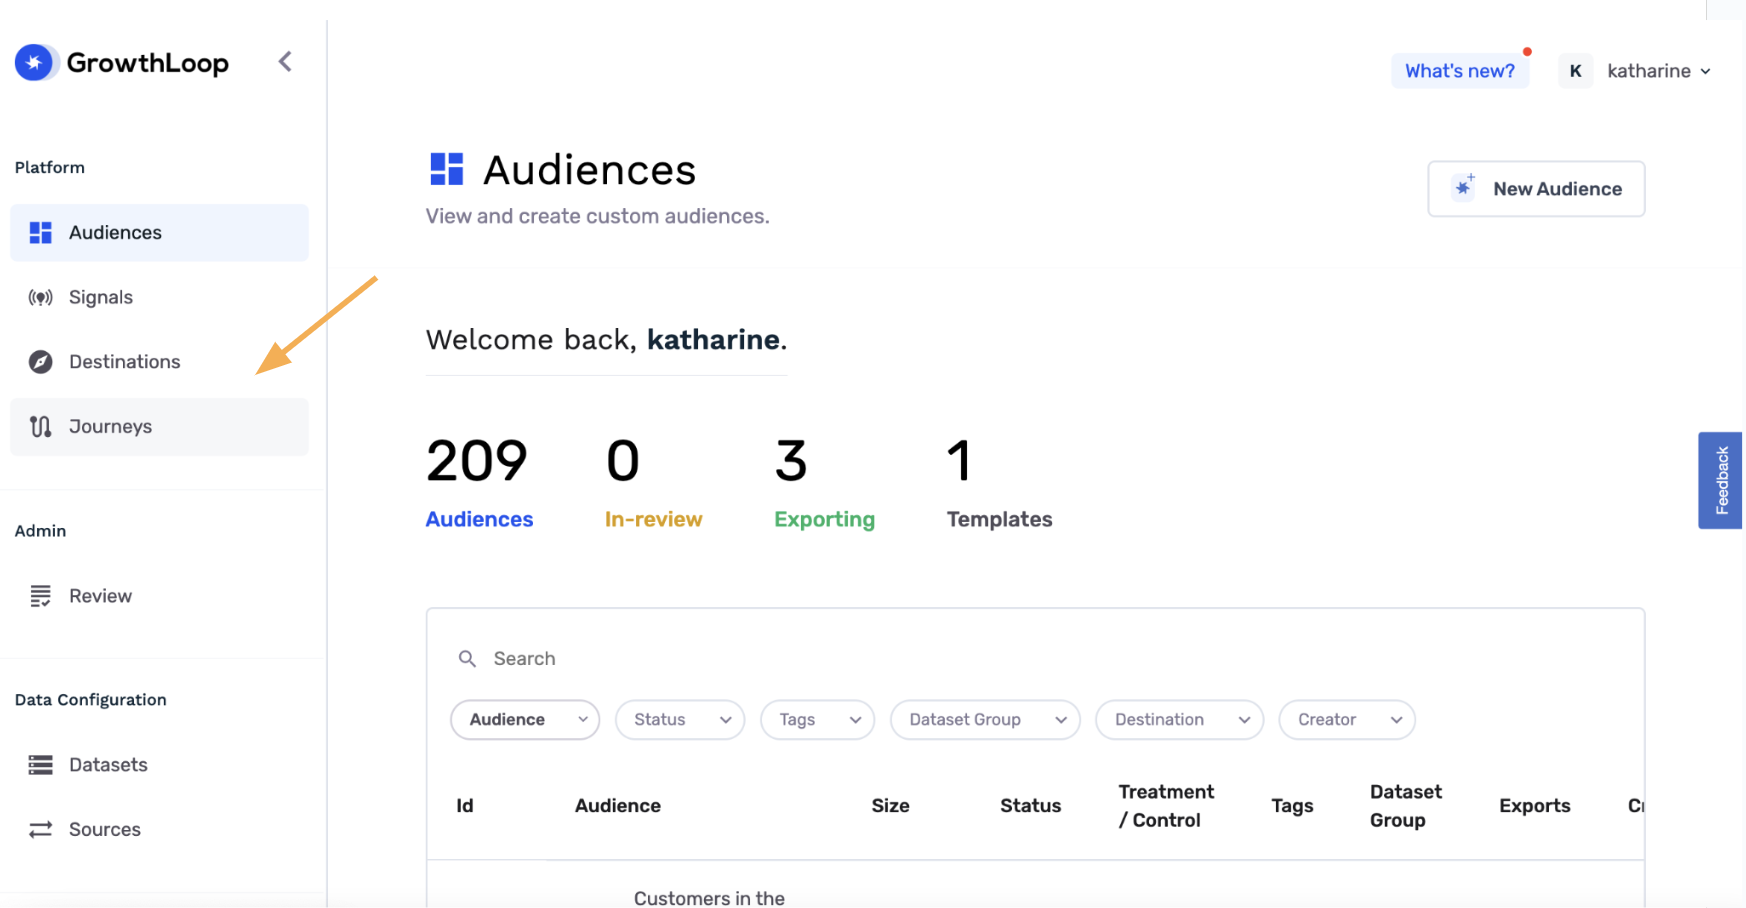
Journeys
Welcome to GrowthLoop’s Journey Builder! In this article, we’ll walk you through the suite of capabilities available in the platform and some helpful hints for designing cohesive, delightful journeys for your customers.
A journey of a thousand steps begins with a single… audience. That’s right, it all loops (GrowthLoops?) right back around to using Audience Builder to create a segment of customers based on the data living in your data warehouse. Learn more about building audiences with GrowthLoop in this article.
Creating a New Journey
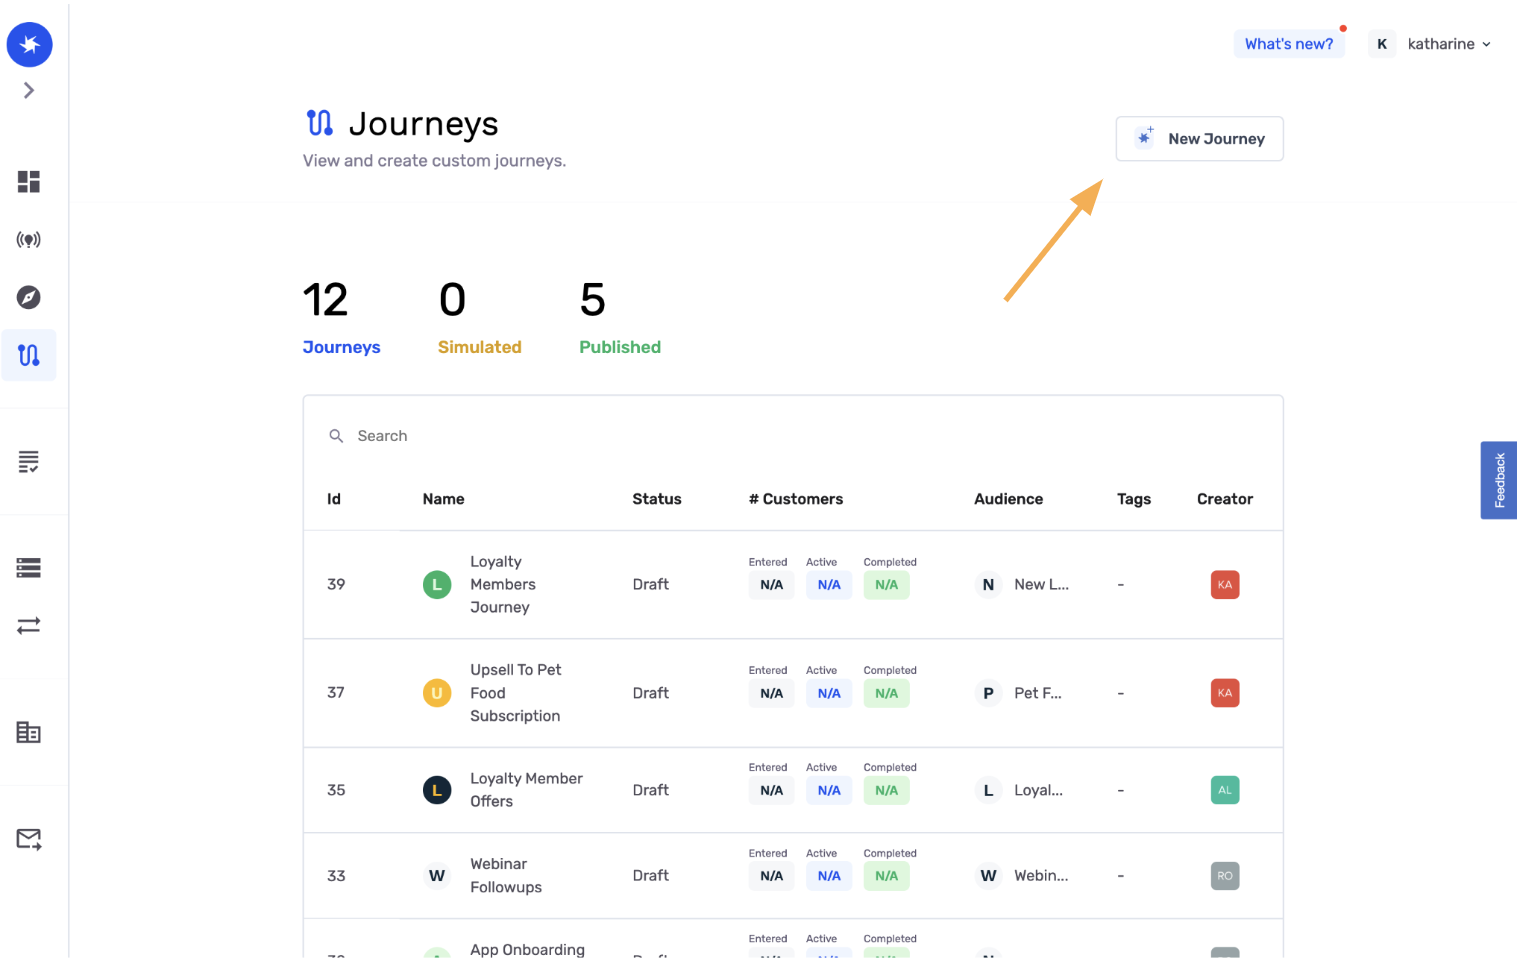
Navigate to the Journeys tab on the left side of your screen.
Click New Journey.
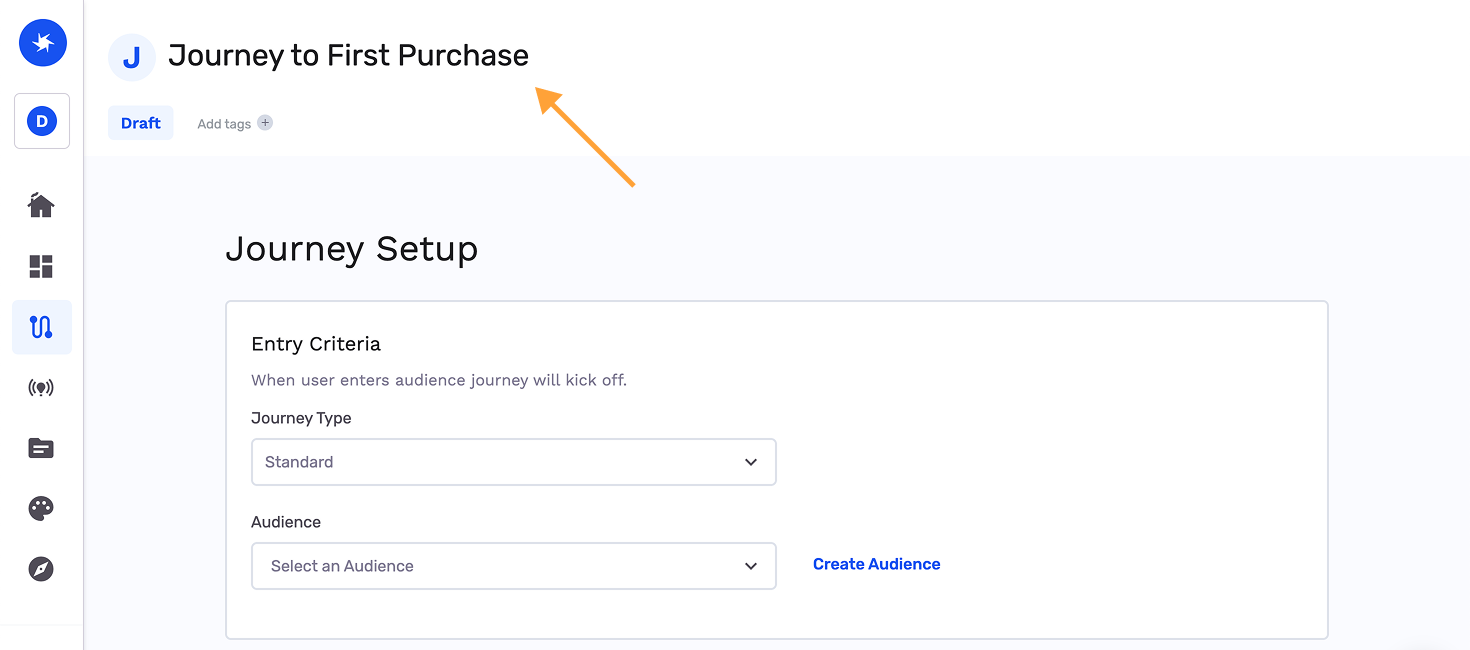
Add a Journey Name. A name is required to save your journey.
Configuring Journey Settings
You will now need to complete Journey Setup by providing the following information:
Entry Criteria: The audience you want to use as the entryway to the journey.
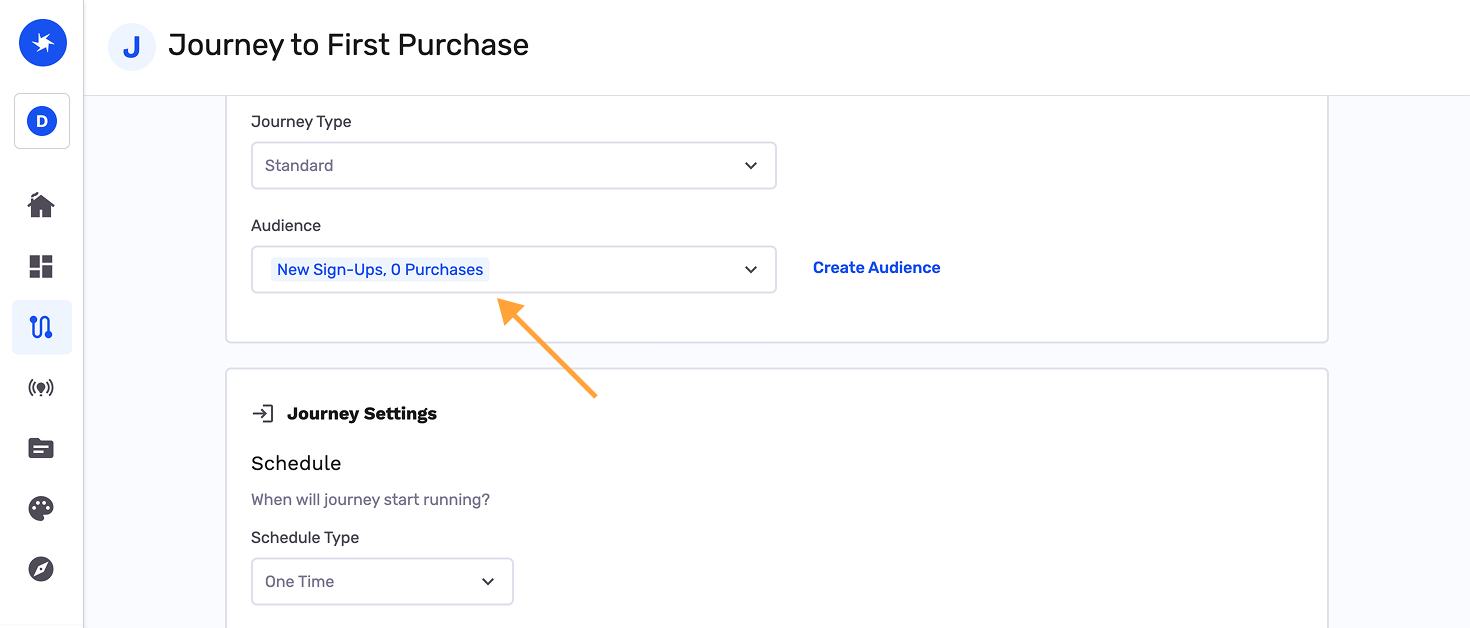
Schedule: You have several options for customizing your journey schedule.
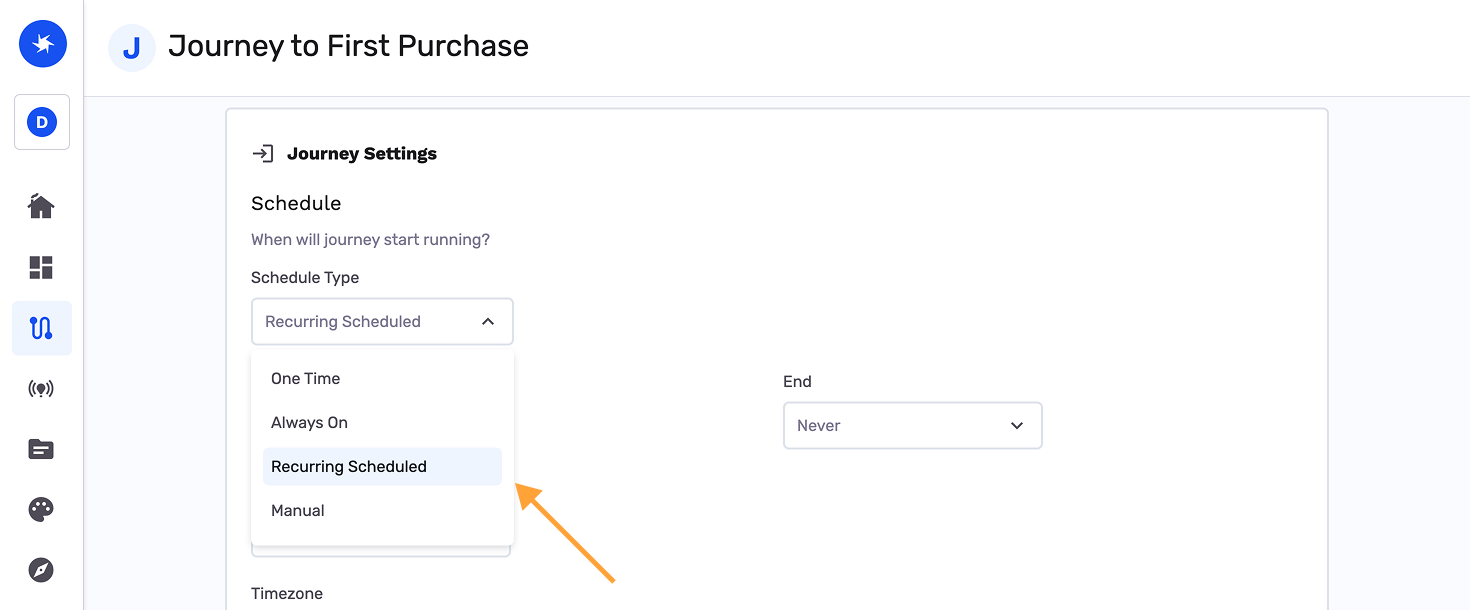
- Journey Schedule: Choose your journey schedule type. A schedule type is required before a journey can be started.
- One Time: Run this journey one time only, either when it's started or at a specified time.
- Always On: Keep this journey running continuously from my specified start to end times. Never is an end time option for a journey you wish to run indefinitely.
- Recurring Scheduled: Run this journey intermittently based on my desired schedule. You can identify the day(s) of the week and time(s) when you wish for your journey to run. As with Always On, you are required to specify start and end times.
NoteNeed to run a journey one node at a time to validate it? You can run individual nodes manually from the journey canvas — even while the journey is still a draft. See Interacting with a journey for details.
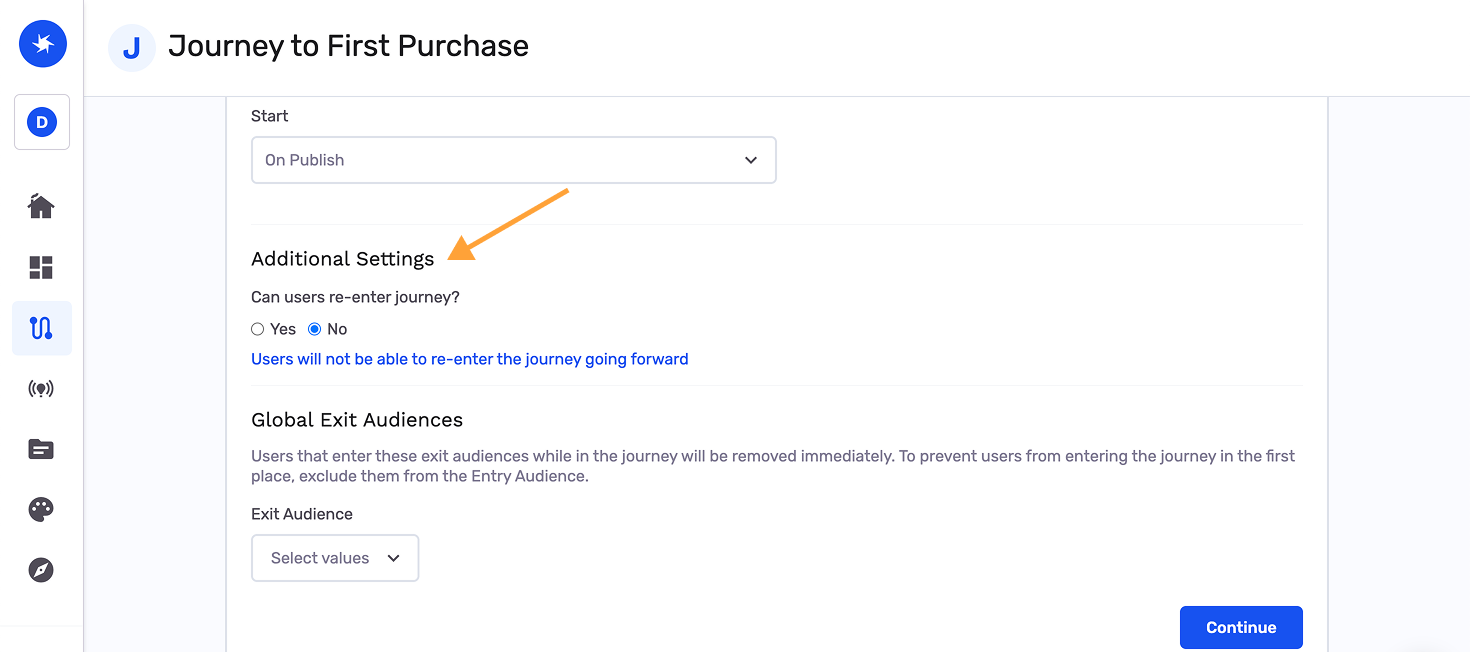
Additional Settings: You have a few additional configuration options, including Journey Re-entry. This feature allows you to declare whether individuals who exit the journey are allowed to re-enter the journey if they again meet the entry criteria. If you want to allow re-entry, you will be asked to specify how long an individual must wait between exiting and re-entering the journey. This time can be zero if you want them to immediately re-enter.
Click Continue.
Building Your Journey
You are now able to build your journey on the journey canvas!
Navigating the Canvas
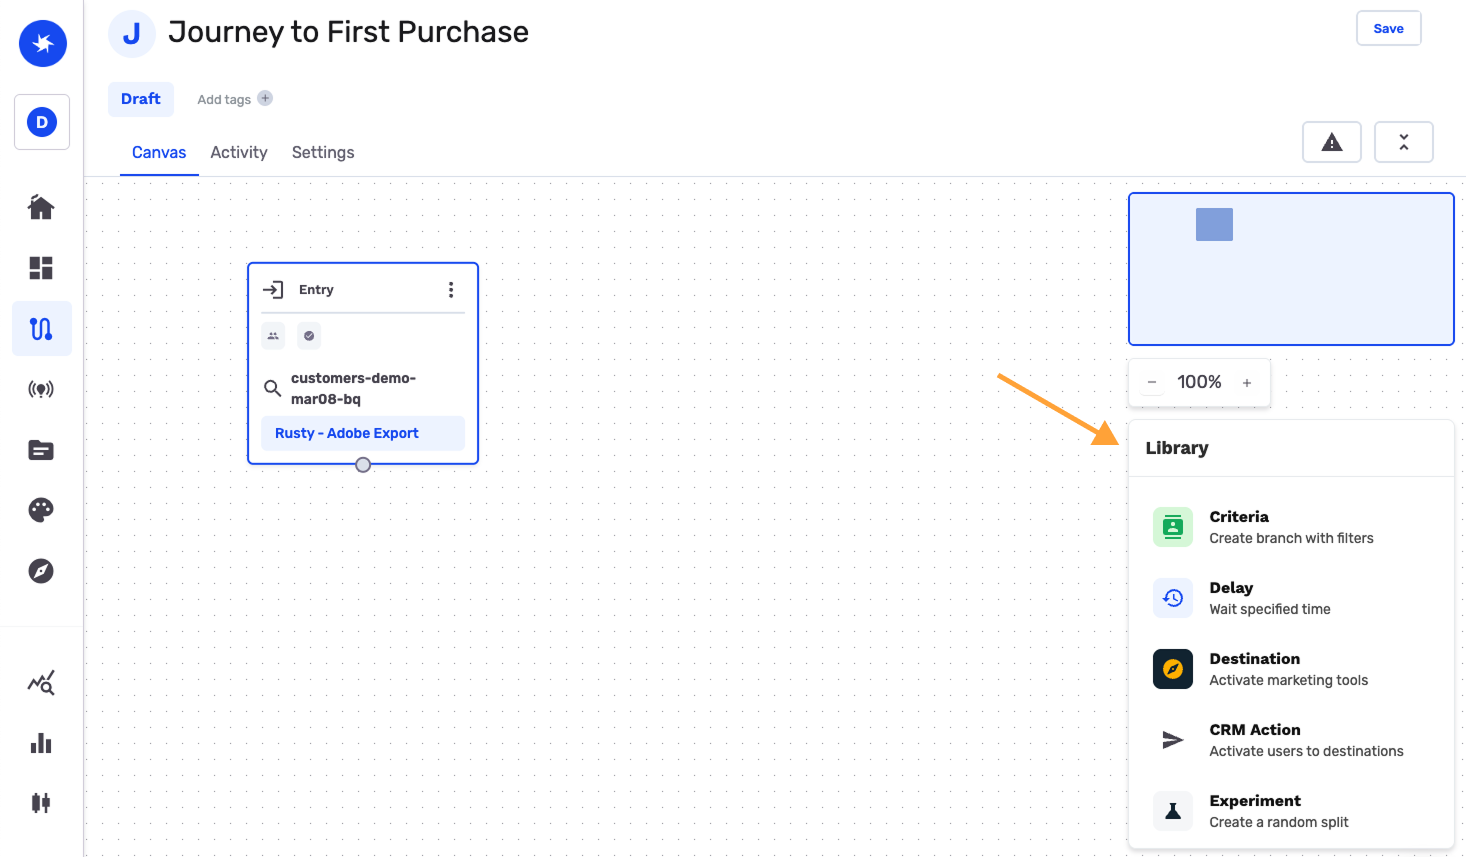
To navigate around the canvas, click and drag anywhere on the screen. As you build your journey, you will be able to see the high-level structure in the Mini Map on the right side of the screen. You can also adjust your Zoom using the controls below the Mini Map.
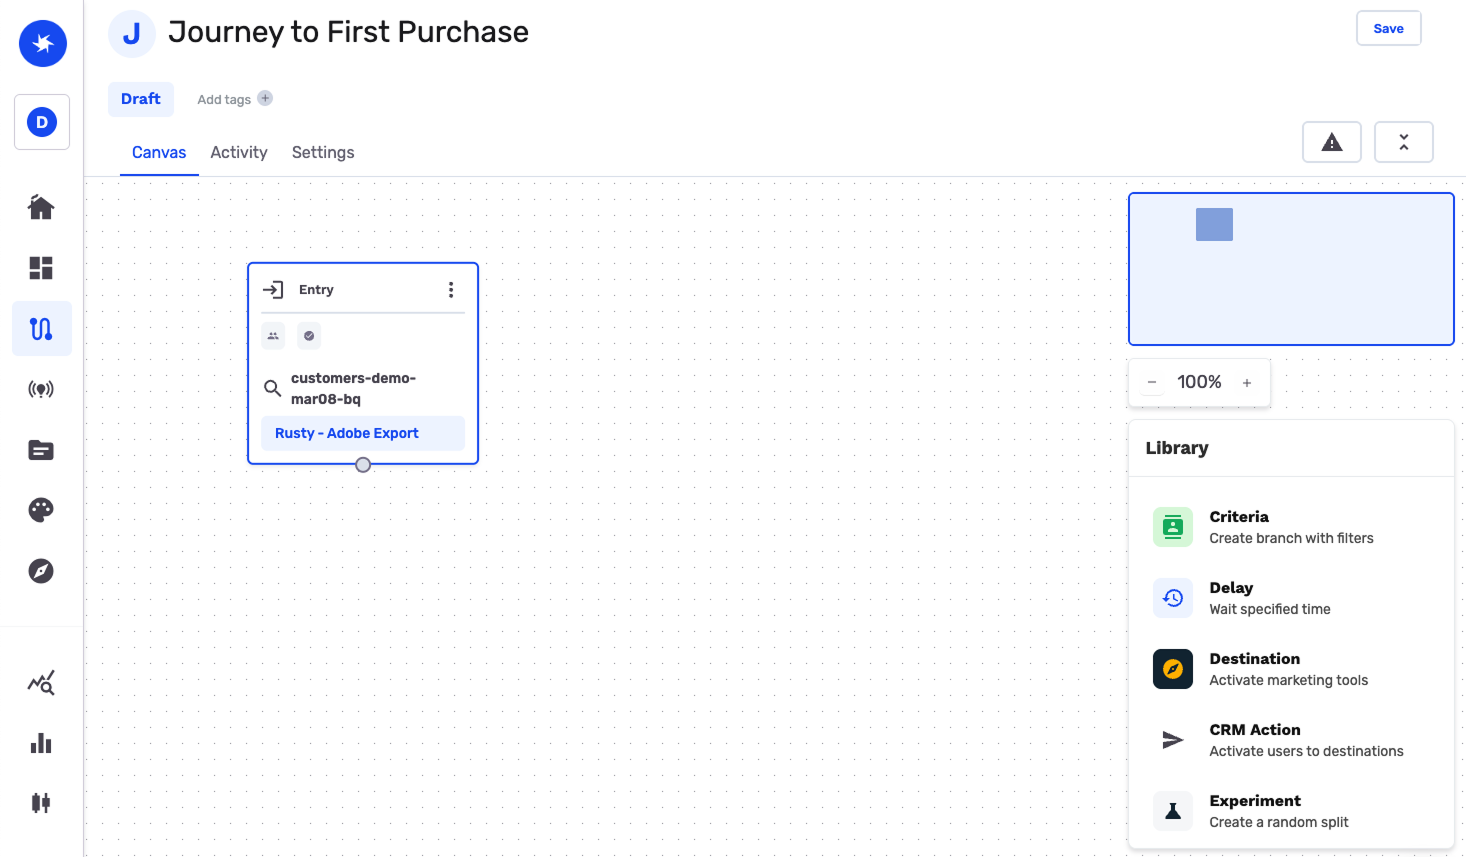
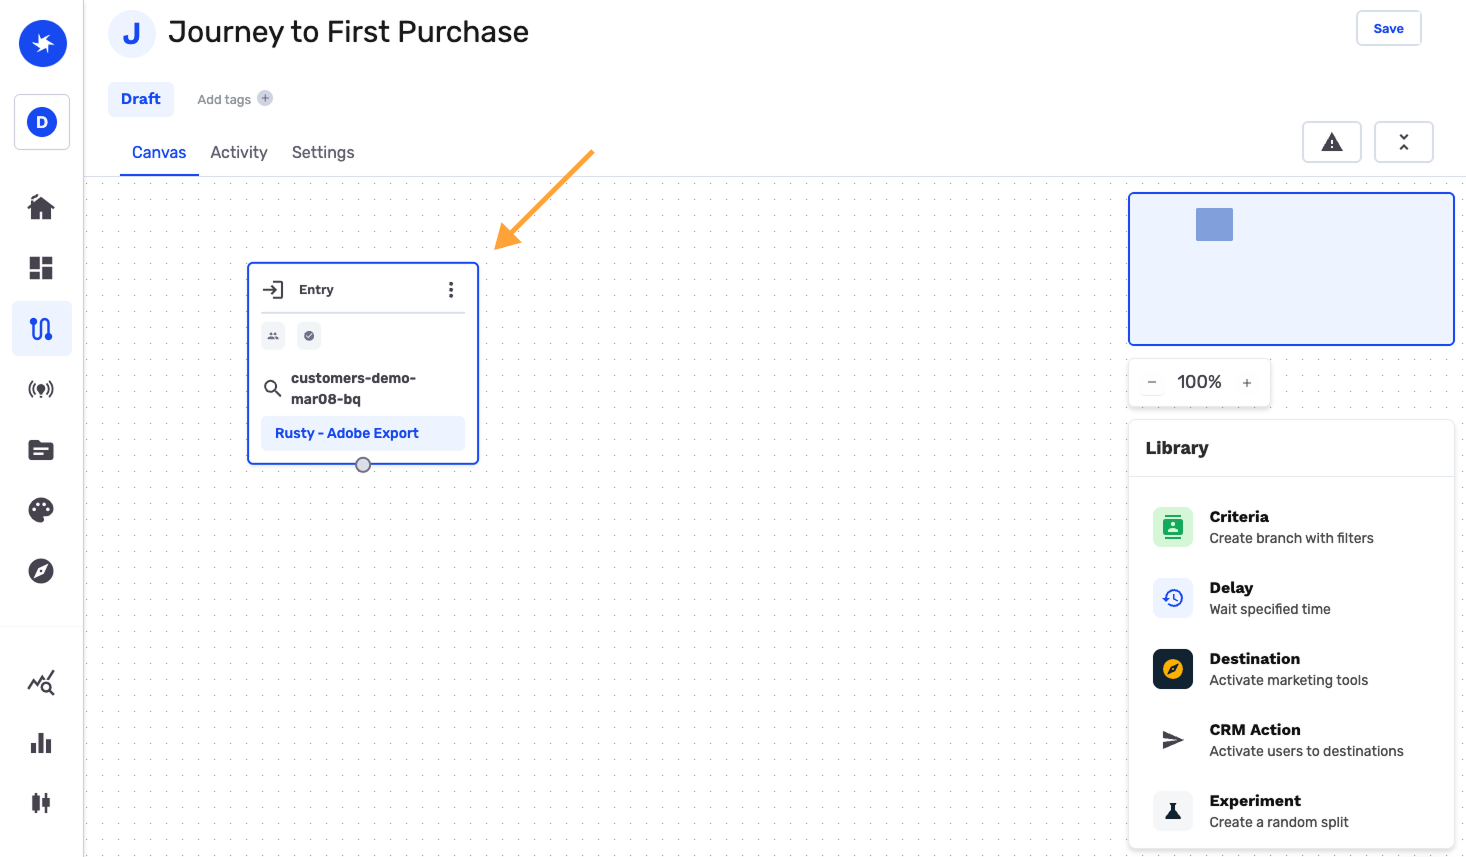
With these controls in mind, you are now able to build your customer journey using any combination of the six node types (described below) shown on the Library on the right side of your screen.
You can add a Node to your journey by clicking and dragging it from this menu onto the journey canvas. To connect nodes in your desired progression, click the circle on the bottom edge of the “parent” node and drag it to anywhere along the top edge of the “child” node.
You can rename any of the nodes on the canvas by double-clicking on the header and entering your desired text.
Entry Node
Every journey starts with an Entry Node identifying the audience that is used as the gateway to the journey. This is the audience you specified during the Journey Setup stage.
Criteria Node
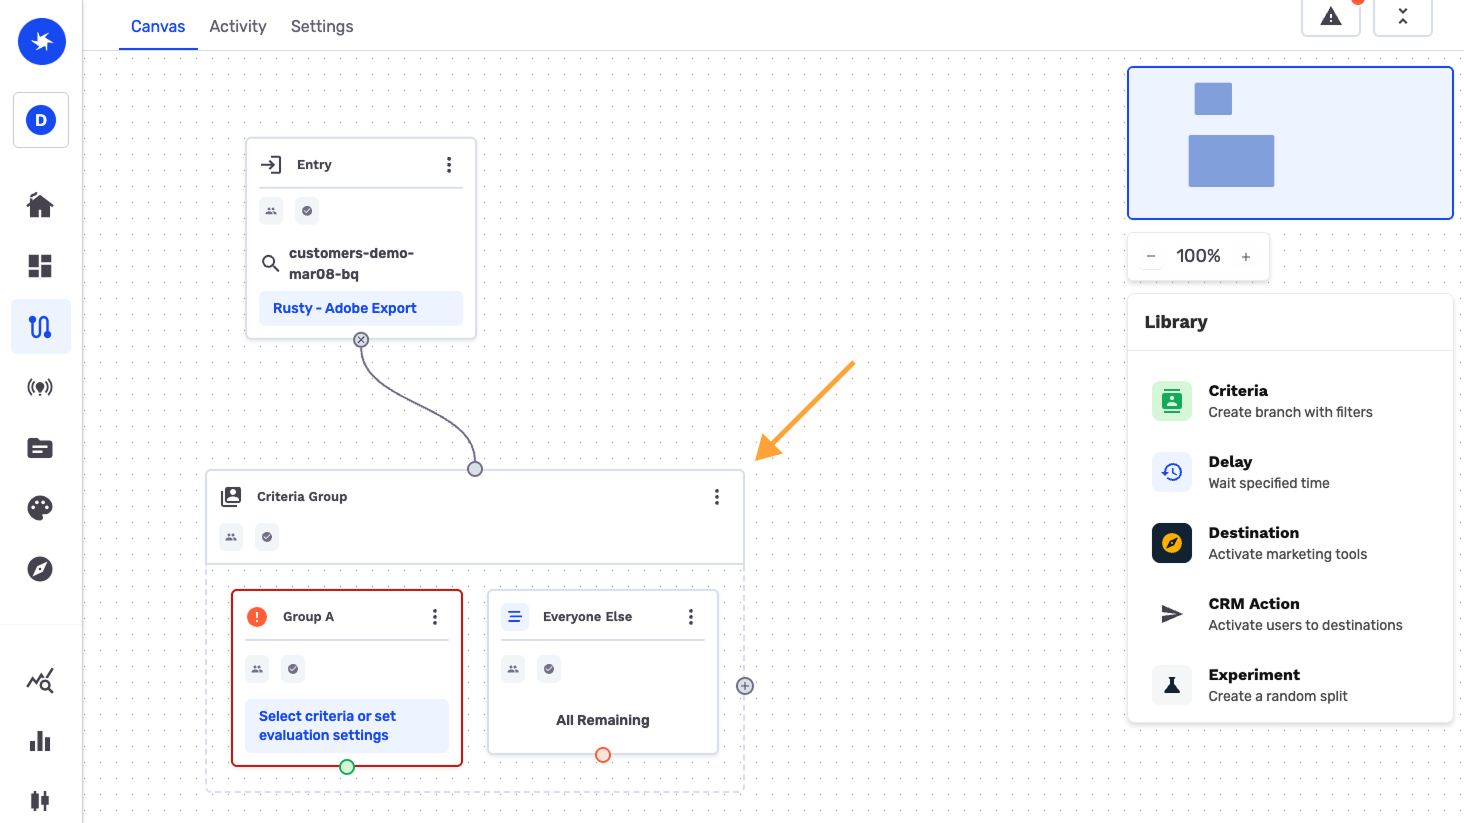
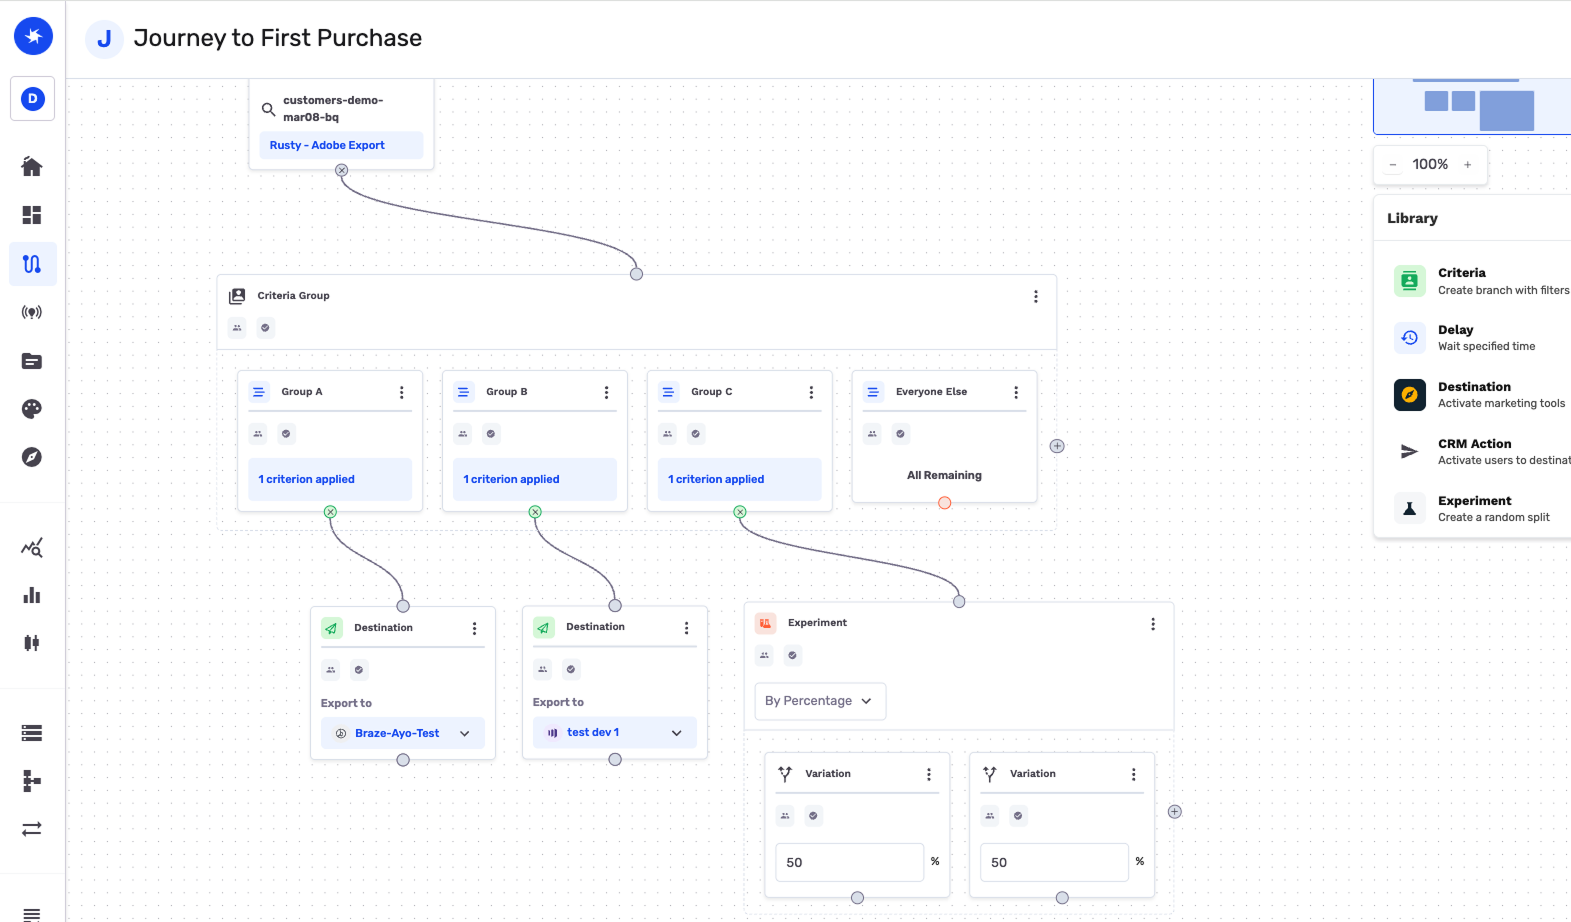
A criteria node (also called group criteria node) allows you to build mini-audiences into as many groups as you need in your journey.
The criteria node starts with 1 grouping + everyone else. This means any users who flow into the criteria node, will be first assessed against the conditions you set on Group A and if they don't meet those criteria, they're passed through the "Everyone Else" path.
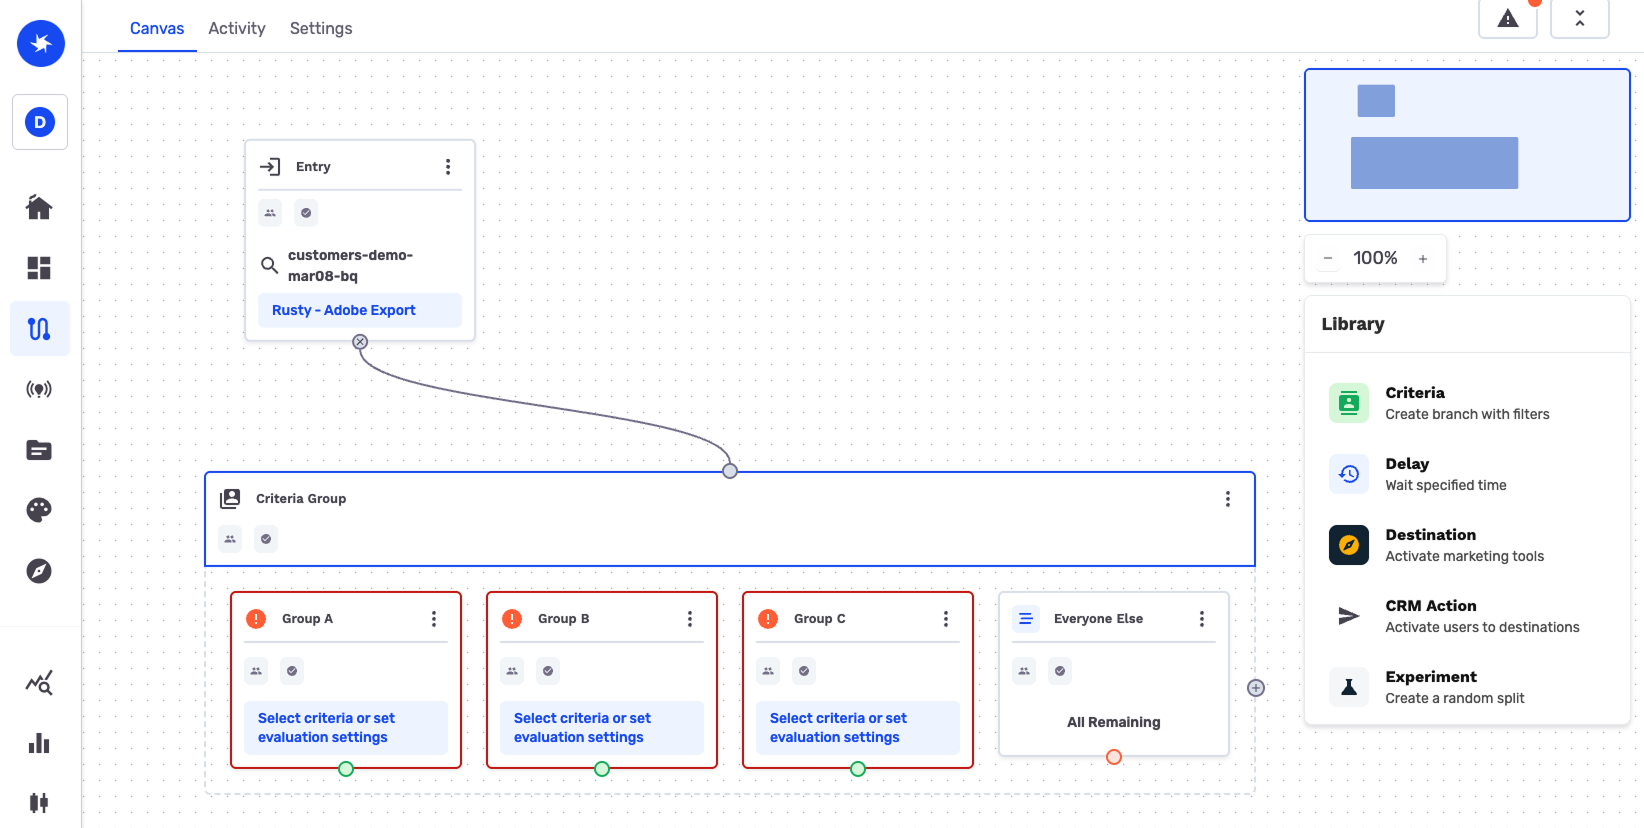
You also have the ability add as many groupings as you'd like. In this case users flowing into the criteria node, will be assessed based on the rules set in the nodes from left to right (ie, checked against your criteria in Group A and if they don't meet them, they move to Group B's criteria and so on in a waterfall manner).
If you ever need to change the order of your grouping, you can hover over each group and you'll see the mini left/right arrow (image above). Clicking them will move the grouping to the left or right respectively.
Now let's get into how you can define your criteria inside a single group.
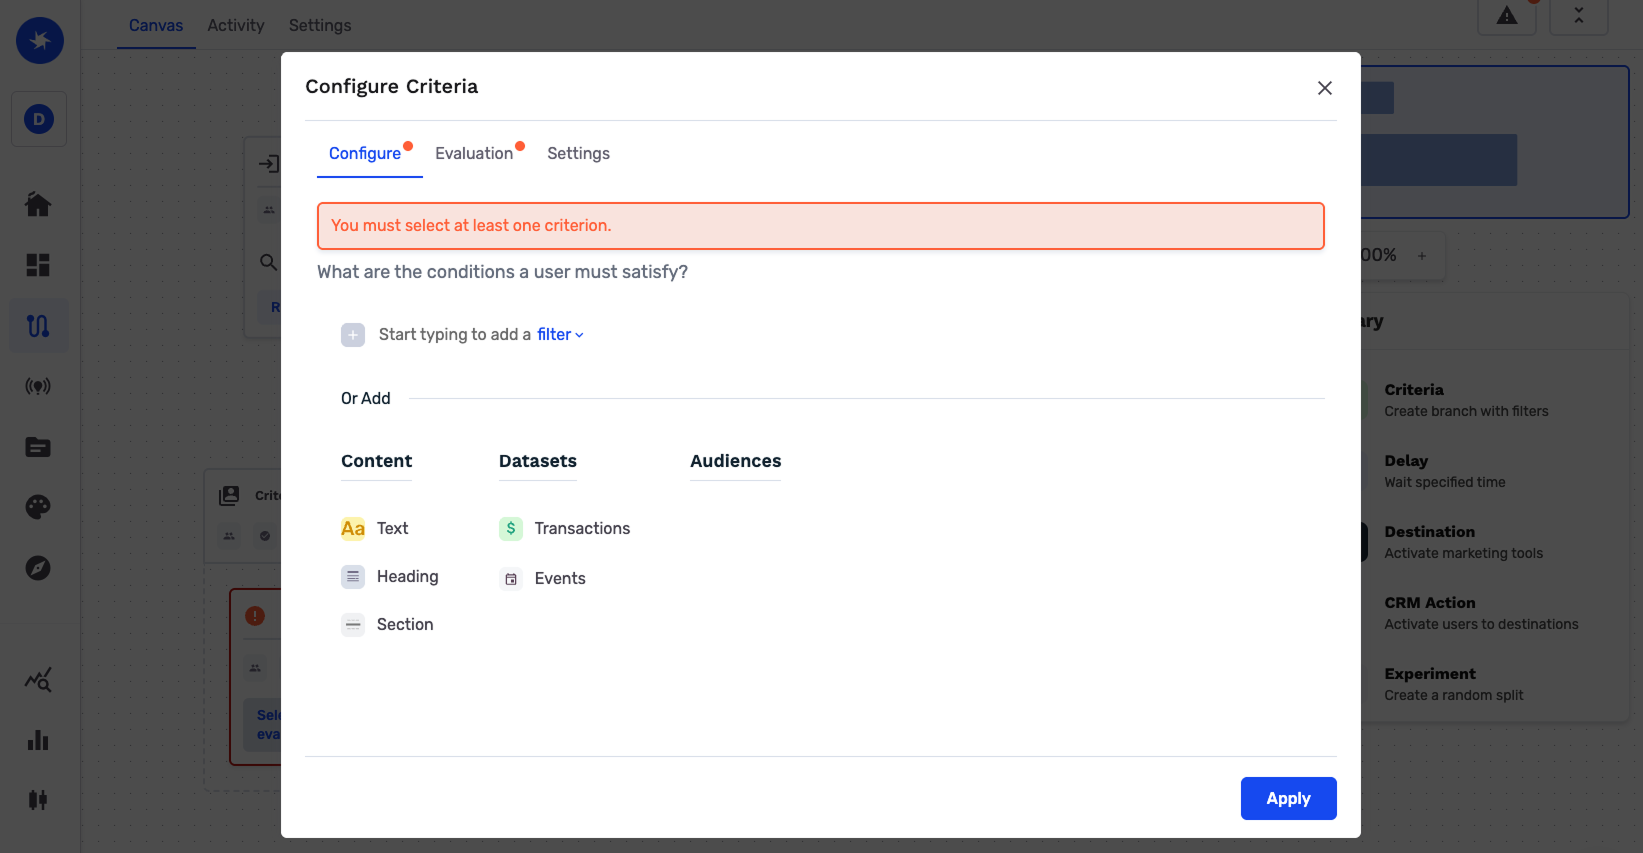
A criteria node is essentially a mini-audience Builder that allows you to filter members of your audience across any table you’ve connected from your data warehouse. To add a criteria, double click on the Select Criteria option. By default, the criteria builder will prompt you to add a filter from your customer table. You can select filters from other tables by clicking Transactions or Events and selecting your desired dataset. In addition to adding filters, you can further customize the appearance of the criteria builder by adding elements like Headings, Text, and Sections.
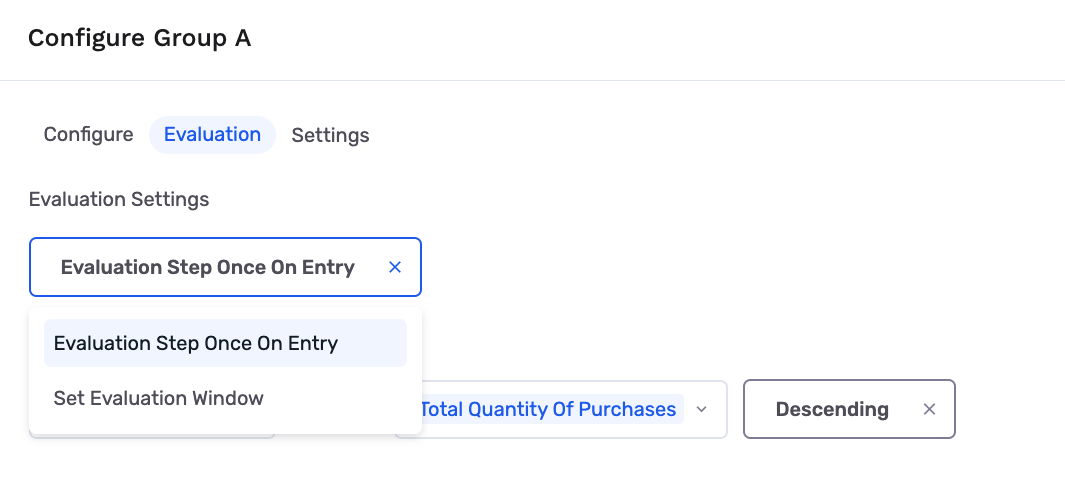
In addition, the criteria node includes an Evaluation feature, which gives you more control over how and when the criteria are evaluated:
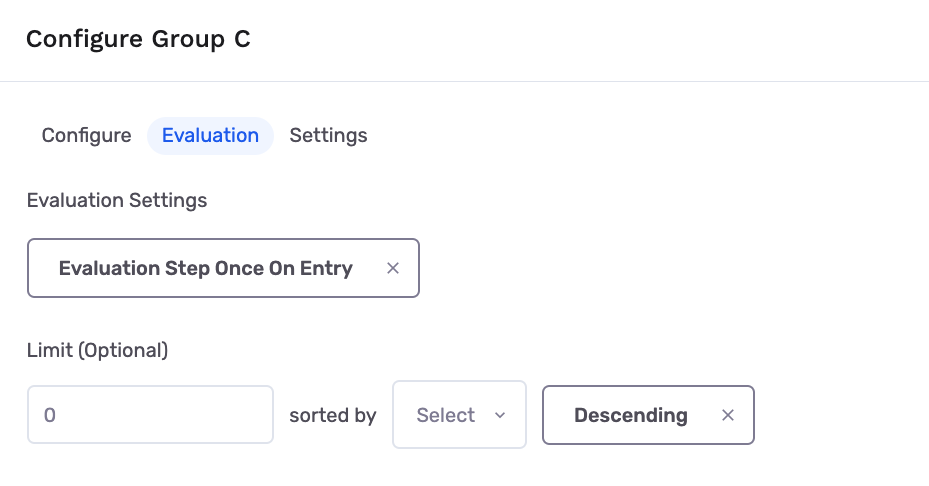
- Evaluation Step Once On Entry (default): Members are evaluated as soon as they enter this group in the criteria node, and they move down this criteria path if they meet them. If they do not, they proceed down to the next grouping in your group criteria node.
- Set Evaluation Window: Members are evaluated regularly over a specified window of days or hours. As soon as they meet the criteria, they meet this group's criteria and proceed down the journey. If they do not, they proceed down the remaining groups of your group criteria node.
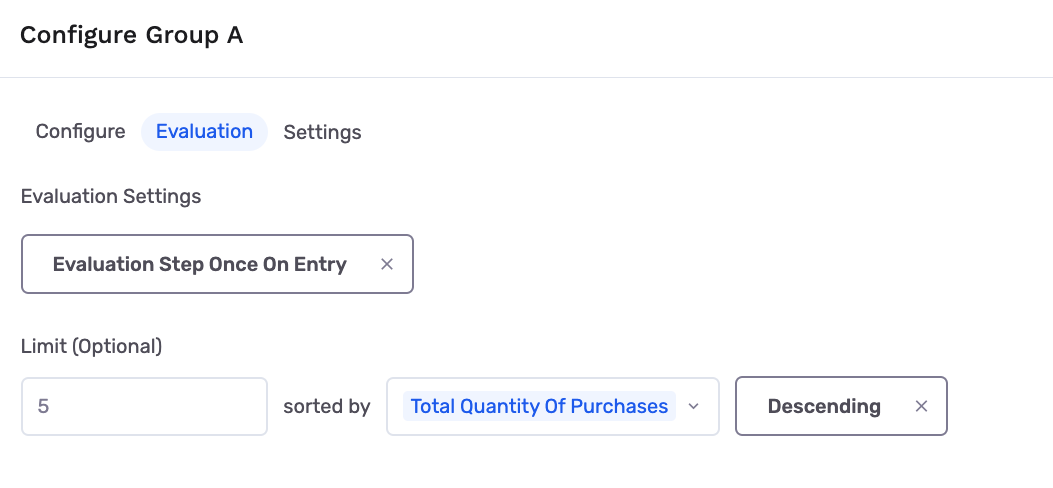
- Limit (optional): You can also set a limit on the number of users that meet the criteria and sort them by a user property in ascending or descending order.
This flexibility ensures that audience members have adequate time to meet the criteria before moving forward and you can further limit the number of users that pass through based on your specific sorting.
Below we're sorting users that meet our criteria by the total number of purchases (in descending order) and only picking the top 5 users.
When you are finished configuring your criteria node, click apply or anywhere outside the criteria builder and you will be brought back to the journey canvas. You can rename your criteria node to reflect this filtering stage by double-clicking Criteria and adding your title text.
Once this node is complete, your audience will be segmented into as many groupings as you have in the group criteria node. This allows you to send each group down their respective sub-branch in the journey as indicated below.
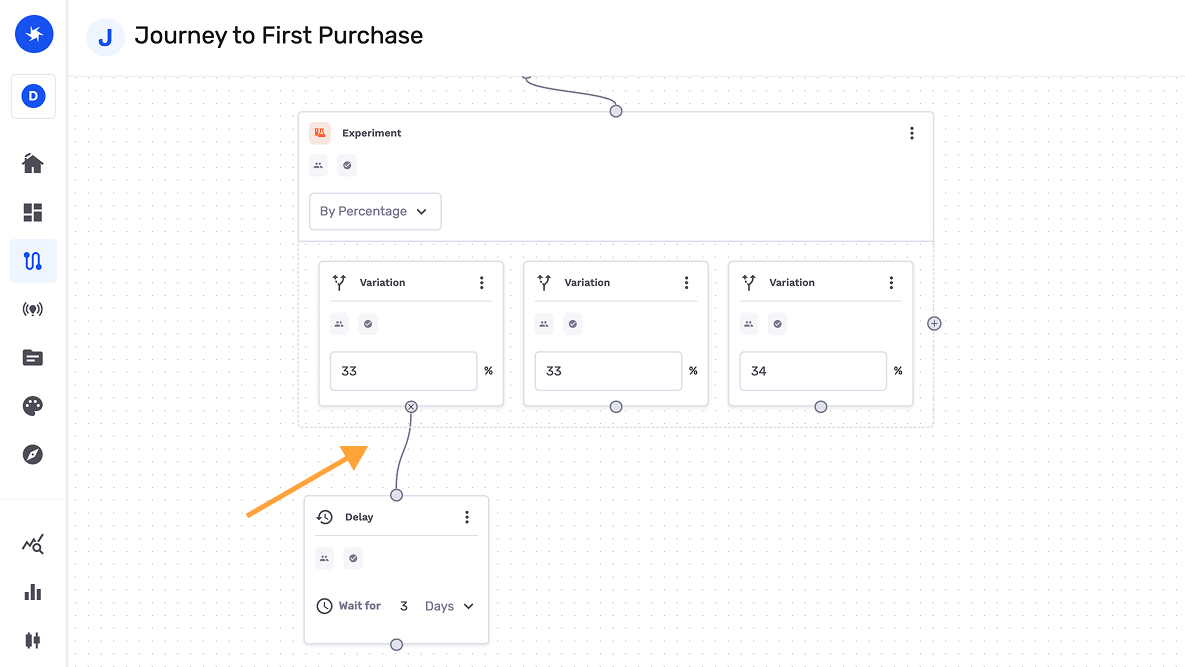
Delay Node
A delay node is used to add a time buffer between nodes. For instance, if you send an audience a discount offer via email and want to check for a conversion after sending, you will want to introduce some kind of time interval to allow the desired purchase to occur.
The delay node looks simple upon first glance - the Basic option shown on the node prompts you to specify a single interval of time to separate the preceding and succeeding nodes.
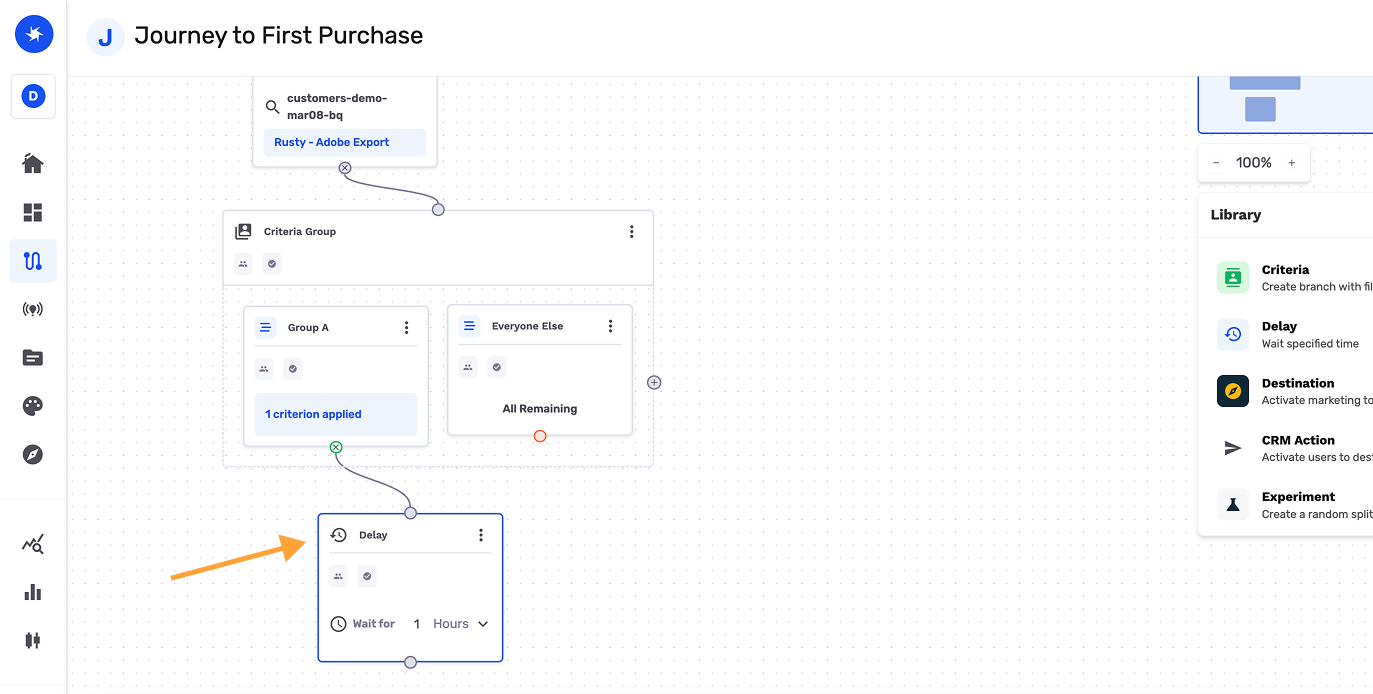
To obtain delay options double-click on the node. You now have the option of setting and configuring one of the following Delay Types.
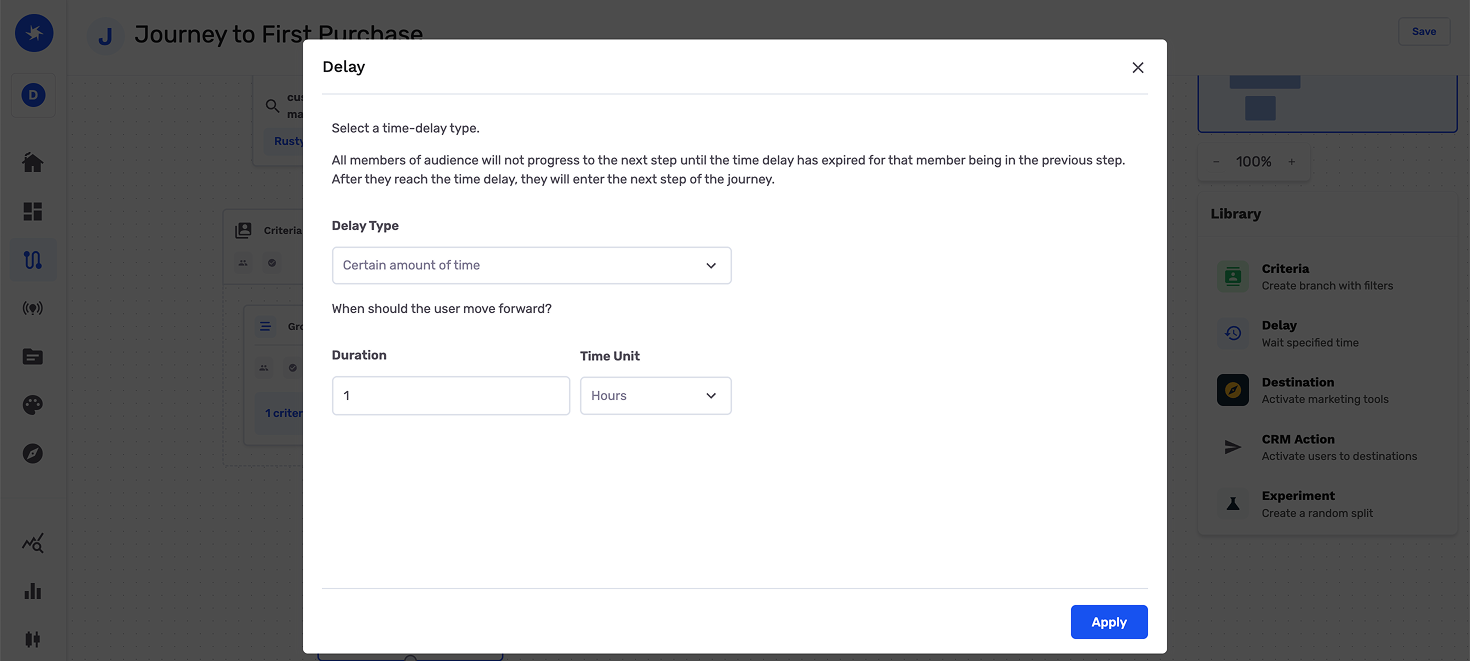
- Certain Amount of Time: Advance individuals to the next node only once a specific period of time has elapsed after they advance from the prior node (i.e. one day).
- Until a Specific Day of the Week: Advance individuals to the next node on a recurring basis (i.e. Wednesdays at 4 PM).
Destination Node
A destination node allows you to send members of your journey to a specific destination. Available destinations are a subset of those currently offered for GrowthLoop’s Audience Builder.
Click Select a Destination and choose your desired platform. Once you have chosen your platform, you will need to configure your export by providing several pieces of information.
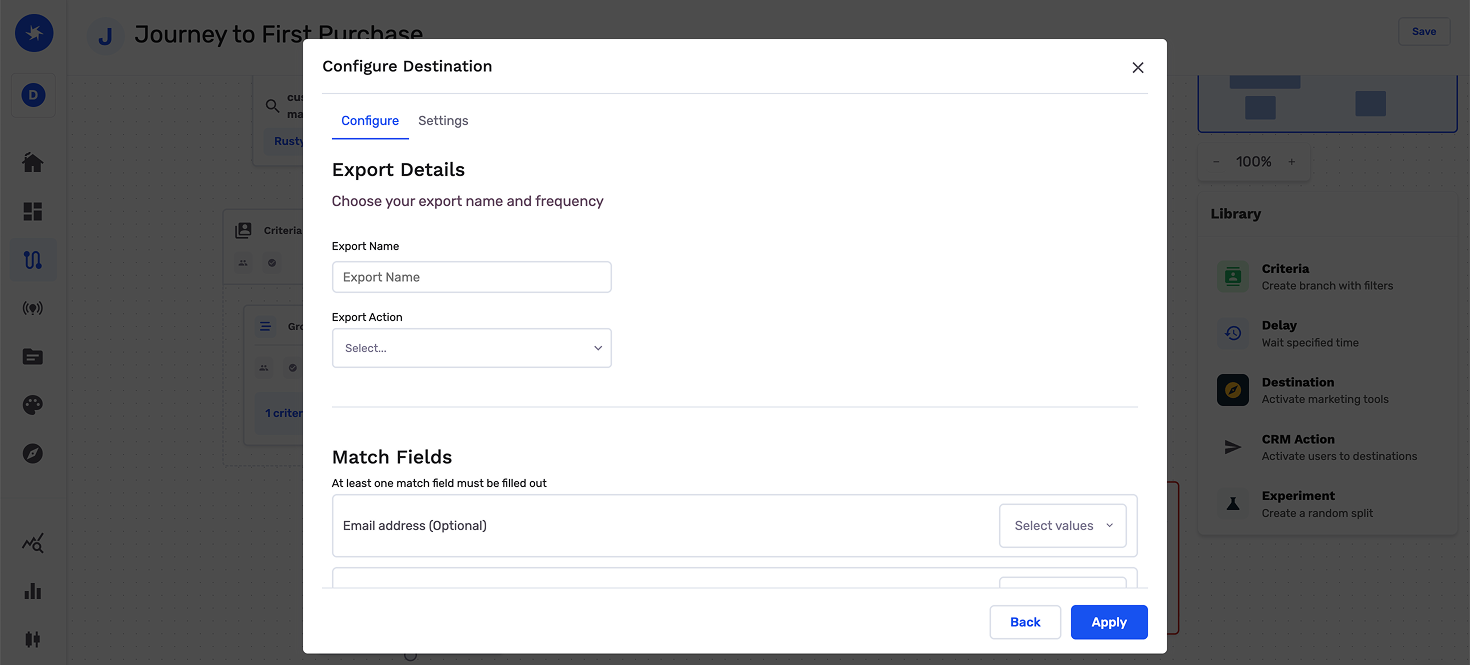
- Export Name: How to identify this subset of journey members in your destination platform and in GrowthLoop export logs.
- Match Fields: How to match customer records from this audience to individuals in the destination platform. Only required for certain destinations.
- Personalization Signals: Which signals to send with your audience members to the destination platform. Only available for certain destinations.
Once you have completed all required/desired fields, click Save.
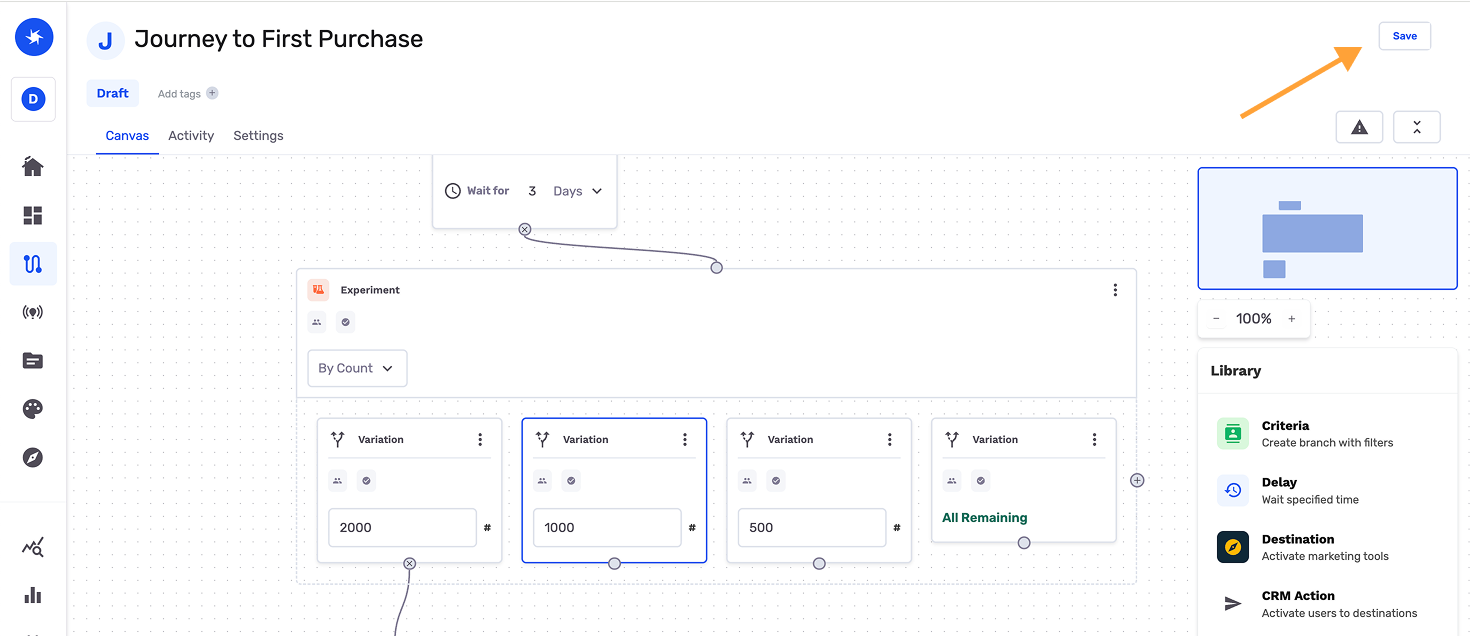
Experiment Node
The experiment node allows you to split your journey members into an unlimited number of randomized groups for experimentation. The group assignment of all individuals will be written back to your data warehouse to enable custom analytics by your team.
You can split your experiments by % or count.
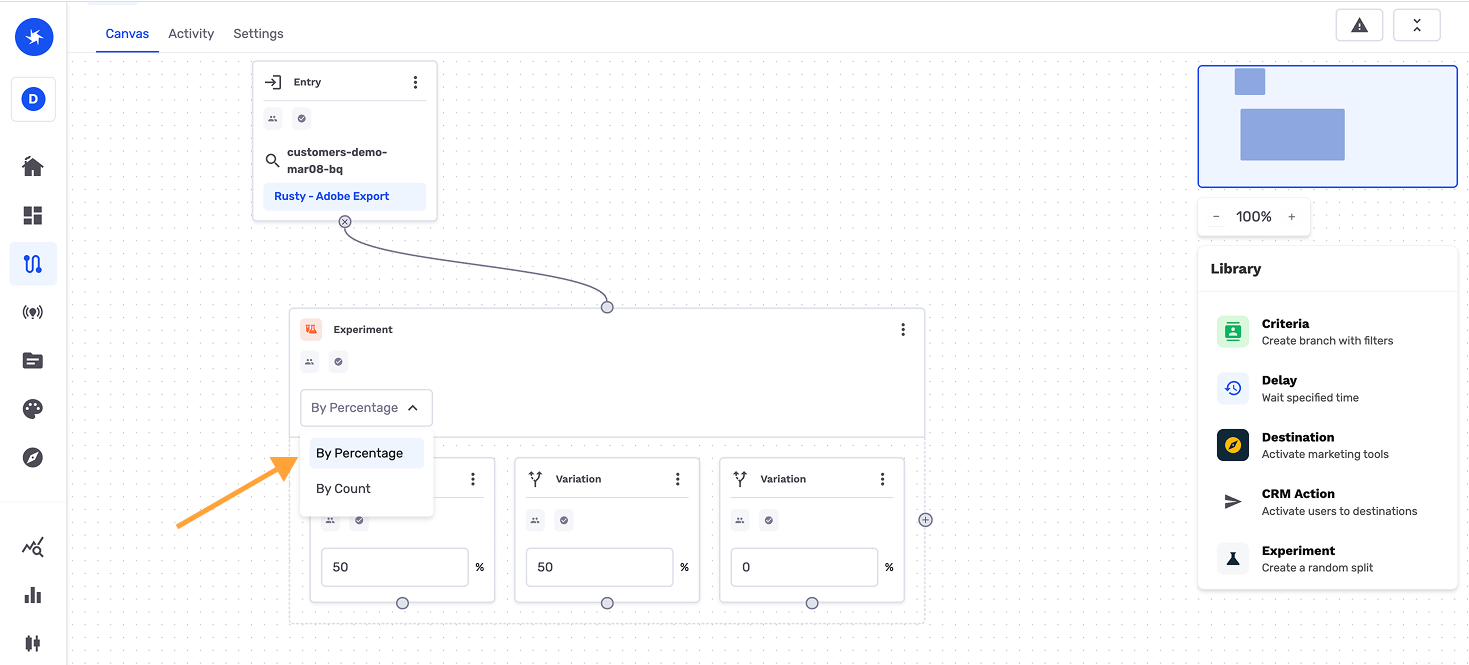
Experiments by % Add as many groups as needed to support your experiment by clicking the + icon. You can provide each group with a name by double-clicking on the Variation text for the group.
For each group, identify what % of the audience should be randomly assigned to each group. Note that the total of these percentages must add up to 100%, or you will receive an error.
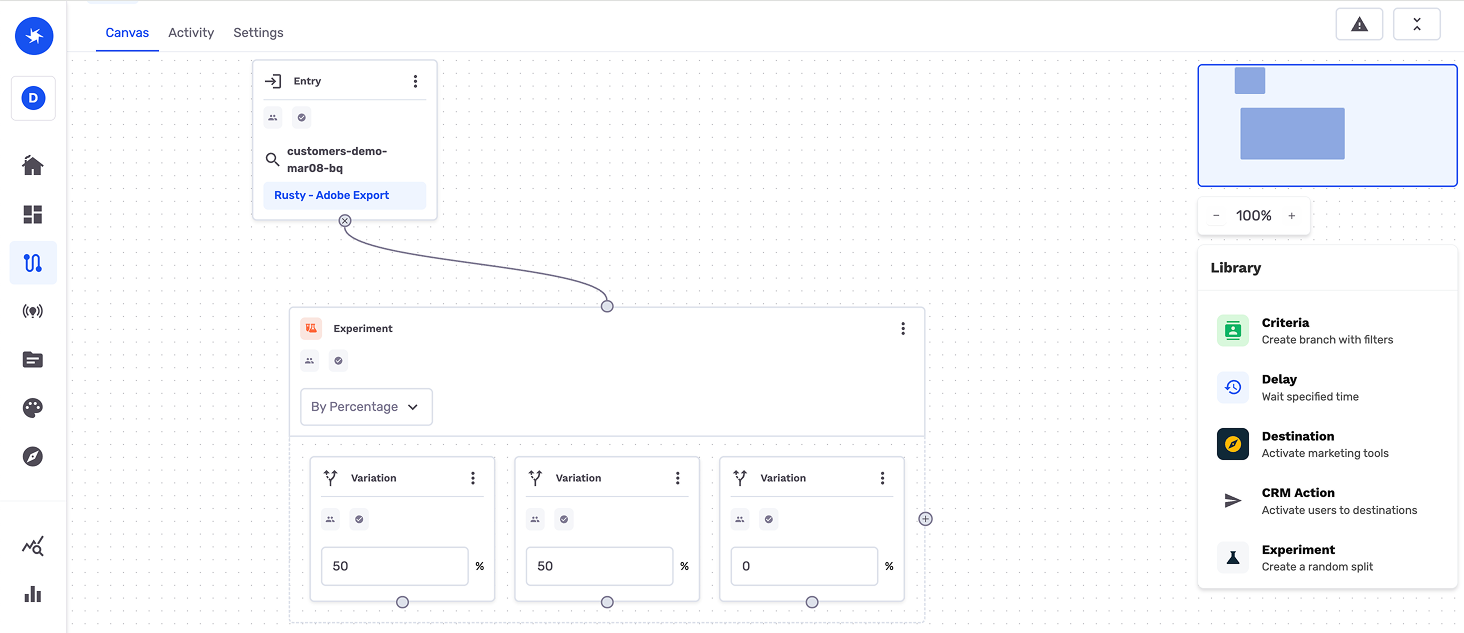
To send each group down a particular pathway, click the circle at the bottom edge of the group’s box and drag it down to the next step in their journey. Note that all groups can ultimately be brought back together by merging them into a single journey step once the experiment you are interested in (i.e. testing the effectiveness of different destination platforms) has been completed.
Experiments by count In this case users flowing into the experiment node will be grouped from left to right.
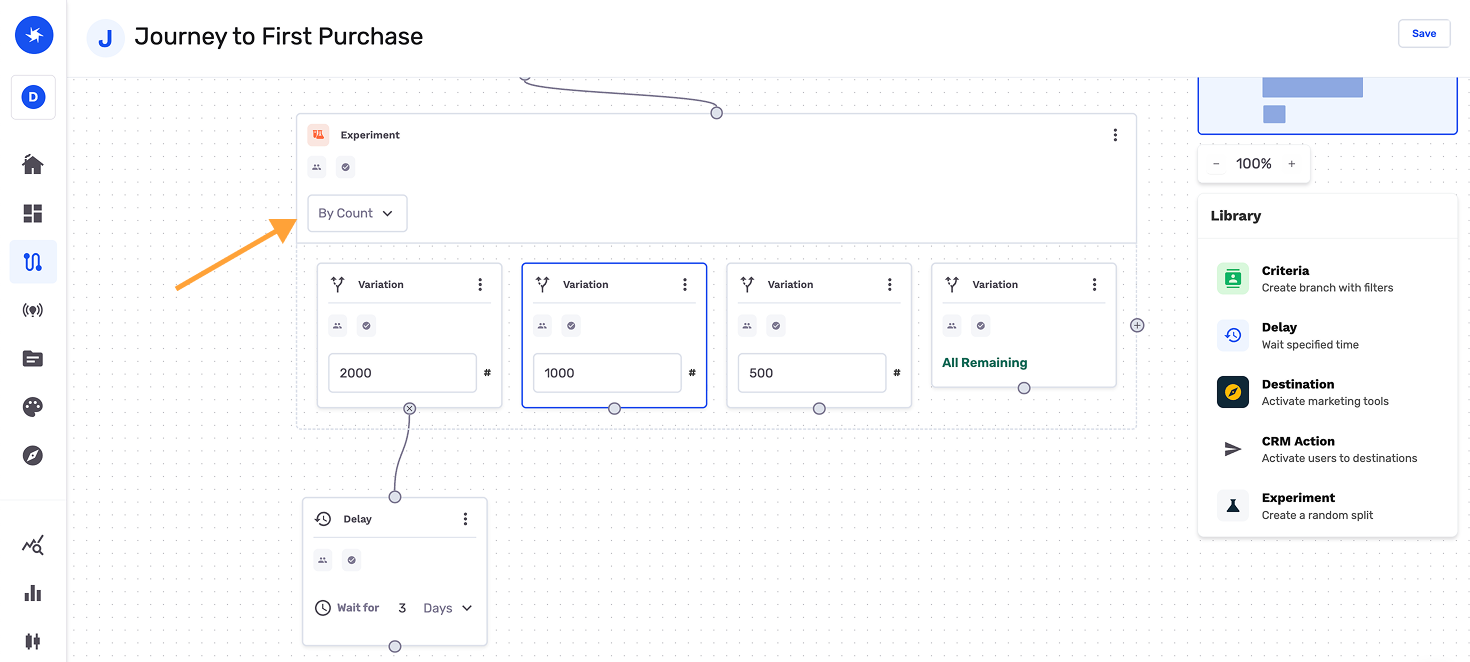
If 10,000 users were to flow into the experiment node above, the first 2,000 go through Var 1, the next 1,000 to Var 2, the next 500 to Var 3 and all the remaining 6,500 through the last variation.
This allows you to control the absolute number of people that flow through each experiment vs. a randomized splitting.
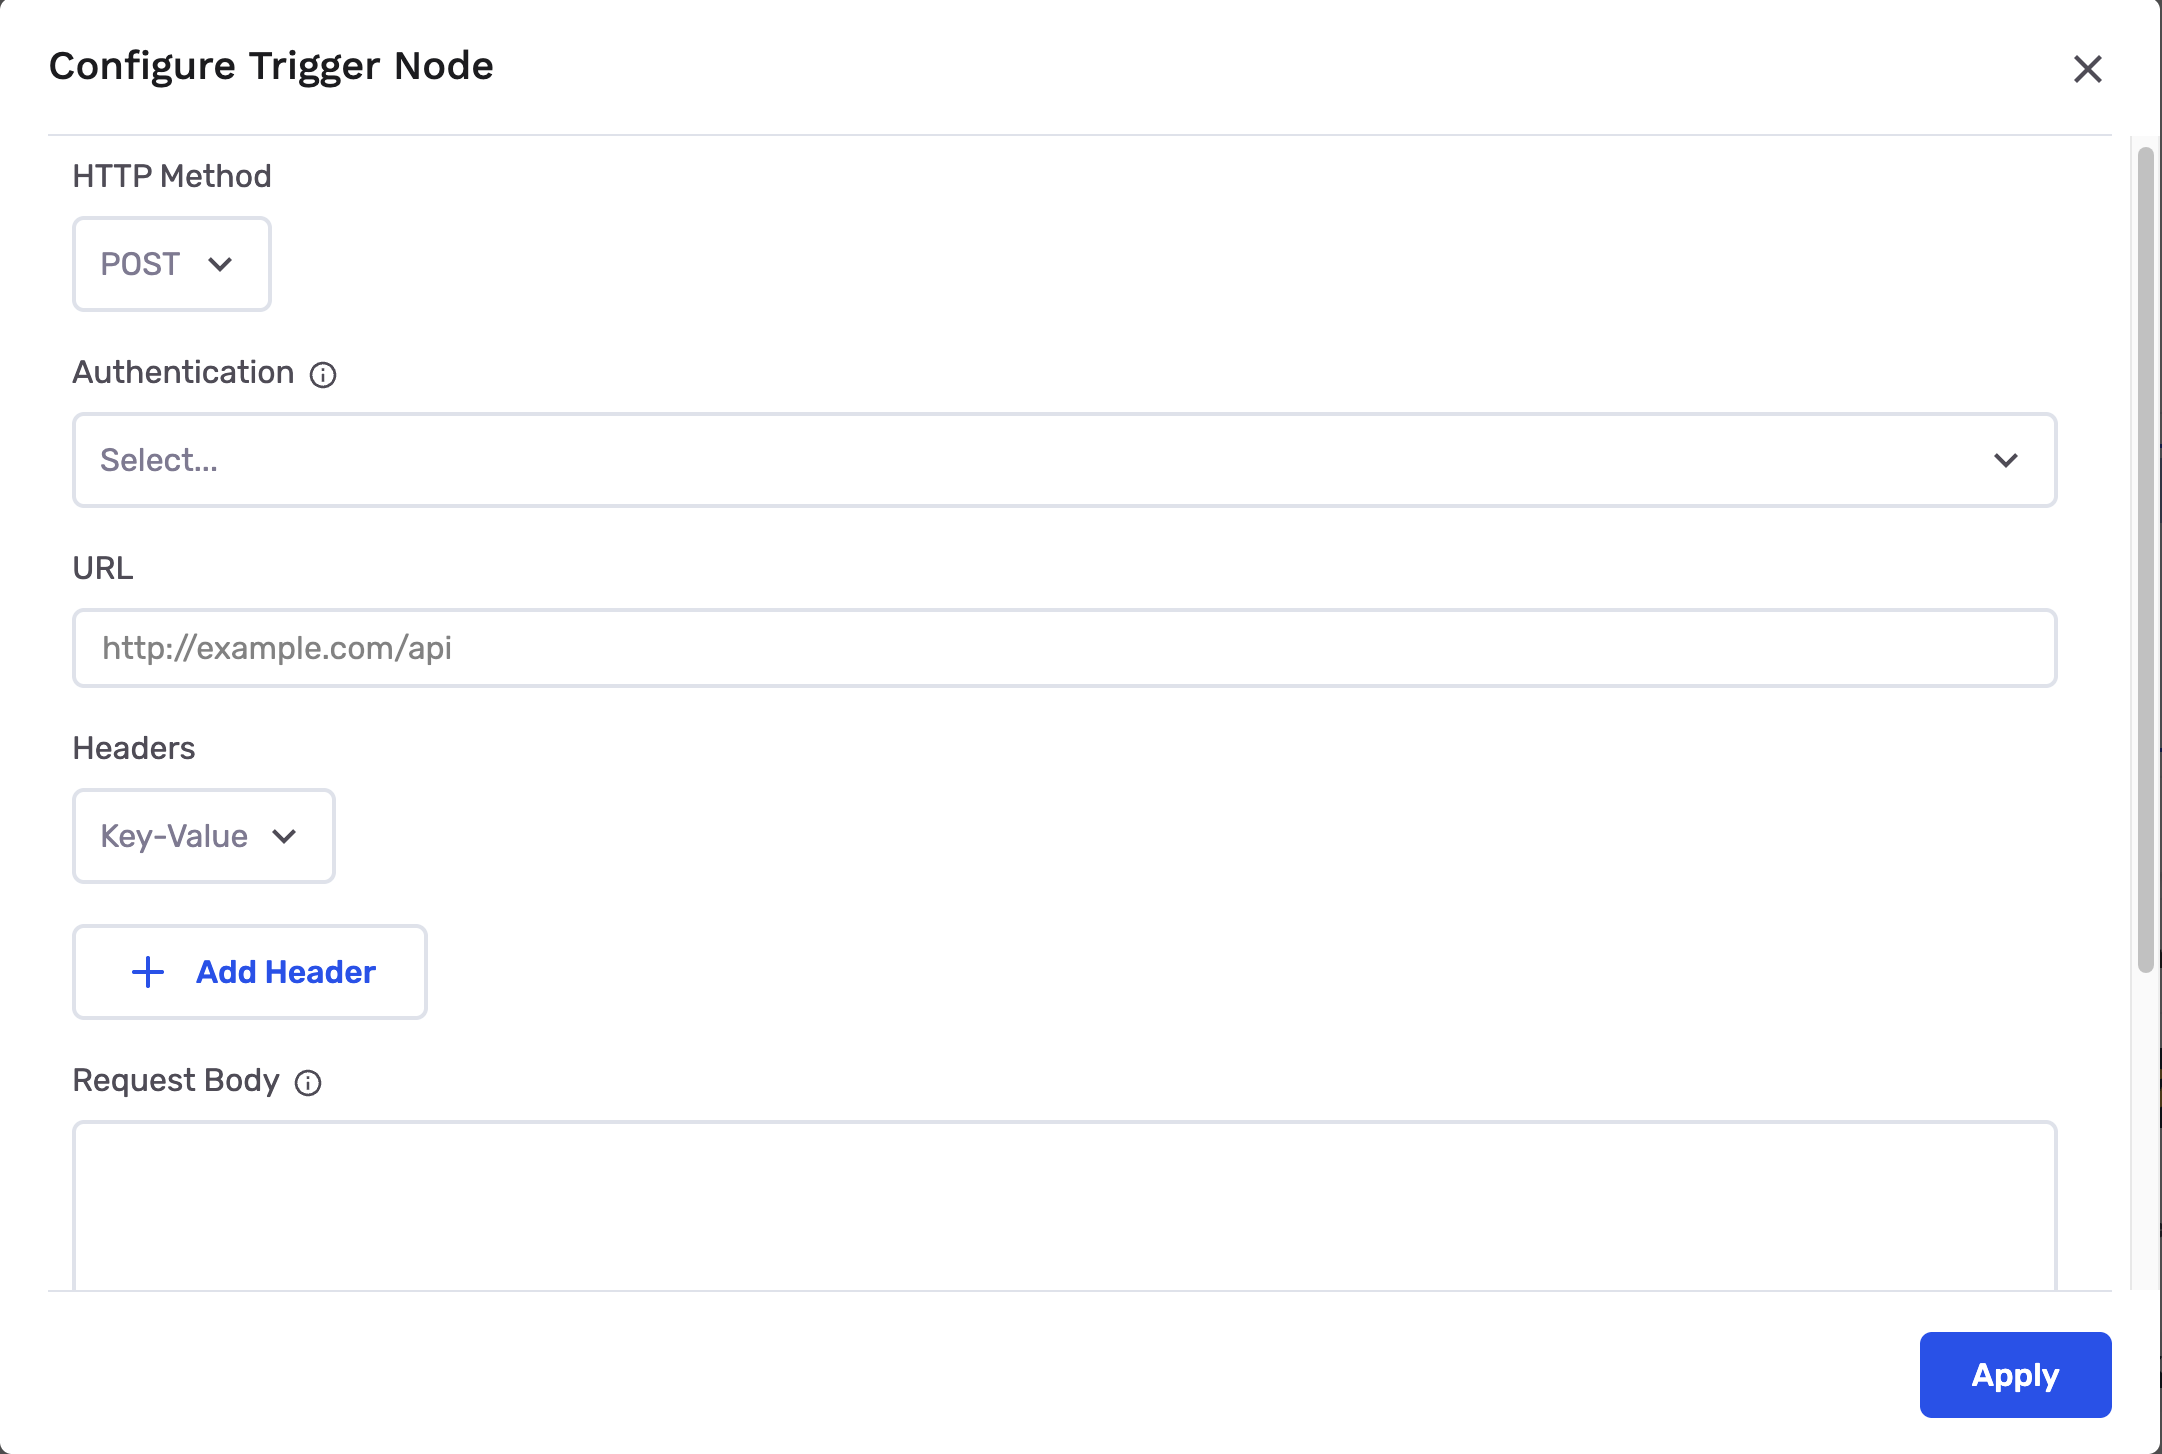
Trigger Node
A trigger node fires an HTTP request to an external endpoint when users enter it. This is useful for integrating with external systems, triggering webhooks, or calling custom APIs as part of your journey flow.
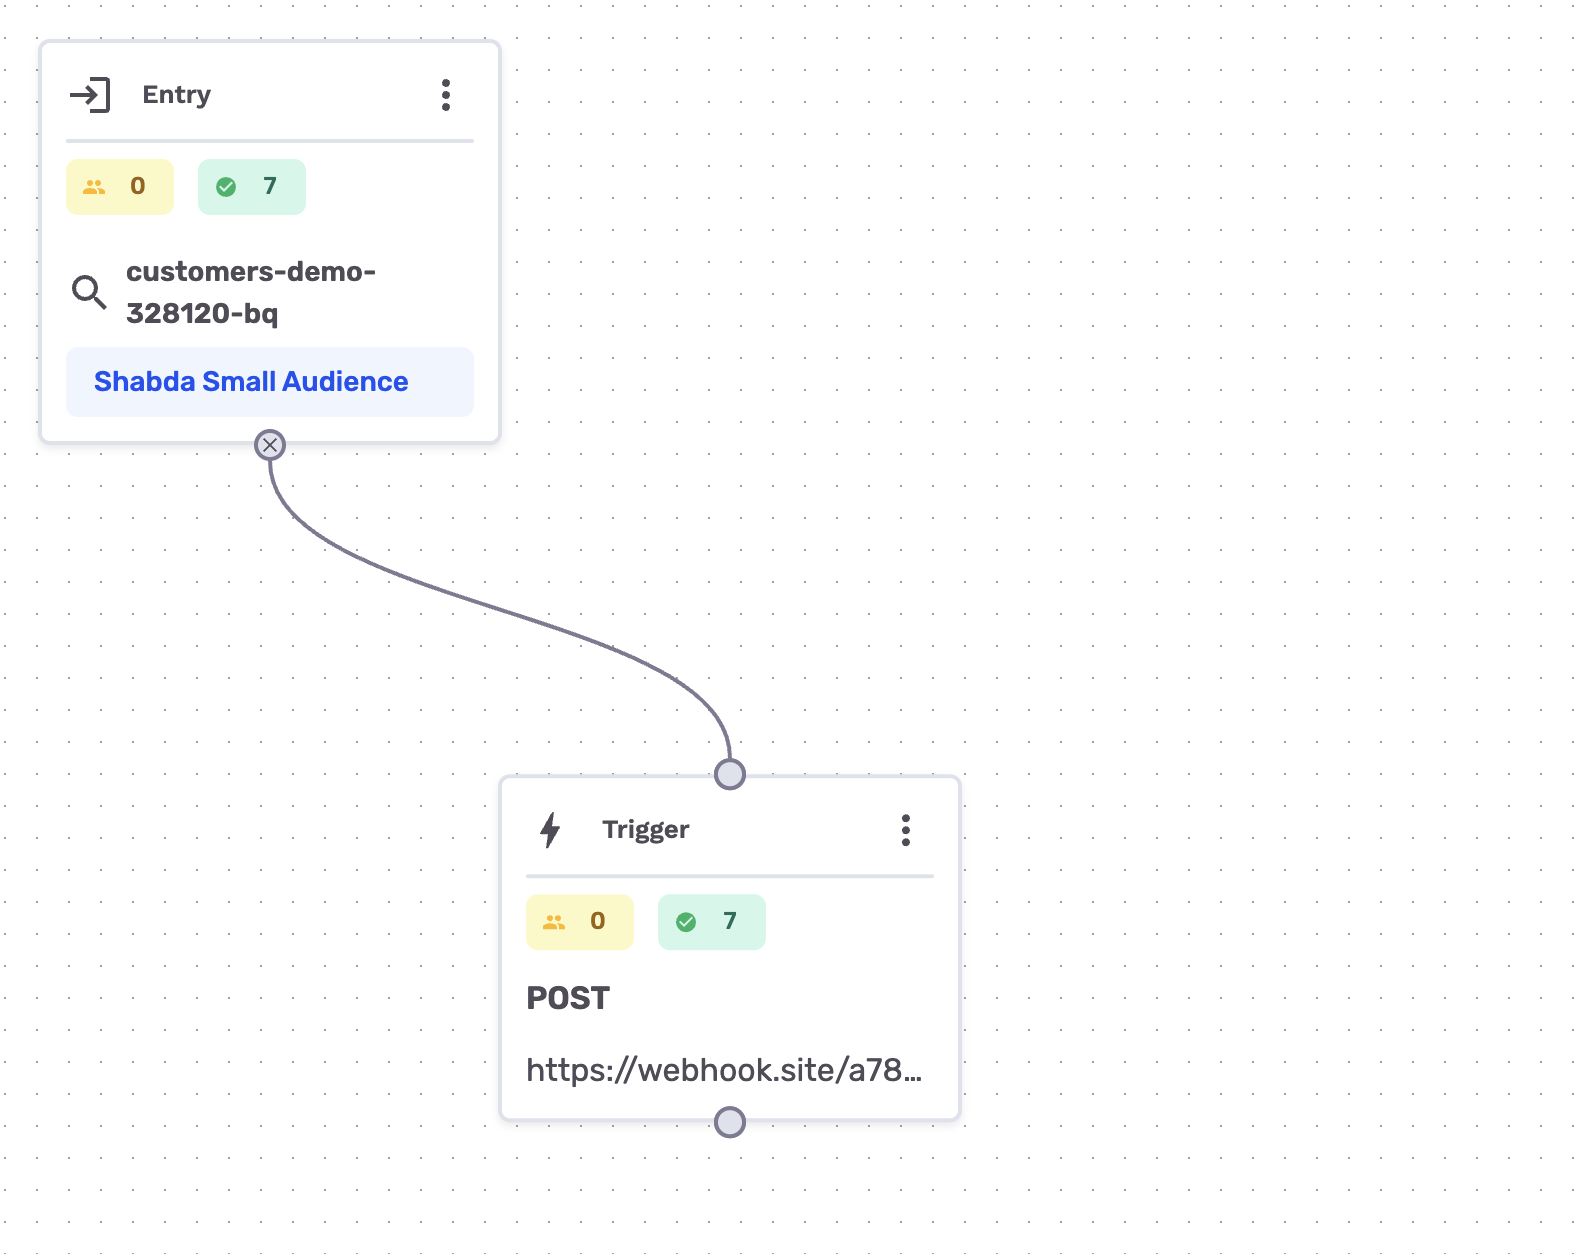
Double-click on the trigger node to open the configuration modal. You will need to provide the following information:
- HTTP Method: Select the HTTP method for the request (GET, POST, PUT, or DELETE).
- Authentication (optional): Select an authentication provider from the dropdown to automatically include OAuth tokens in your request. Authentication providers can be created in the Destinations section under the Authentication category.
- URL: The endpoint URL to send the request to.
- Headers: Add custom headers to your request. You can use either Key-Value format or JSON format.
- Request Body: The body of the HTTP request. You can use Handlebars templating to include user data (see below).
Using Handlebars Templating
The request body supports Handlebars templating, allowing you to include data from your primary dataset in the HTTP request. Use the users variable to access all users currently in this step of the journey, along with their fields from the primary dataset.
Example request body:
{
  "users": [
    \{{#each users}}
    {
      "email": "\{{email}}",
      "first_name": "\{{first_name}}"
    }\{{#unless @last}},\{{/unless}}
    \{{/each}}
  ]
}
You can also reference custom attributes defined in earlier nodes by using the glca_ prefix (e.g., {{glca_loyalty_tier}}).
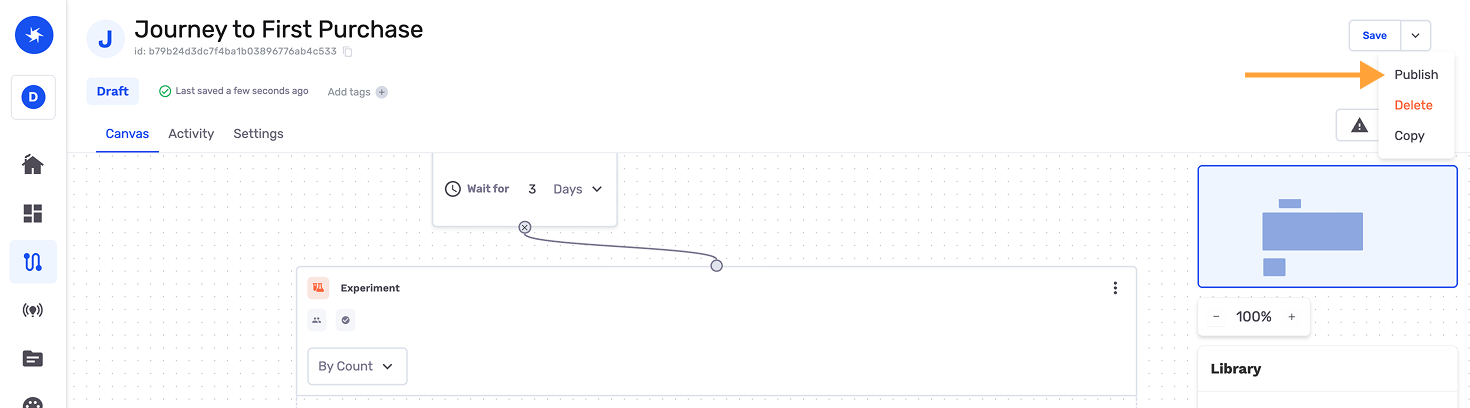
Saving Your Journey
In order to preserve your latest changes, you must click Save.
Starting Your Journey
Once your journey has been saved, it's ready to be started. Click Start to run the journey according to the schedule set by your journey settings. The journey moves from Draft to Running status.
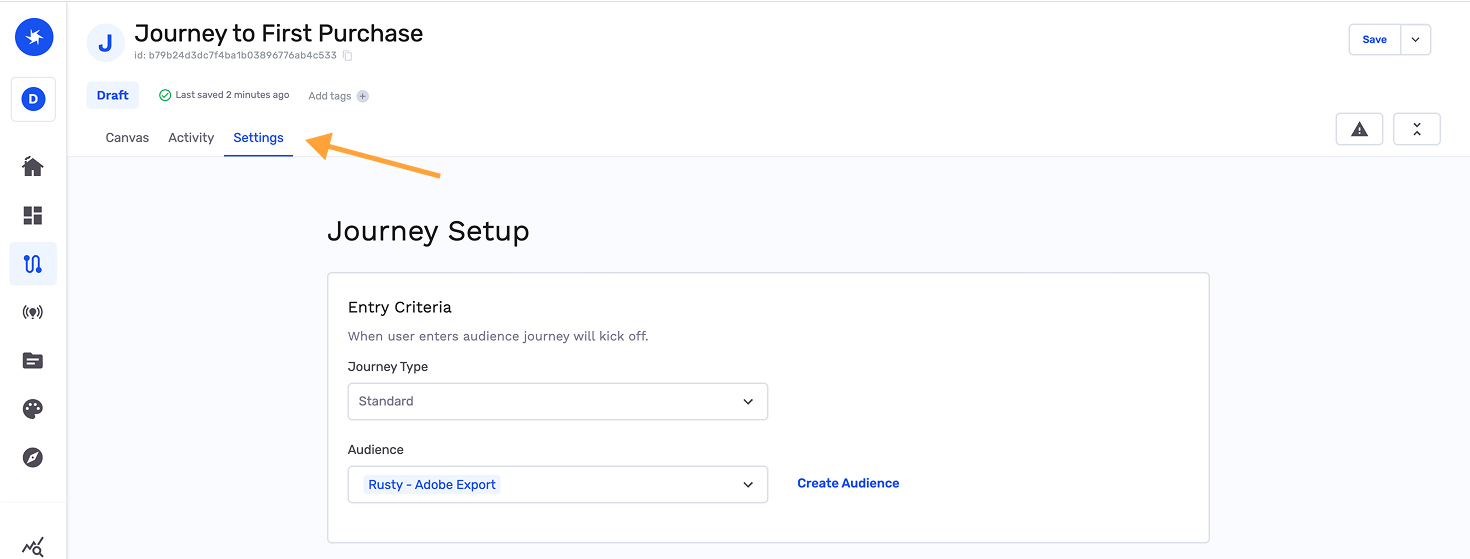
If you want to modify your journey schedule and additional settings, you can click the Settings tab at the top of the Journeys canvas.
Congrats! You’ve created your first journey!
Once your journey is running, you can pause it to make edits, manually run individual nodes to validate behavior, adjust the schedule, or update re-entry settings. See Interacting with a journey for everything you can do once a journey is live.
For more information or to provide feedback to the team, please reach out to [email protected]. We can’t wait to hear from you!
Updated 3 months ago