
Set Up Datasets
Learn how to configure your data in GrowthLoop
In this article, you'll configure your first Dataset in GrowthLoop. Adding a dataset takes seconds to begin using for activation. We'll walk through each step together.
Create Dataset
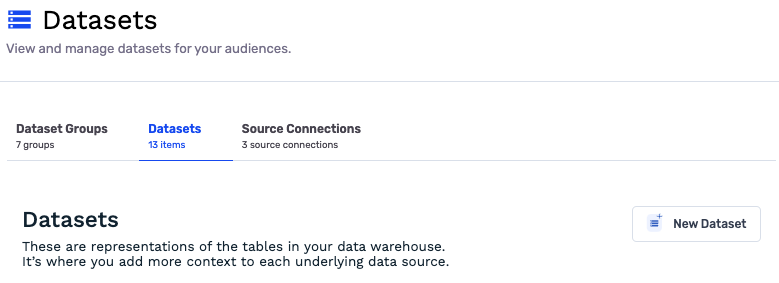
- Navigate to
Datasetsin the left menu rail - Select the
Datasetstab. Here you can see allDatasetsyour team has connected to GrowthLoop - Select
New Dataset - Select your
Dataset Type - Select the data source type
Table or VieworModel - Select the
Datasetwhere your table exists in your source connection - Select the
Tableyou want to reference - Provide Table Alias: Table aliases will appear in the Audience and Journey builders to make it easier for others to recognize and use your
Dataset. We recommend putting in a name others in your organization will recognize. - Add Table Description: Insert a table description so others on your team will know what type of data they can find and use in this
Datasetwhen creating Audiences and Journeys. - Select
Unique Key. We will check your table to ensure your key is unique.
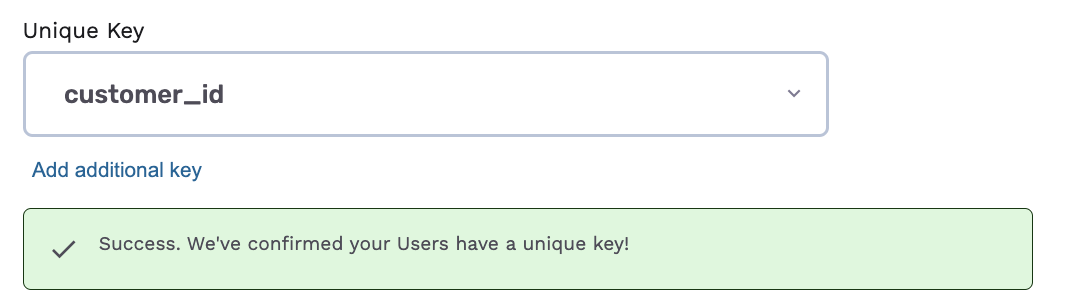
Don't have a Unique Key?If your table does not have a unique key, you can use a Composite Key. You can select multiple fields on your table. Our platform will append those fields and check if the composite key is unique to every record on your table. This is a great way to leverage our platform even when you do not have a single unique column on a table.
Configure Dataset
-
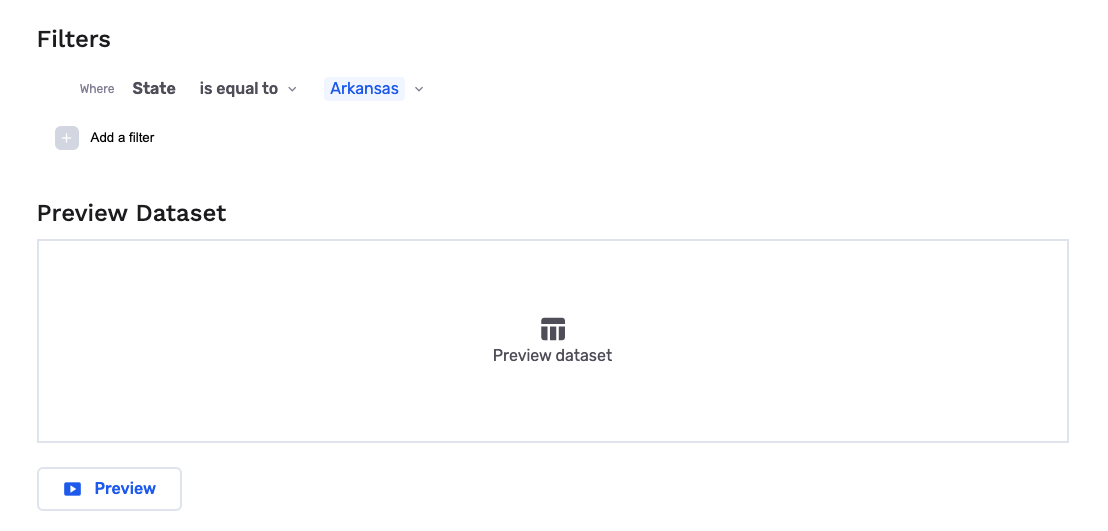
Dataset filters
-
If you only want to expose a sub-set of the data in your dataset, you can further filter down your dataset.
-
Above we have filtered down the dataset to those who have their state = Arkansas and by hitting the preview button you can see a sample records of those filtered data.
-
-
Configure fields: Configure the fields in your dataset.
- Type: This shows the data type of the column that we detected for your
Dataset. This is detected directly from your source schema. - Show by Default: Select fields you will want to show up in the Audience Builder and Journey Canvas when a user selects targeting. All fields will be available from your
Dataset, but the fields designate asShow by defaultwill appear on the page, always making them more accessible to users.
- Type: This shows the data type of the column that we detected for your
- Tag PII Fields: Protect certain columns from being viewed in platform.
- GrowthLoop blocks PII Fields from appearing as filters in your Audience Builder.
- Tagging columns as PII Fields also prevents users from downloading any CSVs with this data.
- *Note:*PII Fields can still be used as personalization signals that are sent to marketing destinations to personalize messages. To restrict this ability, you should Exclude from Personalization.
- Exclude from Personalization: You can exclude fields from being used as personalization in exports. Users will not be able to add these as fields for audience exports. This is valuable if there is certain data, like revenue, you do not want going to any marketing destinations or CSV.
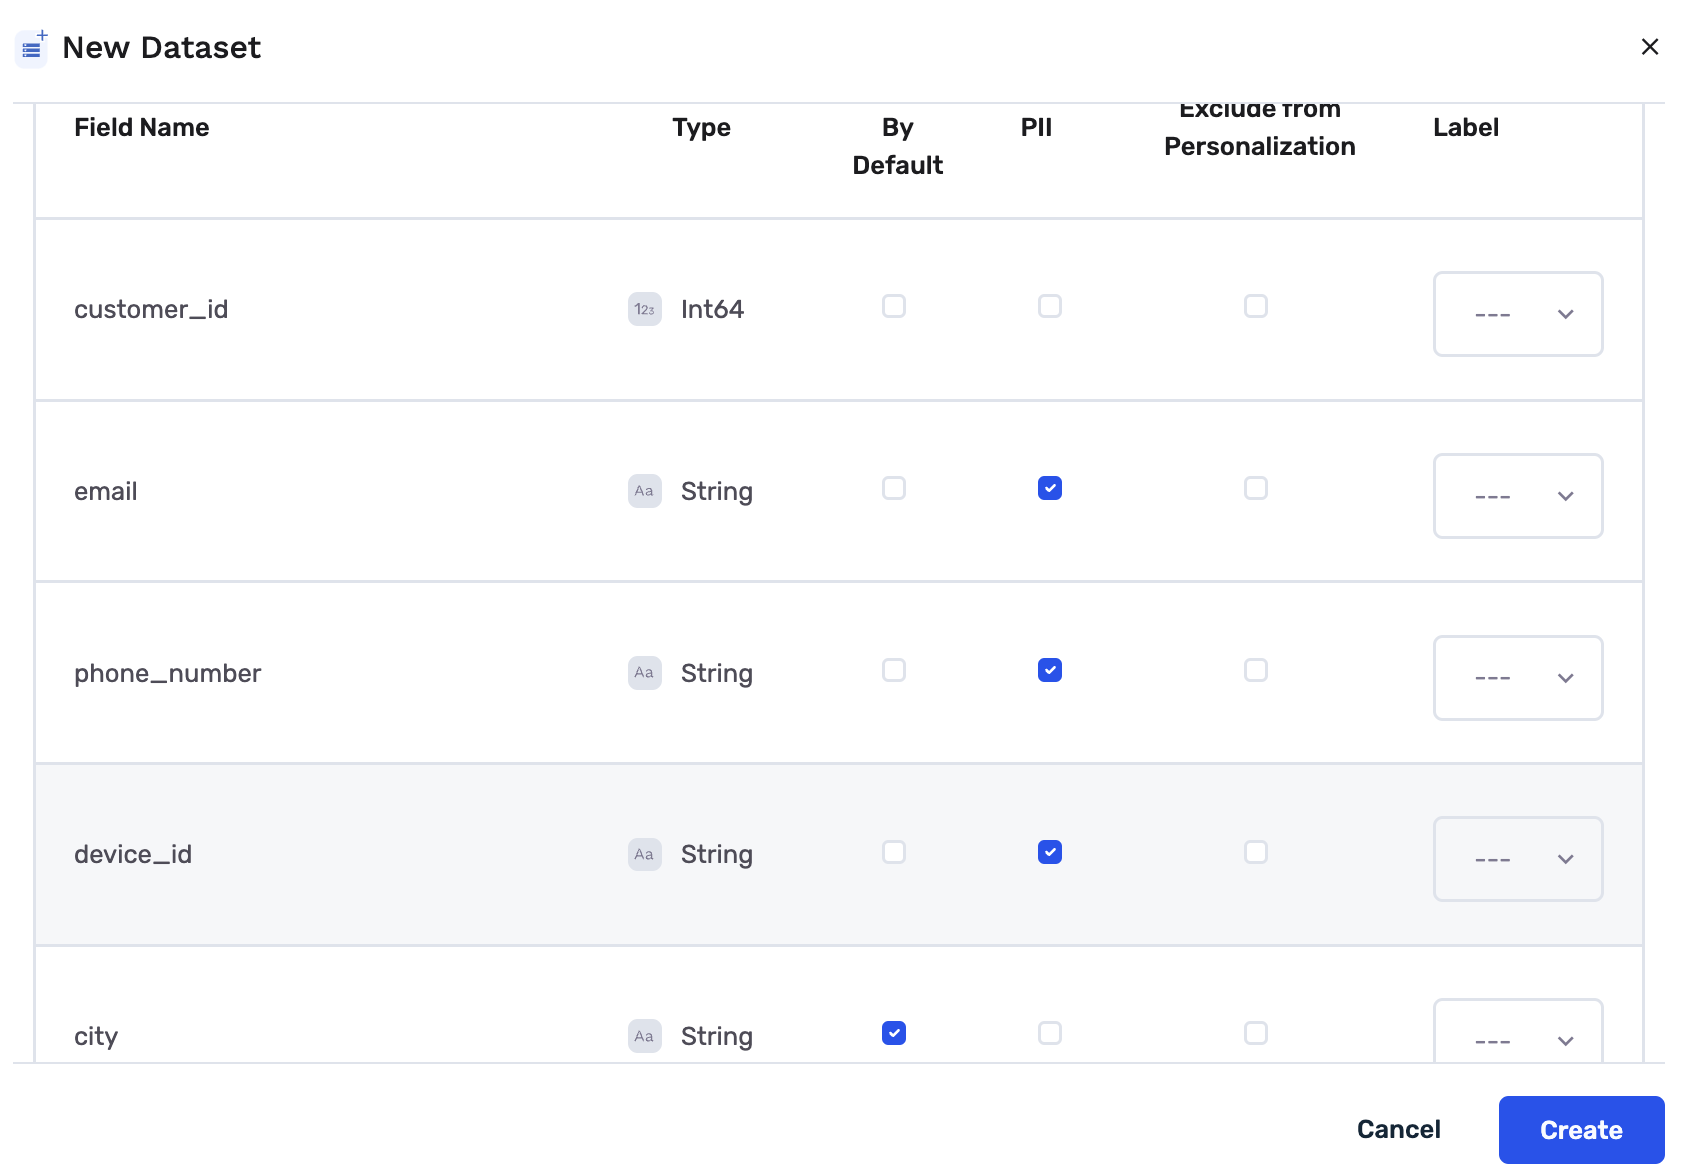
- Label: Label the fields in your
Datasetsso they are easier to use in the application for your team. This helps your team know what type of data is in each column and unlocksRecipesfor your team to use in the platform. More details on Recipes can be found here.

Your dataset is now configured in GrowthLoop
Your dataset can now be used to create:
- Overview Must add your dataset to a specific
Dataset Group - Audiences: Must add your dataset to a specific
Dataset Group - Journeys: Must add your dataset to a specific
Dataset Group
If you are experiencing any issues with GrowthLoop? Reach out to us at [email protected] and we’ll be in touch shortly!
Updated about 1 year ago
What’s Next
Next up: Add your Dataset to a Dataset Group to begin using it in audiences.