
Google BigQuery
Use GrowthLoop audiences for table exports to Google BigQuery.
Connect this destination to export audience membership as rows in a table you choose, for use in Google BigQuery.
This destination writes to your Google BigQuery project and is a good fit when you want to:
- Write audience rows in BigQuery rather than a paid-media or messaging API
- Match contacts on a unique identifier
This maps to GrowthLoop Audiences and Journeys:
| Use it for | Audiences | Journeys |
|---|---|---|
| Writing audience membership to a Google BigQuery table | ✓ | ✓ |
To connect BigQuery as your GrowthLoop warehouse source, see Sources. To land CSV files in a bucket, use Google Cloud Storage.
Prerequisites
Make sure you have:
- Access to a BigQuery data warehouse.
- A Google Cloud service account with the Editor role on the project, and its key saved as a JSON file.
To create the service account, you need serviceAccountAdmin and BigQuery Admin permissions. If you are not sure you have them, check with your Google Cloud administrator.
If you already have the JSON key, skip to Set up Google BigQuery as a destination.
Create a service account
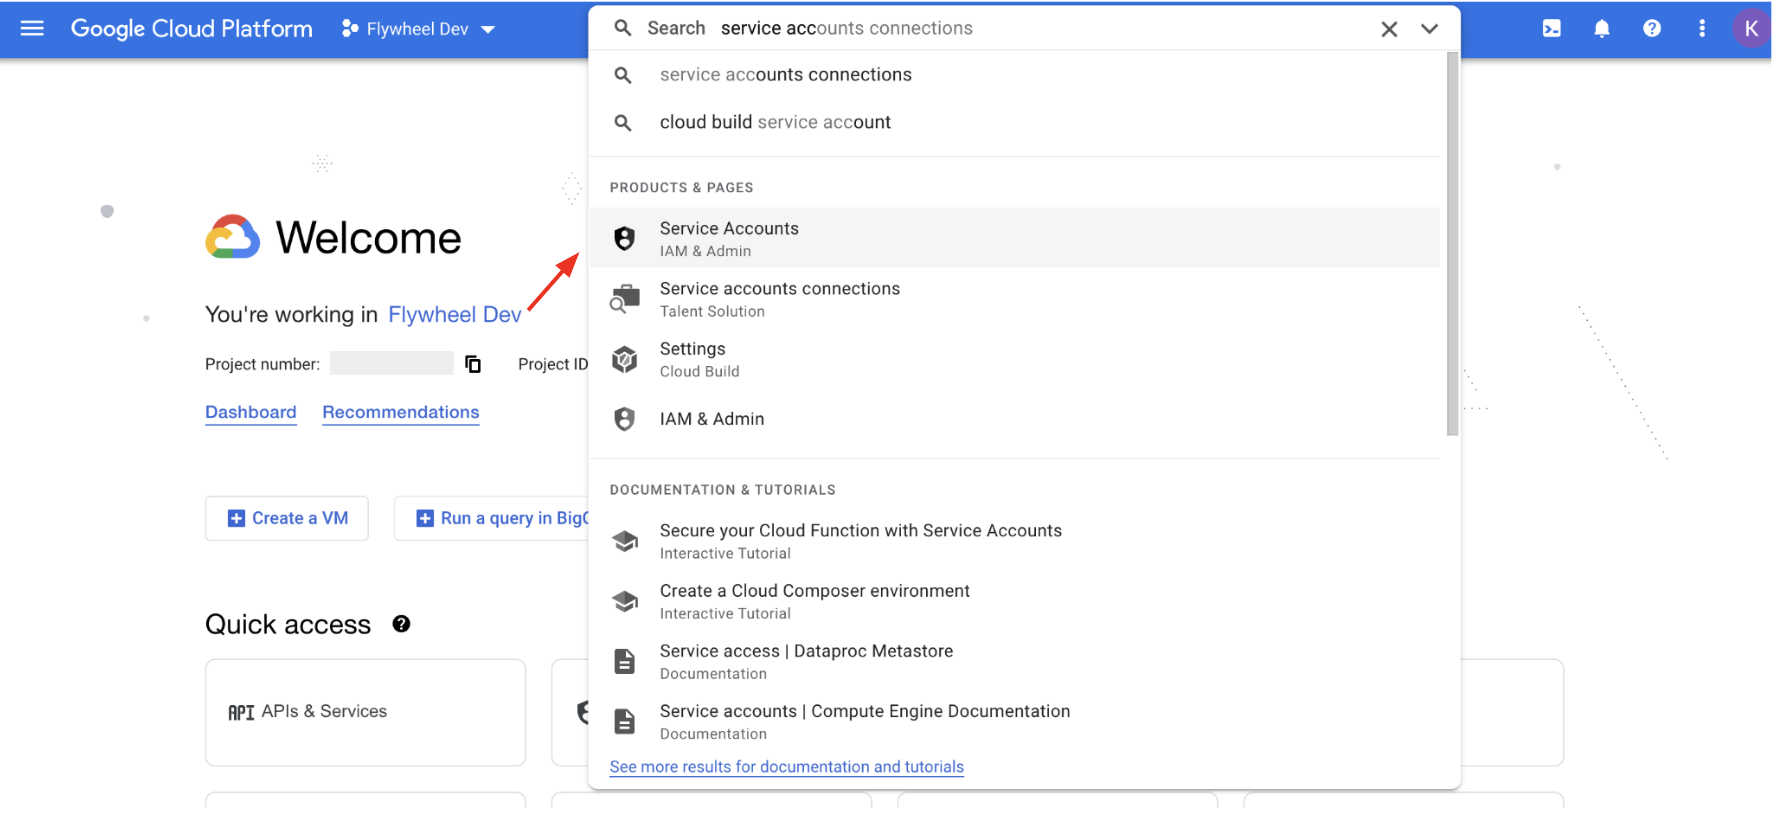
- In Google Cloud, search for Service Accounts.
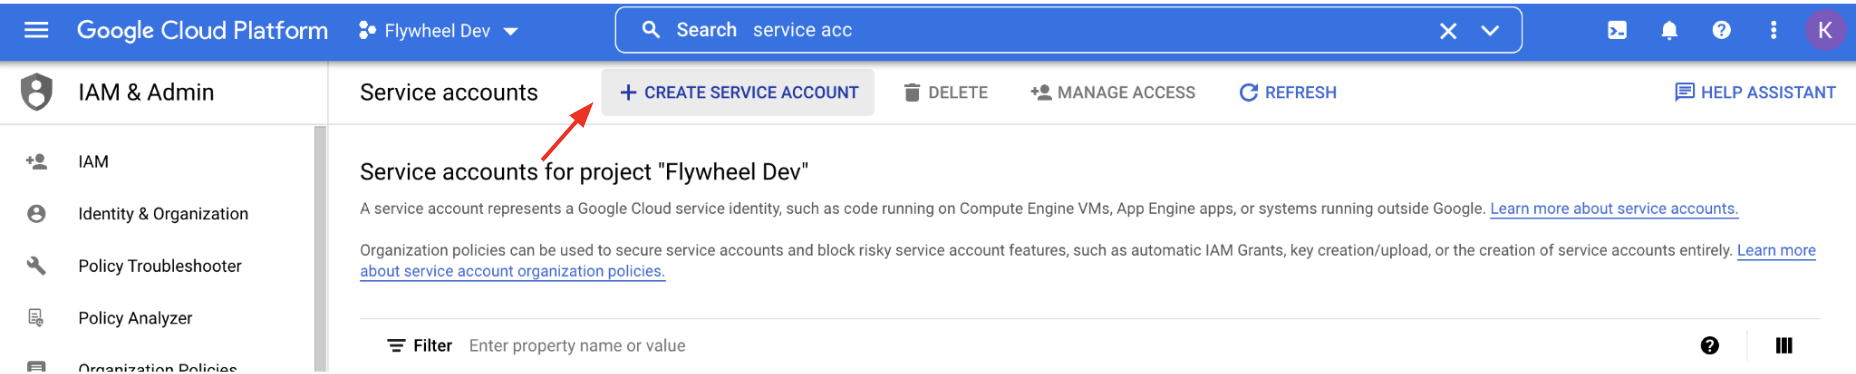
- Click Create Service Account.
- Enter the service account details, then click Create and Continue.
| Field | Description |
|---|---|
| Service Account Name | A descriptive name. Separate words with dashes |
| Service Account ID | Google Cloud fills this in. An email address for the service account appears below it |
| Service Account Description | A short description of why you created the account |

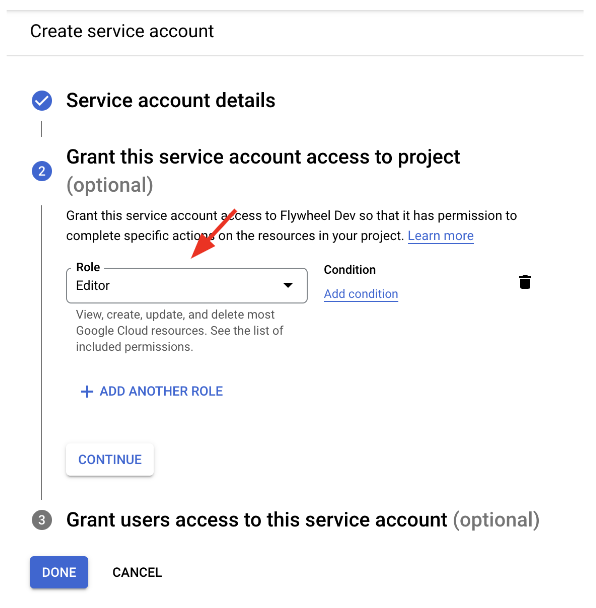
- Grant the service account the Editor role on the project, then click Done.
Create a JSON key
JSON keys let GrowthLoop use the service account. Save the file in a secure place. The key is not recoverable. If you lose it, create another. You can have up to 10 keys per service account.
You need administrative privilege over keys for the project. If you get a permissions error, ask your Google Cloud administrator to grant key creation access or create the key and send you the JSON.
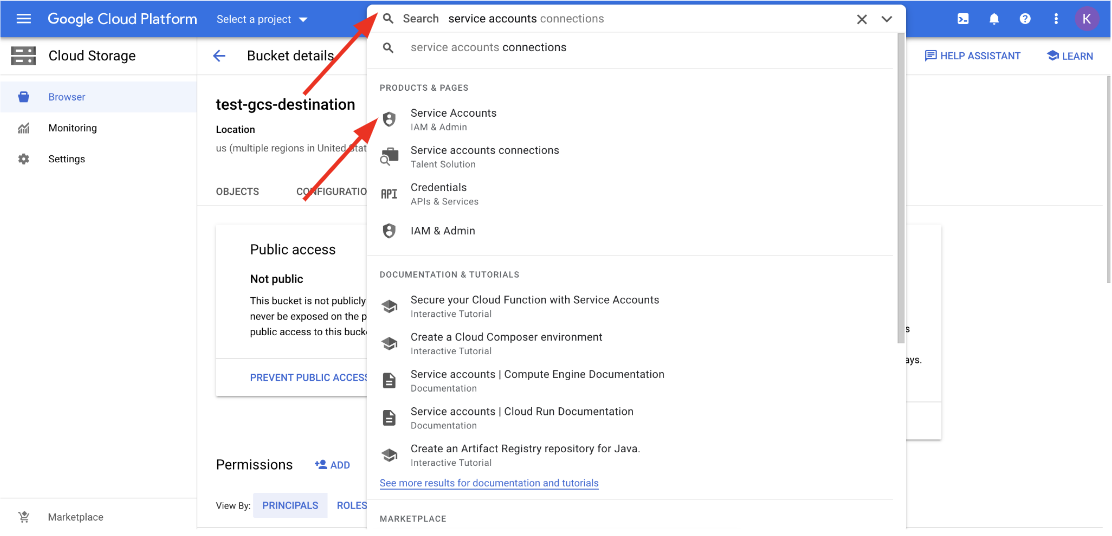
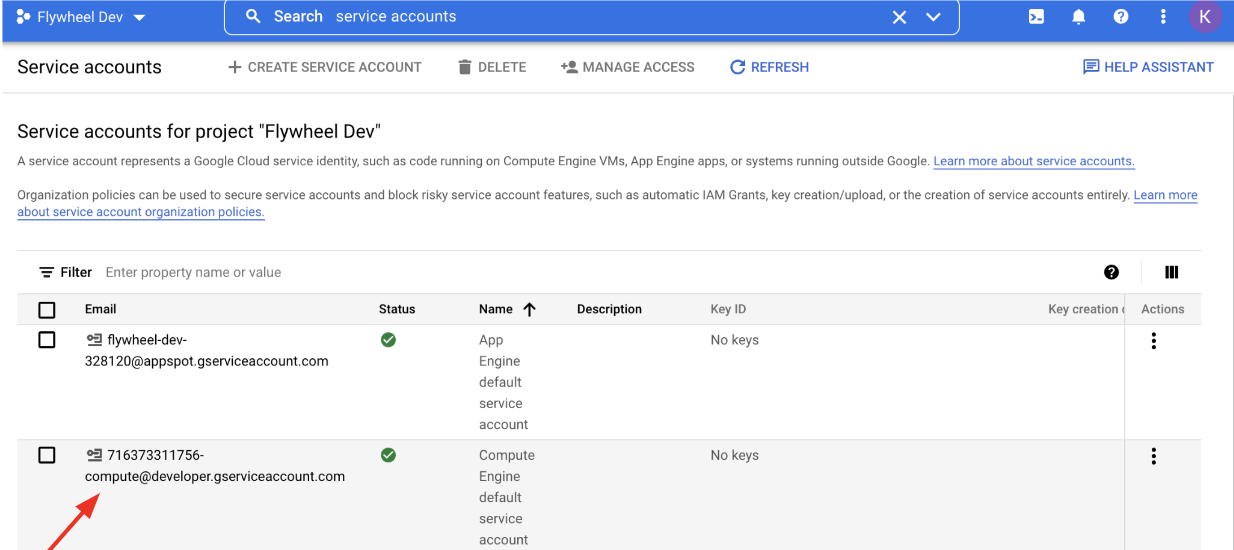
- In Google Cloud, search for Service Accounts and open that page.
- Open the service account you created.
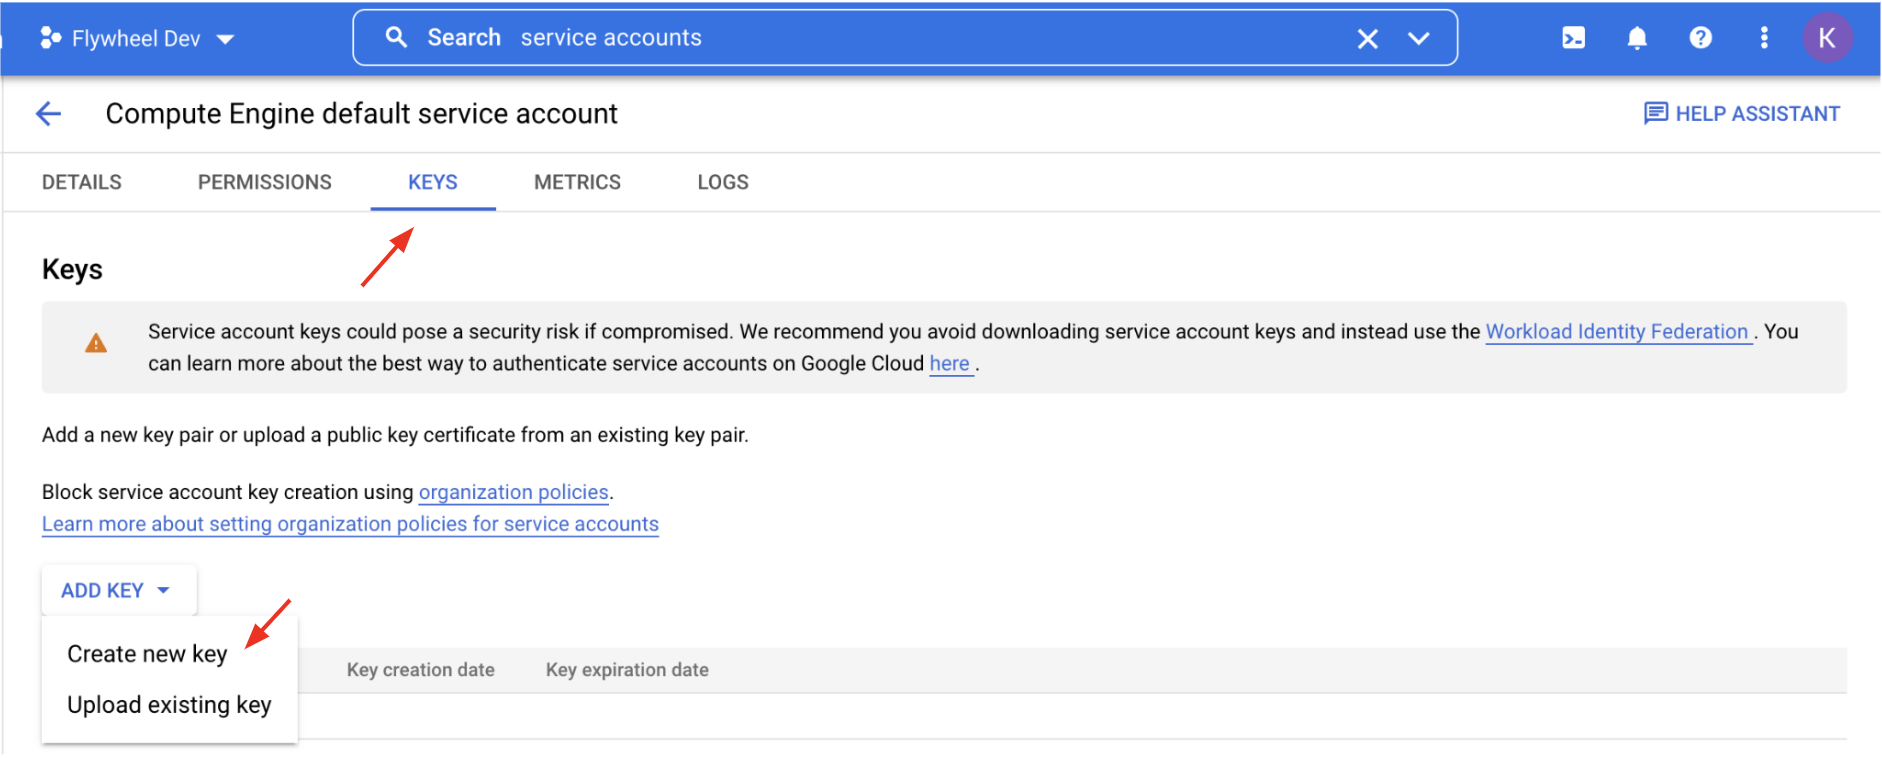
- Open Keys. Click Add Key → Create New Key.
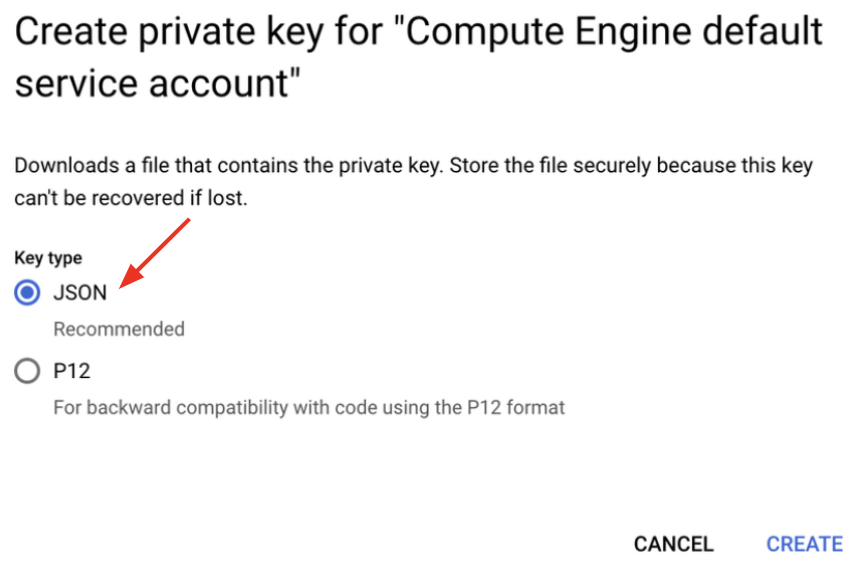
- Select JSON and click Create. The key file downloads to your computer.
Set up Google BigQuery as a destination
- In GrowthLoop, click the Destinations tab on the left sidebar.
- Click New Destination in the upper right corner.
- Search for BigQuery under Data Warehouse and click Add BigQuery.
- Enter the required information, then click Create.
| Field | Description |
|---|---|
| Destination Name | Name this destination in GrowthLoop. Use a name so your team recognizes its purpose, like "Google BigQuery Audiences". |
| Sync Frequency | Set the default export frequency (for example, hourly or daily). You can override this setting for individual exports. |
| Dataset | The BigQuery dataset where GrowthLoop should create the table |
| Credentials | The entire contents of your service account JSON key file |
| Columns to Export | Optional. Comma-separated warehouse column names. If you leave this blank, GrowthLoop exports all columns |
| Prefix for Personalization Fields | Optional. Prefix applied to personalization field names. Defaults to fw. Leave blank for no prefix. If you set one, it must start with a letter and use up to 5 letters or numbers |
GrowthLoop validates the connection. Google BigQuery then appears in your list of connected destinations.
Export to Google BigQuery
From within GrowthLoop, export from an audience or from a journey Destination Node. See Export an audience or Build a journey if you need more information on these steps.
After building or selecting an audience, click Export, then search for your BigQuery destination. In a journey, add a Destination Node under Datawarehouse and select BigQuery.
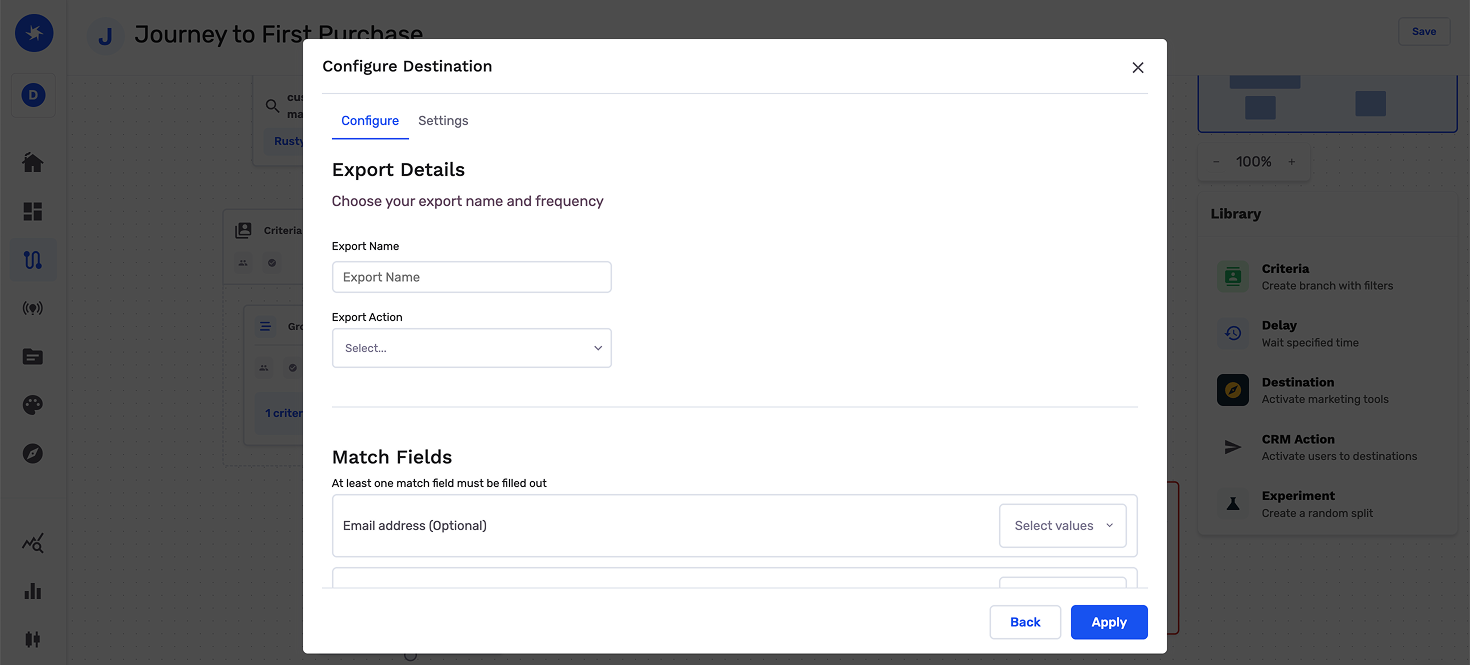
Map identifiers
Map Unique Identifier. This destination requires a unique identifier for each row.
You can also map custom attributes from the audience or from the journey as additional fields.
Configure the export
This is where you set the campaign type and schedule for audience exports. On a journey Destination Node, you set timing on the journey canvas.
| Setting | Audience export | Journey Destination Node |
|---|---|---|
| Export Name | Defaults to the audience name. | Required. Enter a name so you can find the export in GrowthLoop. |
| Table Name | Required. Letters, numbers, and underscores only. | Required. Letters, numbers, and underscores only. |
| Campaign type | Choose a one-time or ongoing export. | The journey schedule controls when the journey runs and contacts are sent to Google BigQuery. |
| Export Inclusion Criteria | All audience members for a full refresh, or Newly added audience members for additions and removals since the last export. | The journey sends contacts who reach the Destination Node. |
| Schedule | Set frequency, start date, end date, and days of the week for ongoing exports. | Users reach this node when the journey runs. Add a Delay Node or set Criteria Evaluation to control timing. |
| Personalization Fields | Extra columns for this export. By default, GrowthLoop sends the destination Columns to Export. | Extra columns for this export. |
Export behavior
This is what GrowthLoop writes when you export an audience.
| Behavior | What happens |
|---|---|
| What GrowthLoop writes | Rows in the BigQuery table you named. Direction is GrowthLoop → Google BigQuery. |
| When it runs | GrowthLoop sends the export as a batch on the next successful run. An export that starts Now runs within about 15 minutes. Journeys send exports on demand when users reach the Destination Node. |
| Table | GrowthLoop creates the table in the Dataset you selected during setup, using the Table Name on the export. |
| Match field | Unique Identifier is required. |
| Columns to Export | If you set this on the destination, GrowthLoop limits the table to those columns unless you add personalization fields. |
| Personalization prefix | Personalization field names use the prefix you set on the destination, or fw if you left the default. |
| One-time exports | GrowthLoop sends current membership once. |
| Ongoing exports | GrowthLoop sends updated membership on each scheduled run. |
Confirm the export was successful
When the run finishes, confirm you can use the data in Google BigQuery.
- Audience export: Open the dataset you selected during setup and look up the table named on the export.
- Journey Destination Node: Open that dataset and look up the table named on the export.
In GrowthLoop, review counts on the audience Exports tab, or open the Activity tab on the journey Destination Node. See Export an audience or Monitor a journey for more information.
Congrats on successfully exporting to Google BigQuery!
Troubleshooting
These are the issues we see most often. You can always email us at [email protected] for help.
| Problem | Cause | Resolution |
|---|---|---|
| Connection fails to validate | The JSON key is incomplete, or the service account cannot write to the project | Paste the entire JSON key. Confirm the service account has the Editor role |
| You cannot create a service account | Your user lacks serviceAccountAdmin or BigQuery Admin | Ask a Google Cloud administrator to grant those roles or create the account for you |
| You cannot create a JSON key | Your user cannot manage keys | Ask a Google Cloud administrator to grant key access or create the key for you |
| Table Name is rejected | The name uses characters other than letters, numbers, or underscores, or it is already in use | Use only letters, numbers, and underscores, and choose a unique table name |
| The table is missing | You are looking in the wrong dataset, or Table Name does not match what you entered on the export | Open the Dataset from destination setup and look for the export Table Name |
| Expected columns are missing | Columns to Export or Personalization Fields omit those columns | Add the columns on the destination or on the export |
Updated 26 days ago