Custom Attributes
Why and how to best take advantage of custom attributes in your journeys
In this article we will walk through the power of custom attributes to better tag your customers as they flow through a journey.
What are custom attributes
Custom attributes allow you to tag each customer as they pass through journey nodes. It's a great way to add context to your customers as they flow through your journey and reference them in your reports or use those as personalization fields.
Keep in mind that a journey must be saved first, before its custom attributes become available as a personalization / additional field in an export node.
How to use it
The following node types currently support custom attributes:
- Entry node
- Criteria node
- Destination node
- Experiment node (on each variation)
by navigating to the node's settings tab and adding your custom attributes.
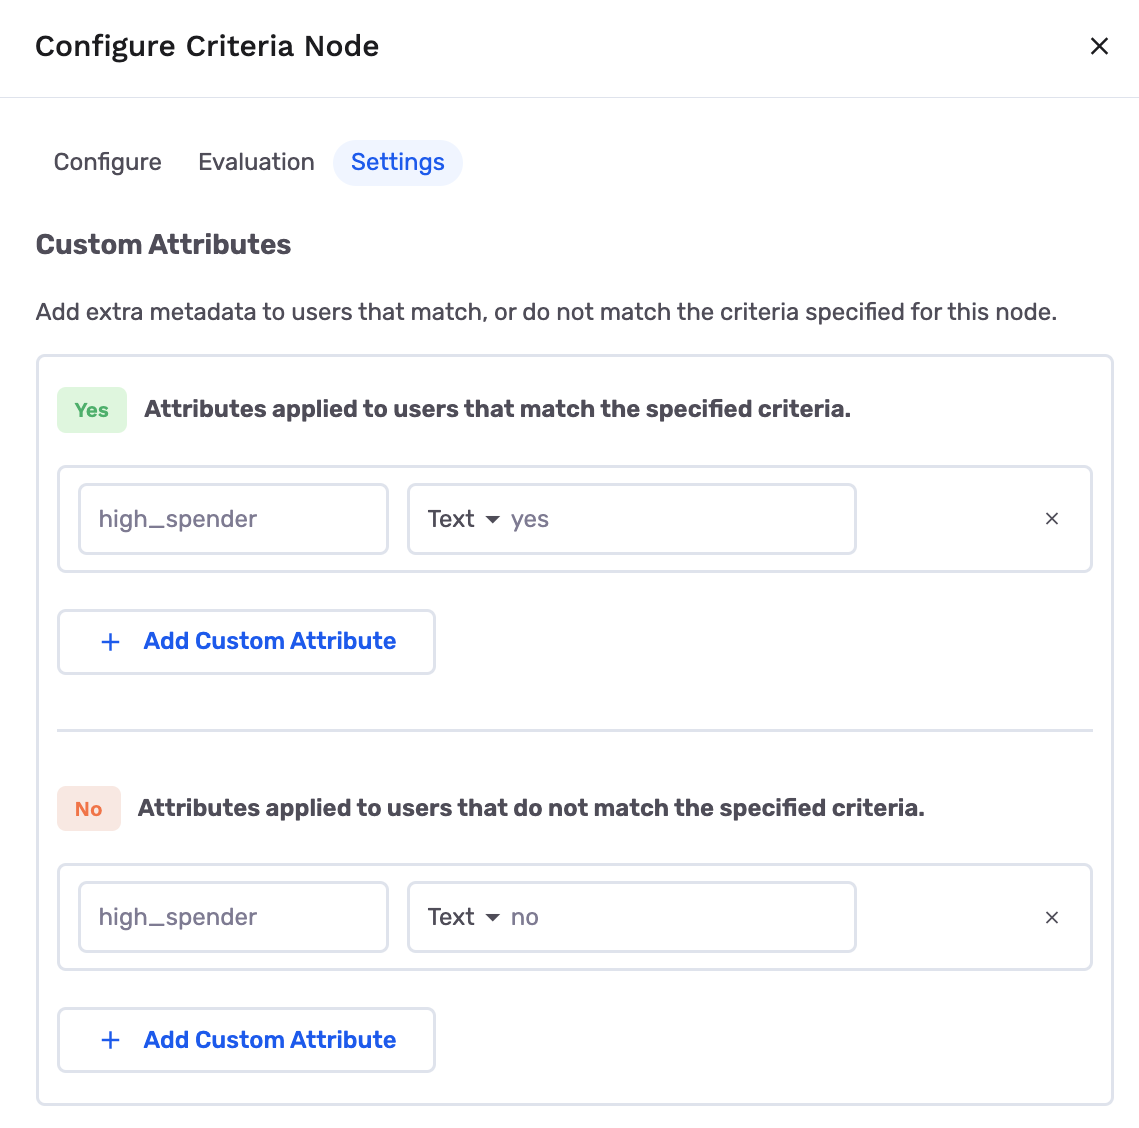
Note Criteria nodes allow you to have different custom attributes for the success vs. failure paths as shown below:
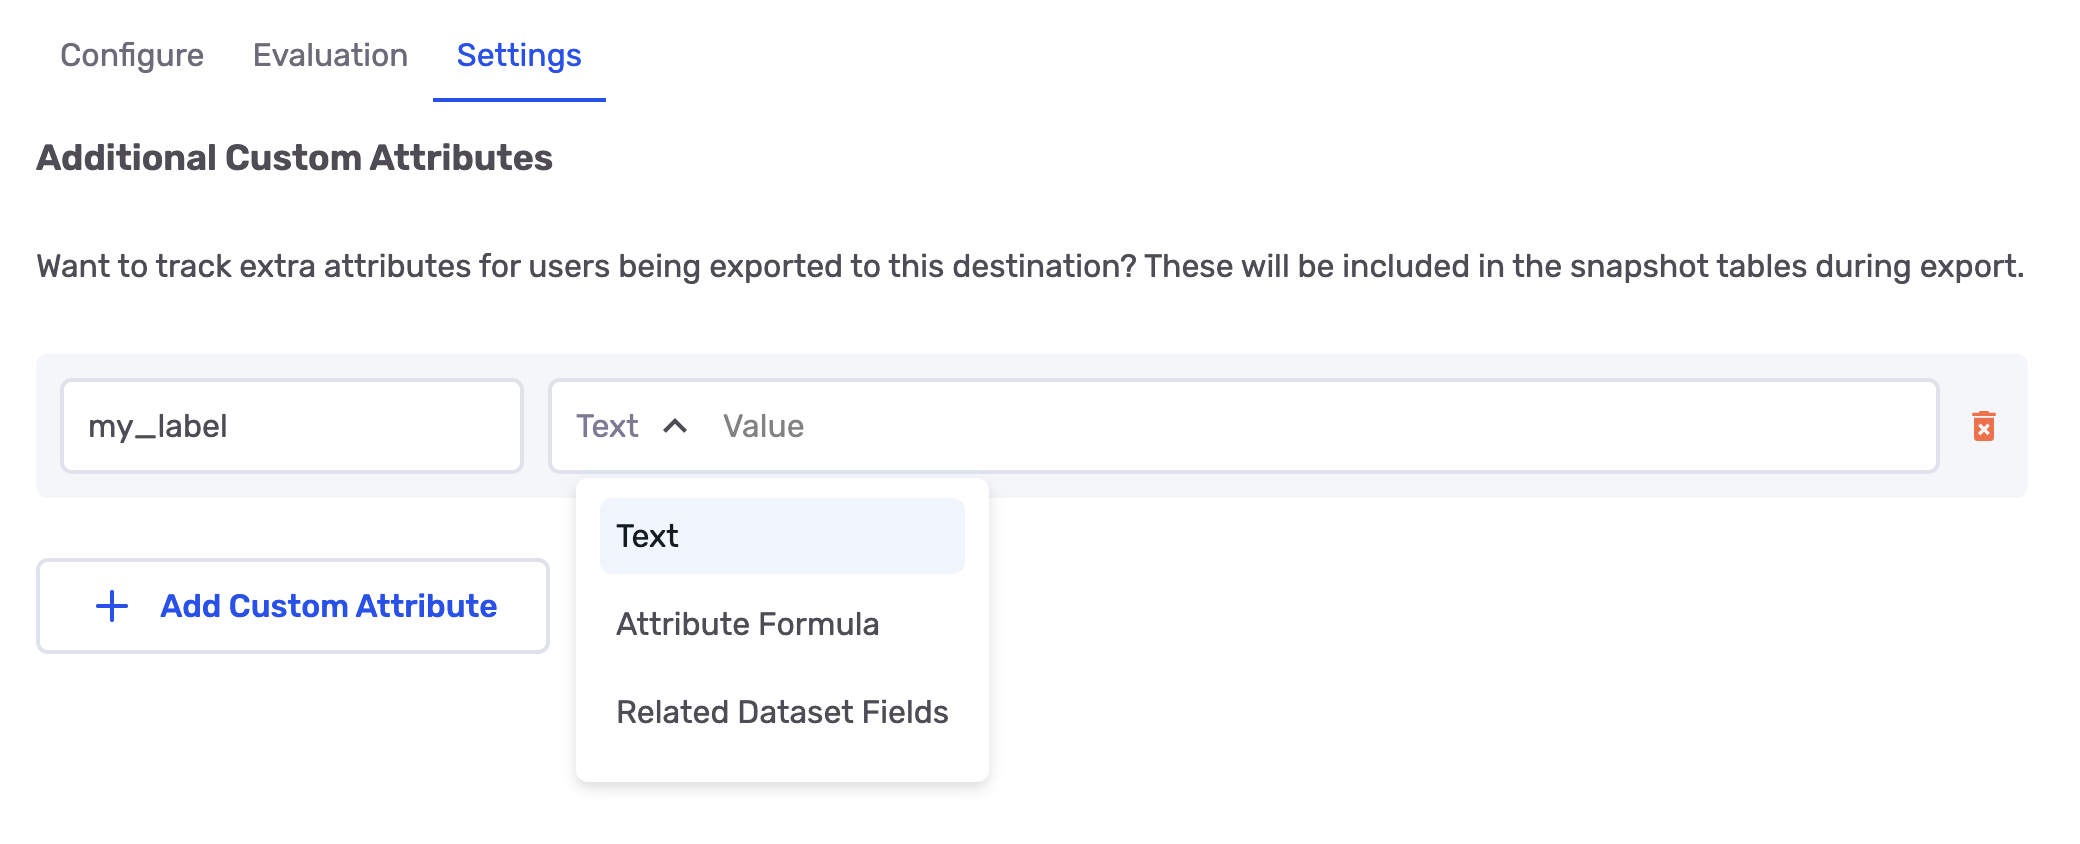
What's extra powerful about custom attributes is that your values can either be:
- A static text value
- A formula
- A field from a related table
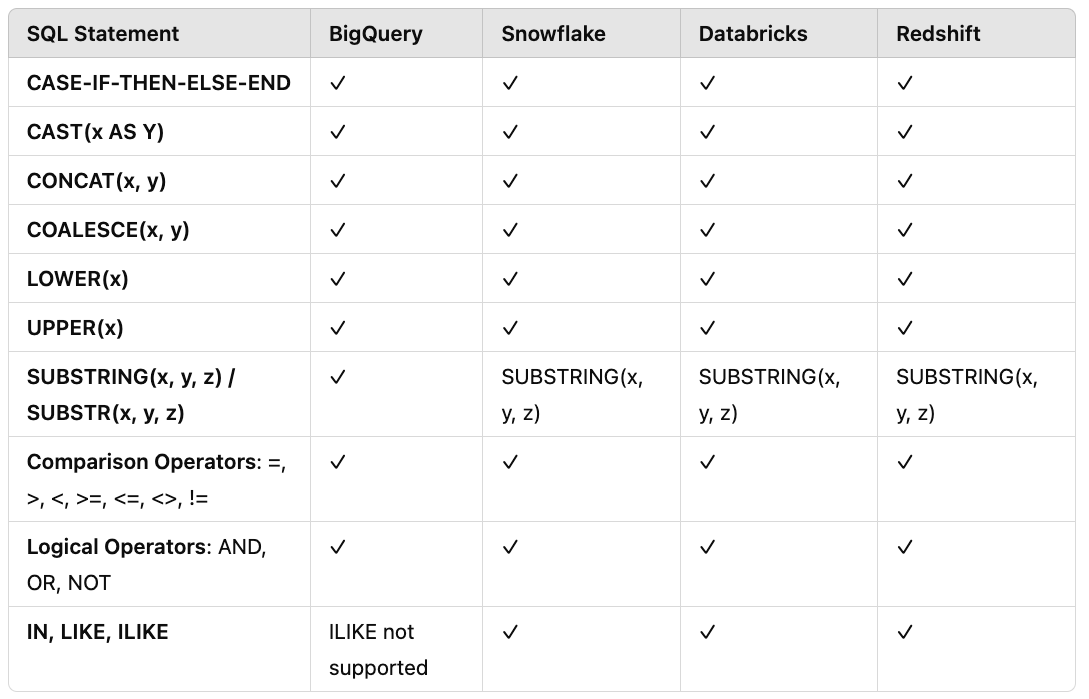
When choosing an Attribute Formula, you can use several SQL statements as follow:
Different ways to leverage Attribute Formula
Referencing your key attributes | Description | Example Values |
|---|---|---|
Referencing the Primary Dataset |
You should always reference |
|
Referencing GrowthLoop's System Fields | These are GrowthLoop's details of the Journey. |
|
Referencing the Journey Table | These are GrowthLoop's details on the node within the journey |
|
Referencing previously defined custom attributes | Allows any node in the journey to reference previously defined custom attributes, where glca stands for GrowthLoop Custom Attribute | If you define a custom attribute called Nullifying Custom Attributes |
Referencing a value from a secondary table in your DatasetGroup | Allows you to define a custom attribute from a secondary table. | In order to reference your secondary table in the custom attribute formula, you can simply call the table and it's corresponding field -- for example: |
A few custom attribute examples
-
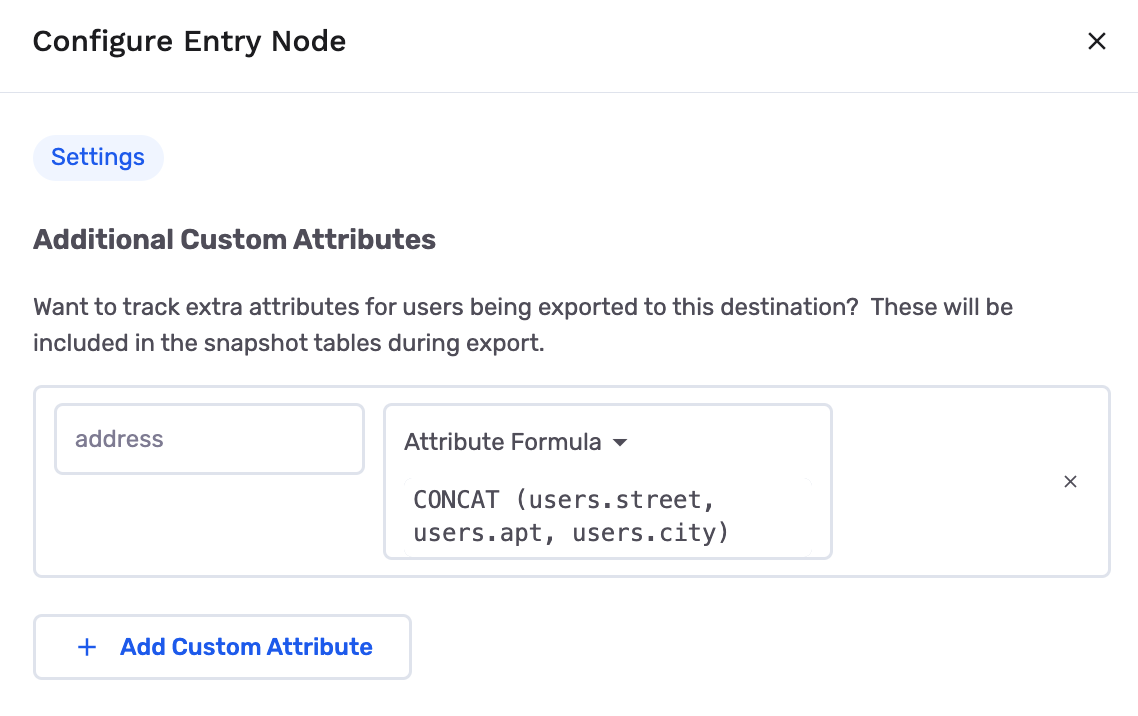
Building a custom attribute for each user's full address:
-
Assign different promotion codes based on what type of users they are
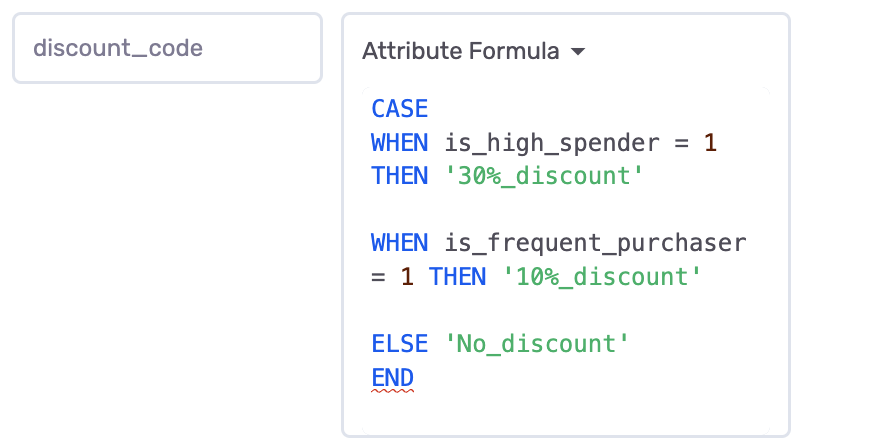
-
To continue on example 2 above, we will now build a custom attribute (promo_campaign) where we combine the user's gender with the above discount code. This is so we can send them a more gender-specific promotional email campaign with the right discount code combined.
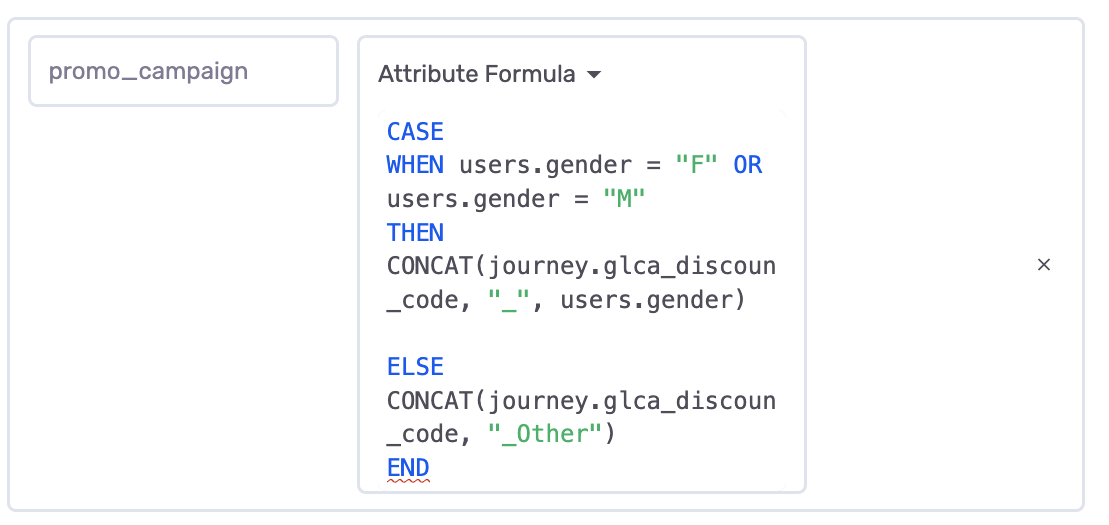
-
Now let's create a custom attribute using a field from a secondary table in your DatasetGroup (the Transaction table). The transaction table has the transaction_value as a column which we'd like to save as the custom attribute.
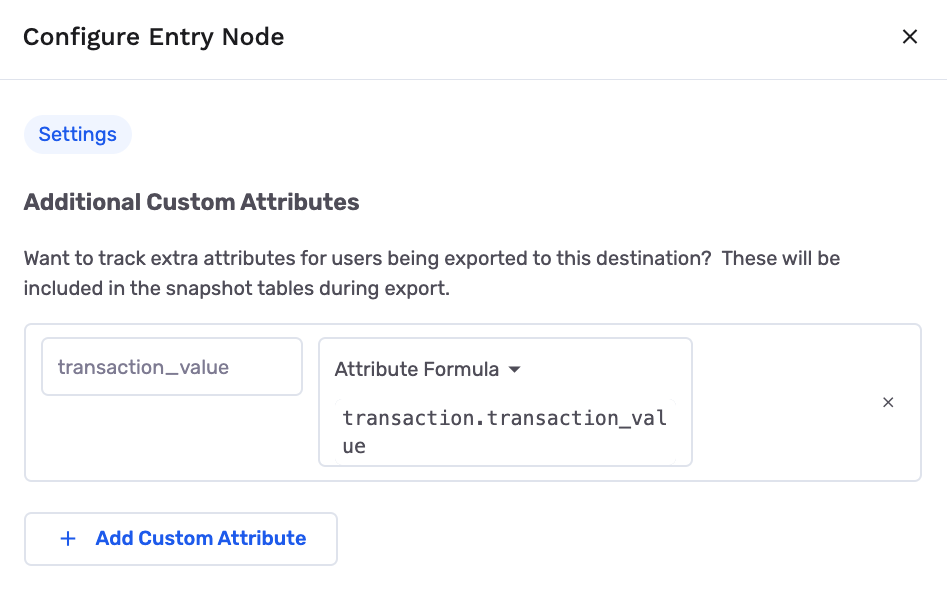
Related Custom Attributes
Related custom attributes can be used to pull-in fields from another table in the dataset. The related dataset must be in the dataset group, and have a join configuration to the primary dataset.
- Select the secondary dataset
- Select the field to pull-in
- Configure the resolution method
Since custom attributes are specified per-customer in the primary table, the resolution method allows you to pick which row or aggregation to use. The resolution method can be "Arbitrary", "Order By", "Aggregation", or "Aggregation Array"
Arbitrary
Pick a random row from the secondary dataset.
Order By
Pick the first/last or nth row after sorting the rows associated with that customer.
- Order By: The column to sort by
- Direction: The direction to sort
- Index: 1 for first, 2 for second etc
Aggregation
Aggregate all of the rows associated with that customer into a single value per customer.
- Method: Max, Min, Avg, Sum, Count
Aggregation Array
Aggregate all of the rows associated with that customer into an array per customer.
- Order By: The column to sort values in the array by
- Direction: The direction to sort values in the array
- Limit: The maximum number of values to collect into the array (Optional, leave blank to keep all)
Examples
Sum of transaction value per customer

Most recent transaction ID per customer

Collect inventory codes into an array for each customer
Updated 3 days ago
