HubSpot Syncs
Enhance your HubSpot CRM with powerful customer data from your data warehouse.
In this guide, we’ll walk you through syncing customer data from your data warehouse into HubSpot to supercharge your CRM efforts. Let's get started!
Supported Objects
GrowthLoop enables syncing to these HubSpot objects:
| Object | Description | Sync Modes | Required Fields | Optional Fields |
|---|---|---|---|---|
| Contacts | Individuals interacting with your business, storing personal details and communication history. | Insert, Upsert, Update | Email: unique user identifier | First Name, Last Name, Phone Number, Company, Job Title, Address, Lifecycle Stage |
| Companies | Organizations associated with your business, capturing company-specific information. | Insert, Upsert, Update | Company Name: unique company identifier | Domain, Industry, Phone Number, Number of Employees, Address, Annual Revenue |
| Deals | Sales opportunities tracking potential revenue through your pipeline. | Insert, Upsert, Update | Deal Name: deal identifier | Deal Stage, Amount, Close Date, Deal Type, Associated Contacts, Associated Companies |
| Tickets | Customer service requests or issues, facilitating support tracking and resolution. | Insert, Upsert, Update | Ticket Name: ticket identifier, Pipeline: ticket pipeline | Ticket Status, Priority, Source, Description, Associated Contacts, Associated Companies |
| Line Items | Individual products or services associated with deals, detailing specifics of the transaction. | Insert, Upsert, Update | Name: item identifier, Price: unit price, Product ID: product identifier | Description, SKU, Discount, Tax, Associated Deals |
Prerequisites
- To set up Syncs in HubSpot, ensure you have an active HubSpot account and have configured it as a destination. Click here to learn how.
Create and configure sync
NoteHubSpot enforces daily and per-second API rate limits. If your sync exceeds the daily limit (typically 1 million records for Enterprise plans), it may take multiple days to complete. During this time, the sync status will remain “Processing” as we pause and resume the sync across days.
- Navigate to the Syncs tab on the left sidebar and click Create Sync in the top right corner.
- Set up your Sync with the following details:
- Sync Name: A clear, friendly name for your sync.
- Sync Frequency: How often data should sync to the destination.
- Update Rule: The default method for syncing data to the destination. GrowthLoop supports
Insert Only(adds new records),Update Only(modifies existing record attributes), andUpsert(combines insert and update) - Dataset / Table: The table that contains your data.
- Dataset Unique Field: The column with unique values for each row in the table. This will be detected and selected automatically.
- Match Field: The column used to match data in your source table with the destination system.
- Connection: Choose the destination for syncing data. Select HubSpot.
- Object Type: Select the object to sync data. Your options are:
Contacts,Companies,Deals,Tickets,Line Items - Match Field: The column used to match data in the destination system with your source table.
- After selecting/inserting the required information, click Save Sync.
- Next, set up the field mappings to start your sync. Please refer to the Support Objects table at the top of the page. For this example, we will set up a sync to
Contacts, which requires Email. We'll also map the optional field First Name along with it. - Under Source, open the drop-down and select the field containing email addresses.
- In the Destination section, choose Email from the drop-down menu, unless already selected.
- Click Add Mapping to add another Source > Destination row.
- In the Source section, select the field containing the first name for each contact.
- Then under Destination, choose First Name from the drop-down menu, unless already selected.
- After mapping all the fields, clicking Update Sync will prompt you with the following two options:
- Updates Only: We recommend you go with the this option, especially if you’re setting up the sync for the first time.
- Back-fill: This option is when you are updating an existing Sync with newly mapped fields and you’d like all your already synced events to have those fields backfilled for them. This operation can be very expensive and time consuming on your underlying Data Warehouse, so please choose that option if you’re absolutely sure.
- Once complete, return to your sync and enable it by clicking the toggle at the top of the page.
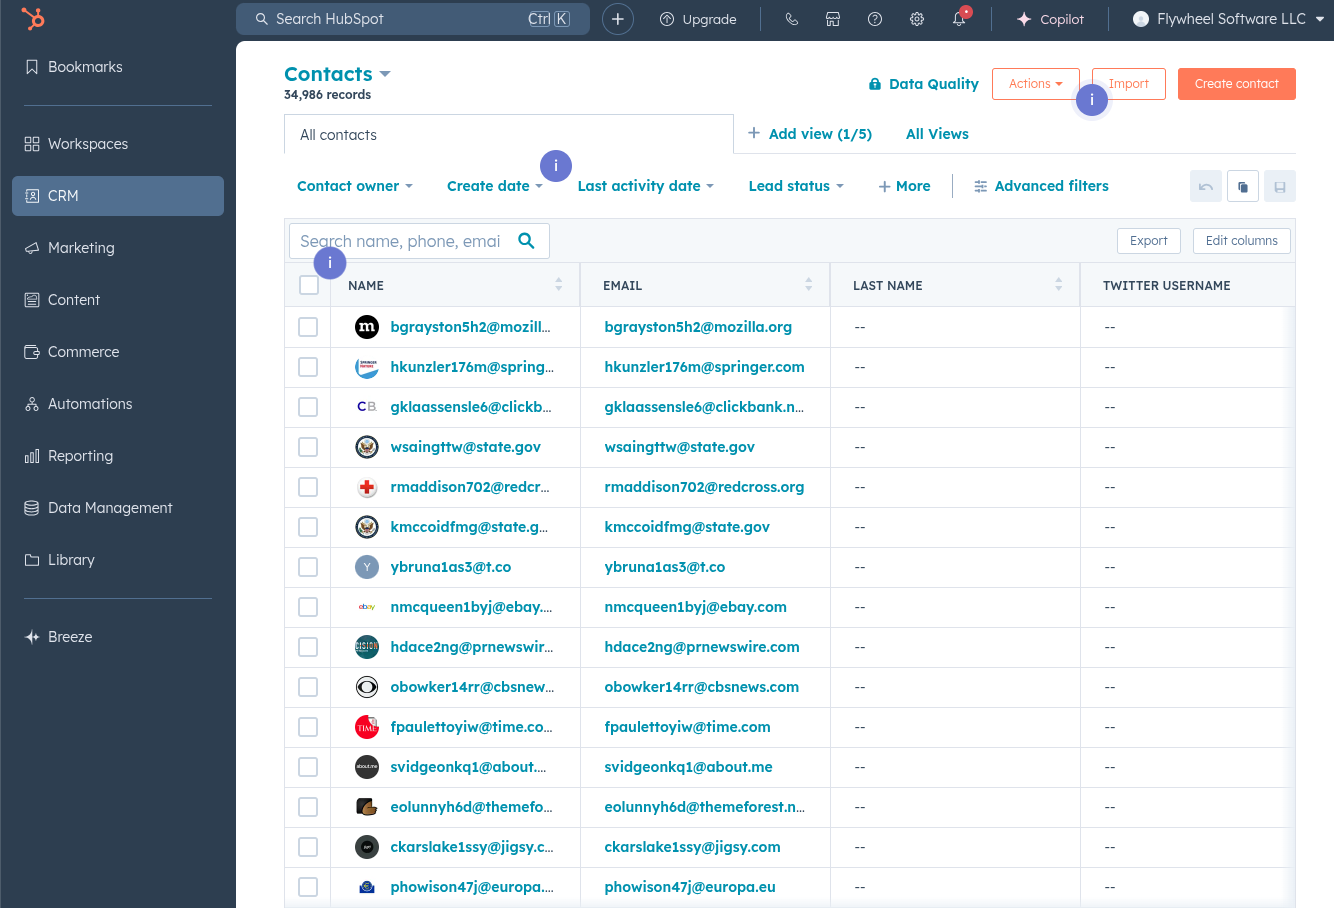
- To confirm that your sync has been successfully sent to HubSpot, login to your account and navigate to the CRM section. Here is where you can view the newly inserted records and attributes.

The emails shown in this image are not real
SuccessYou have successfully created a sync to
Contactsin HubSpot!
Note:If you experience any issues when connecting to or creating syncs to HubSpot, please reach out to us at [email protected], and we’ll be in touch shortly to help resolve the matter!
Updated 9 months ago